Dreaming of the perfect acrylic nails for your next getaway? Whether you’re off to the beach, exploring Europe, or relaxing in Mexico, the right nail design can elevate your trip. From stylish French tips to tropical patterns, this guide offers all the inspiration you need for your next nail appointment. Keep reading to uncover the most unique and adorable nail ideas that will make your vacation extra special.
Sunset Gradient
Capture the beauty of a beach sunset with these stunning gradient nails. The smooth transition from soft pink to vibrant orange is accented with iridescent flakes, creating a tropical and bright look. This design is perfect for a beach theme or a summer vacation, evoking images of warm sunsets over the ocean.
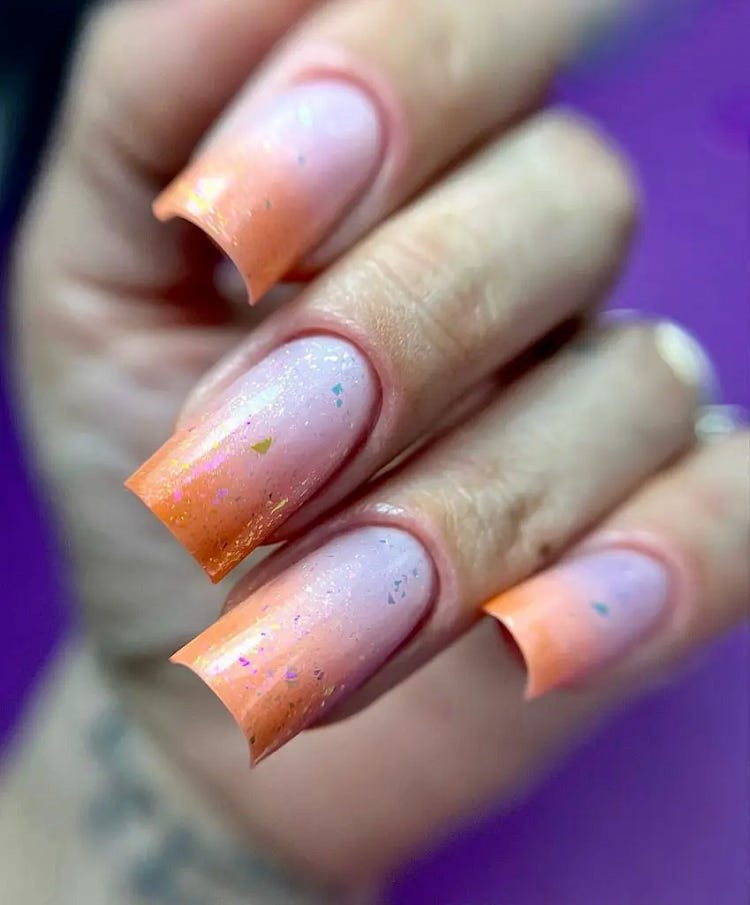
Consumables:
- Pink polish (Essie’s “Ballet Slippers”)
- Orange polish (China Glaze’s “Orange Knockout”)
- Iridescent flakes (LeChat Nails)
- Sponge for gradient effect
- Top coat (Essie’s “Gel Couture”)
At-Home Instructions:
- Apply a base coat.
- Use a sponge to create the gradient effect, blending the pink and orange polishes.
- Add iridescent flakes while the polish is still wet.
- Finish with a top coat to secure the design and add shine.
Aqua Bliss
These bright aqua nails are perfect for a beach vacation. The vibrant blue base color is complemented by a textured accent nail, adding a unique and trendy touch. This design is ideal for summer and gives off a refreshing, tropical vibe.
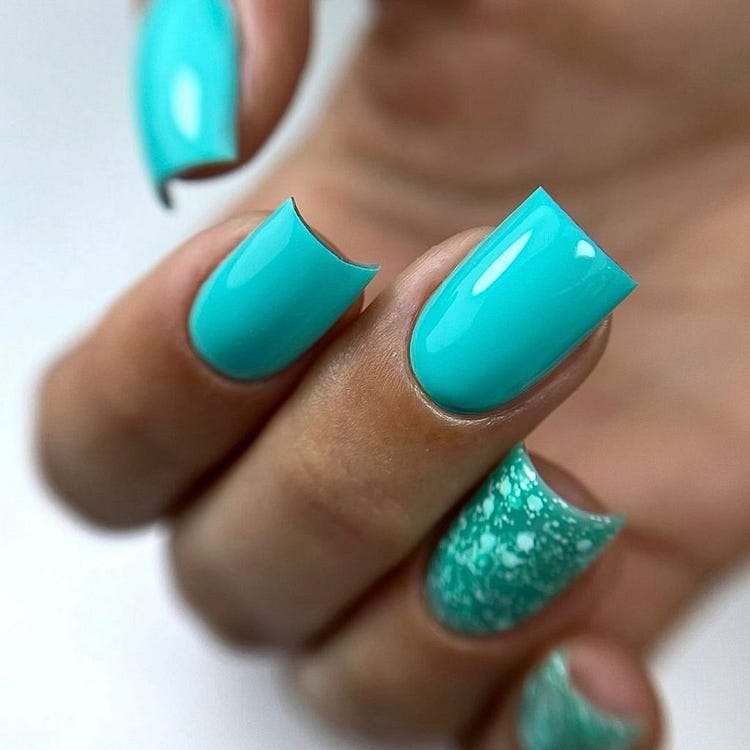
Consumables:
- Aqua polish (OPI’s “My Dogsled Is A Hybrid”)
- Textured polish (Ciaté’s “Luxe Tux”)
- Top coat (Orly’s “Glosser”)
At-Home Instructions:
- Apply the aqua polish on all nails except the accent nail.
- Apply the textured polish on the accent nail.
- Finish with a top coat to enhance the shine and protect the design.
Classic White Elegance
For a natural-looking and timeless design, these classic white nails are perfect. The bright white polish gives a clean and elegant look, making it suitable for any vacation setting, from a beach getaway to exploring Europe. This design is simple yet sophisticated.
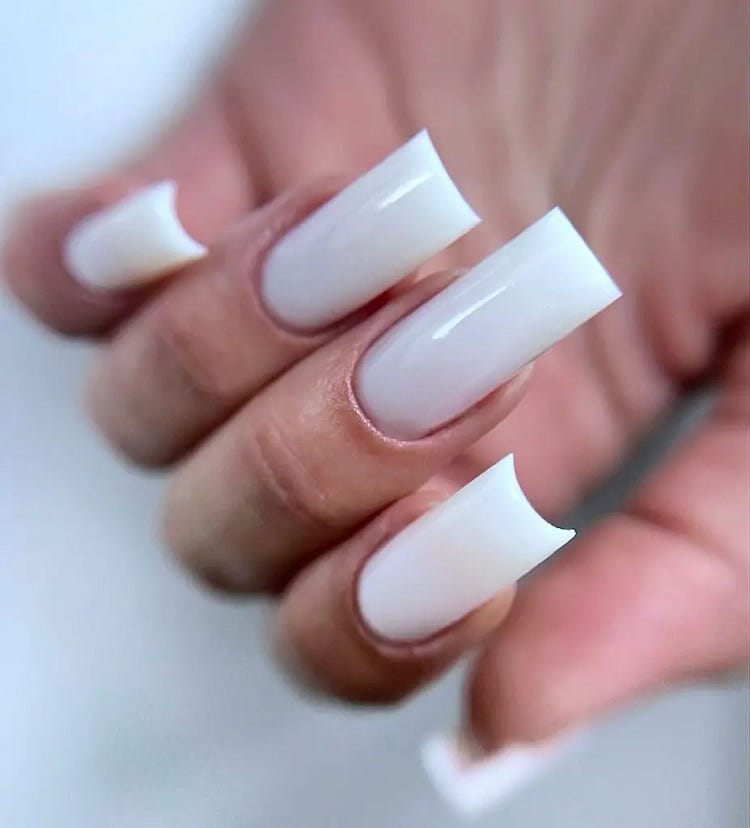
Consumables:
- White polish (Essie’s “Blanc”)
- Top coat (Sally Hansen’s Miracle Gel)
At-Home Instructions:
- Apply a base coat.
- Apply two coats of white polish for full coverage.
- Finish with a top coat to add shine and protect the polish.
Tropical Fun
These bright yellow nails with playful tropical designs are perfect for an island getaway. The combination of solid yellow nails with fun accents like flamingos and leopard print adds a unique and cute touch. This design is ideal for a beach vacation and is sure to stand out.
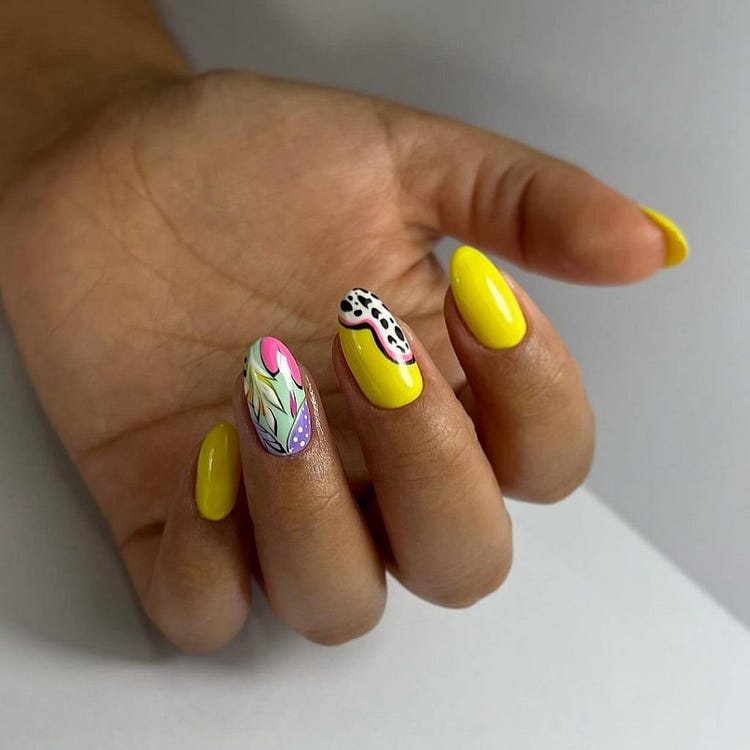
Consumables:
- Yellow polish (China Glaze’s “Happy Go Lucky”)
- Nail art pens (Sally Hansen’s I Heart Nail Art Pen)
- Top coat (Essie’s “Gel Couture”)
At-Home Instructions:
- Apply the yellow polish on all nails except the accent nails.
- Use nail art pens to create the tropical designs on the accent nails.
- Finish with a top coat to seal the design and add shine.
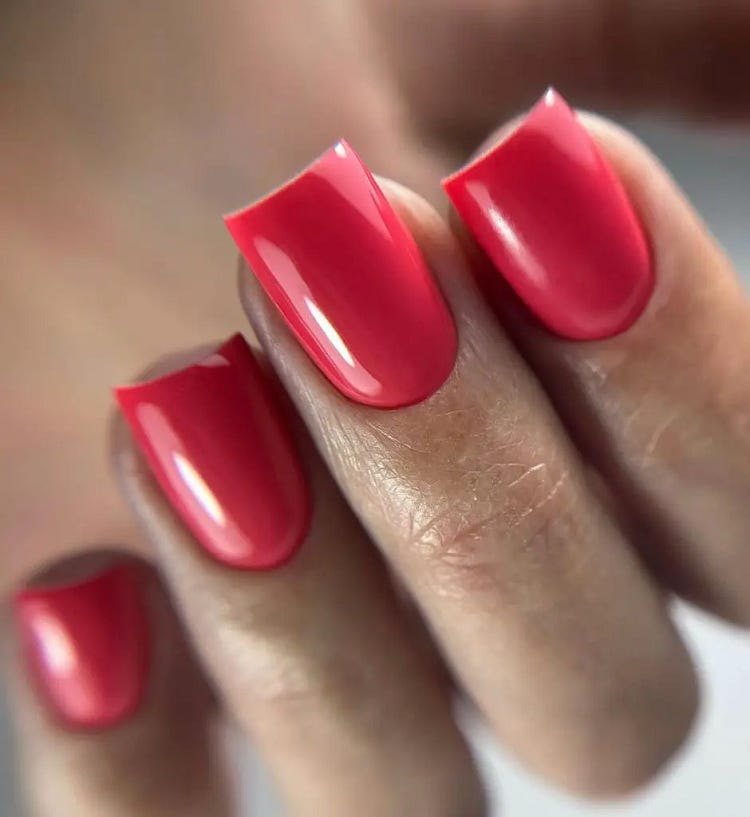
Fiery Red Statement
These vacation acrylic nails in a vibrant red make a bold statement. The bright and intense color is perfect for those who love a classic yet striking look. Ideal for a summer vacation, this design is both trendy and timeless, suitable for any occasion.
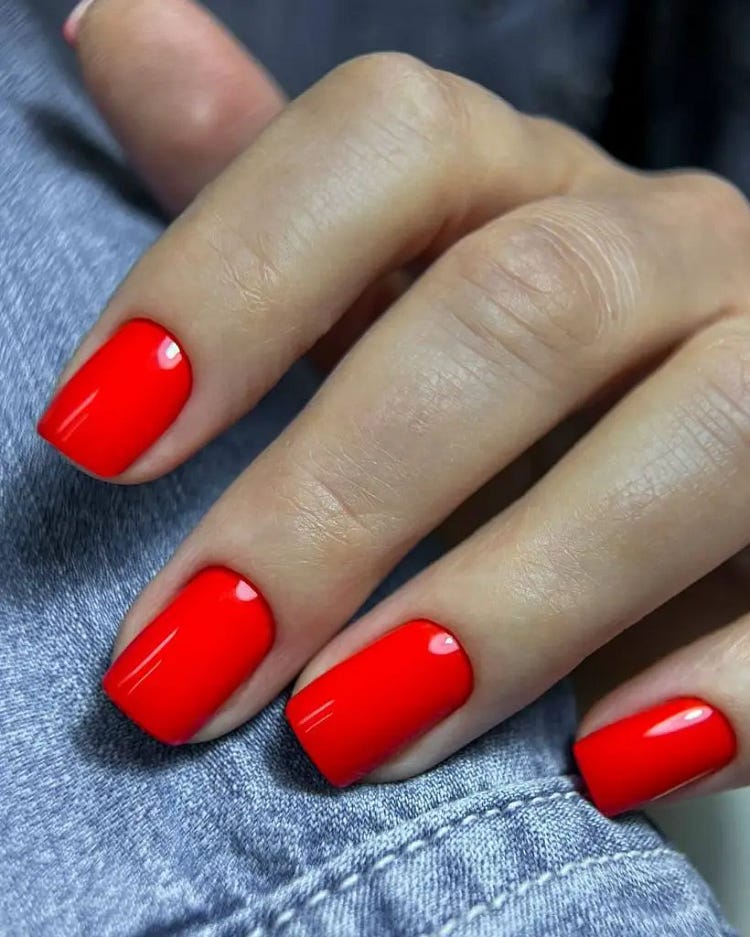
Consumables:
- Red polish (OPI’s “Big Apple Red”)
- Top coat (Sally Hansen’s Miracle Gel)
At-Home Instructions:
- Apply a base coat.
- Apply two coats of red polish for full coverage.
- Finish with a top coat to add shine and protect the polish.
Wild Leopard Print
These trendy nails combine neon pink and blue with a bold leopard print, creating a unique and eye-catching design. Perfect for an adventurous vacation, this look is sure to stand out and make a statement.
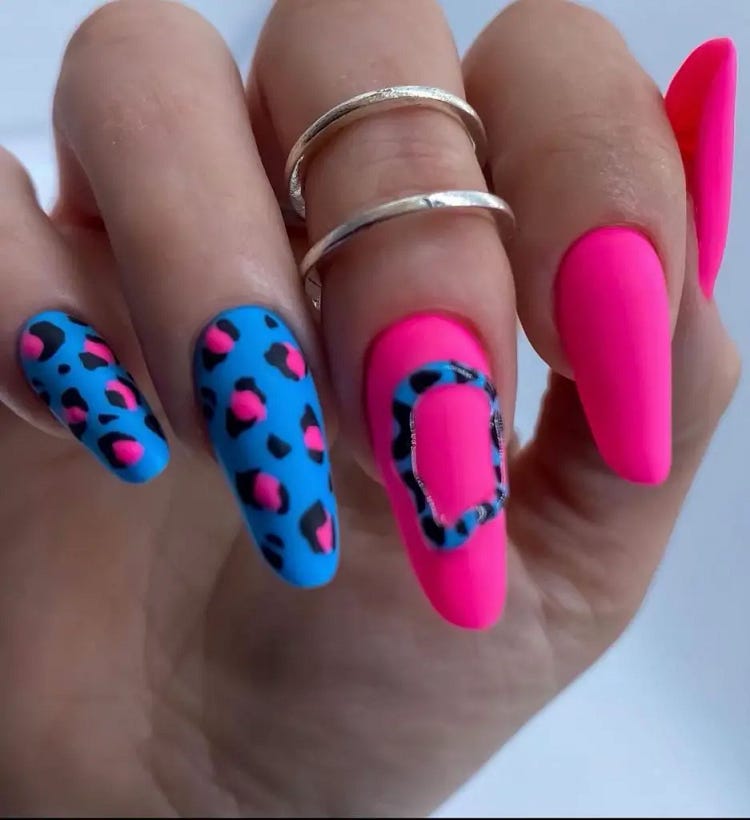
Consumables:
- Neon pink polish (China Glaze’s “Shocking Pink”)
- Blue polish (OPI’s “Teal the Cows Come Home”)
- Black polish (Essie’s “Licorice”)
- Dotting tool
- Top coat (Essie’s “Gel Couture”)
At-Home Instructions:
- Apply the neon pink polish on three nails and the blue polish on the remaining nails.
- Use a dotting tool to create leopard print spots with the black polish.
- Finish with a top coat to protect the design.
Pastel Dreams
These long nails feature a dreamy mix of pastel pink and blue, creating a soft and whimsical look. The translucent tips add a touch of elegance, making this design perfect for a summer vacation or a romantic getaway.
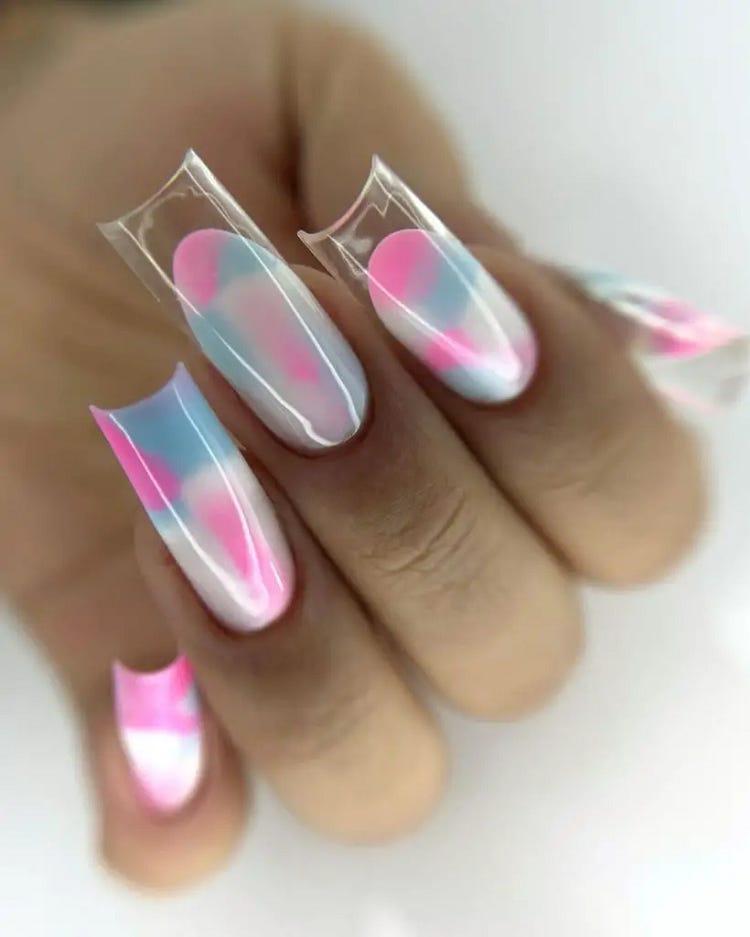
Consumables:
- Pastel pink polish (Essie’s “Fiji”)
- Pastel blue polish (OPI’s “It’s a Boy!”)
- Top coat (Orly’s “Glosser”)
At-Home Instructions:
- Apply the pastel pink and blue polish in an alternating pattern.
- Blend the colors gently to create a seamless transition.
- Finish with a top coat to add shine and protect the design.
Subtle Elegance
These nails combine a matte gray with a nude base and a touch of gold, creating a natural-looking and elegant design. Perfect for a sophisticated vacation in Europe or a chic city break, this look is understated yet stylish.
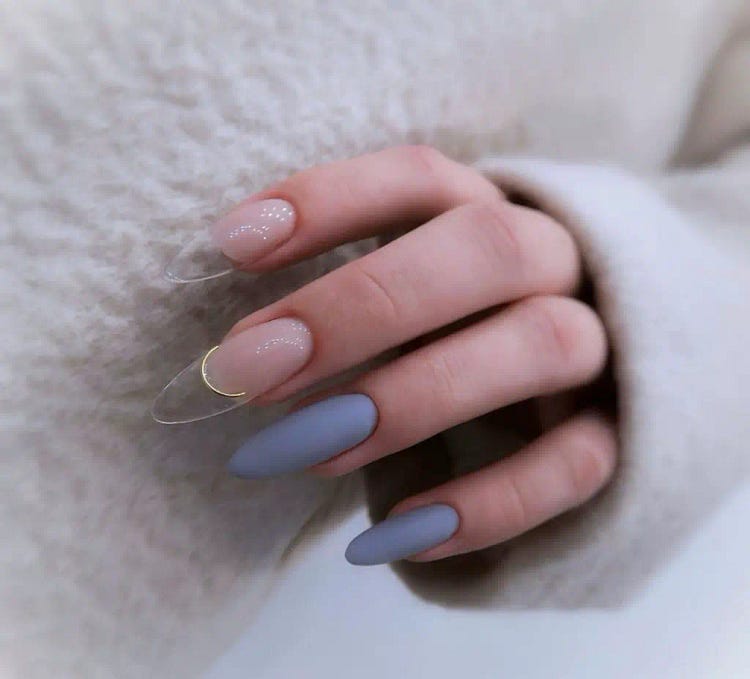
Consumables:
- Matte gray polish (Zoya’s “Dove”)
- Nude polish (Essie’s “Mademoiselle”)
- Gold foil (Born Pretty Store)
- Matte top coat (OPI’s “Matte Top Coat”)
At-Home Instructions:
- Apply the nude polish as a base.
- Apply the matte gray polish on alternating nails.
- Add gold foil accents to the nude nails.
- Finish with a matte top coat for a smooth, elegant finish.
Classic Coral
For a cute and classic look, these coral nails are perfect. The vibrant coral color is ideal for a summer vacation, adding a pop of color to any outfit. This design is simple yet stylish, making it a great choice for any vacation setting.
Consumables:
- Coral polish (China Glaze’s “Flip Flop Fantasy”)
- Top coat (Sally Hansen’s Miracle Gel)
At-Home Instructions:
- Apply a base coat.
- Apply two coats of coral polish for full coverage.
- Finish with a top coat to add shine and protect the polish.
Glittery White Elegance
These vacation acrylic nails combine a clean white base with a striking silver glitter accent nail. This bright and trendy design is perfect for a summer vacation, adding a touch of glamour to a classic look. The contrast between the solid white and the glitter creates a unique and elegant effect, suitable for any special occasion or a chic getaway in Europe.
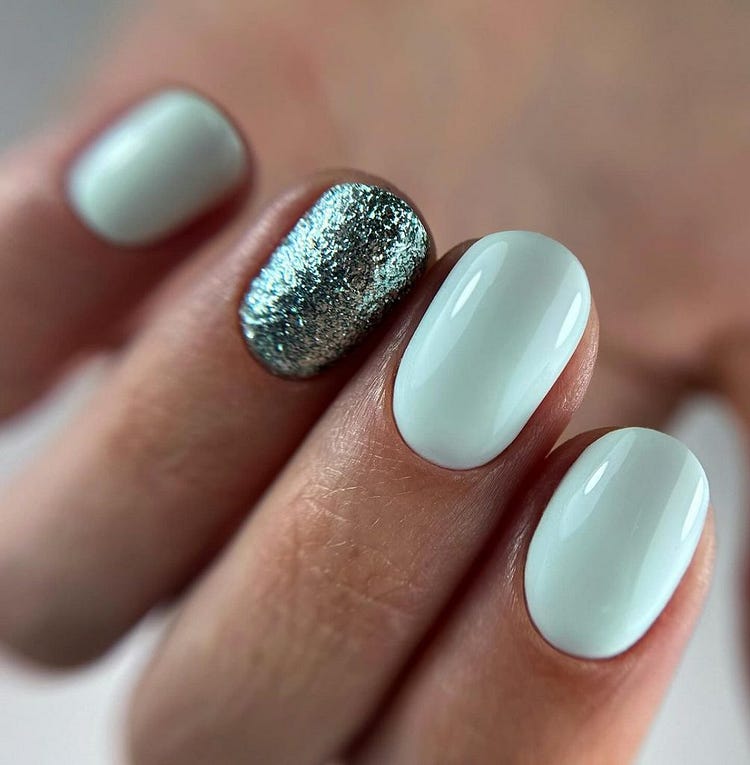
Consumables:
- White polish (Essie’s “Blanc”)
- Silver glitter polish (OPI’s “Crown Me Already!”)
- Top coat (Seche Vite)
Nature-Inspired Elegance
This neutral and sophisticated nail design is perfect for a more natural-looking manicure. The combination of olive green, white with gold leaf accents, and black leopard print gives a nod to European elegance while maintaining a trendy and unique look. This design is versatile, making it suitable for various vacation settings, from urban adventures to relaxing retreats.

Consumables:
- Olive green polish (OPI’s “Suzi — The First Lady of Nails”)
- White polish (Essie’s “Blanc”)
- Gold leaf flakes
- Leopard print nail stickers
- Top coat (Sally Hansen’s Miracle Gel)
At-Home Instructions:
- Apply the olive green polish on two nails and white polish on the remaining.
- Once dry, use a fine brush to apply gold leaf flakes on the white nails.
- Add the leopard print stickers to the tips of one olive green nail.
- Seal with a top coat for a long-lasting finish.
Bold Pink Patterns
For those who love bold and colorful designs, these bright pink nails with intricate white patterns are a show-stopper. Ideal for short nails, this design is both playful and sophisticated. The contrast between the pink base and the white patterns makes the nails pop, making it a perfect look for an island getaway or a beach party.
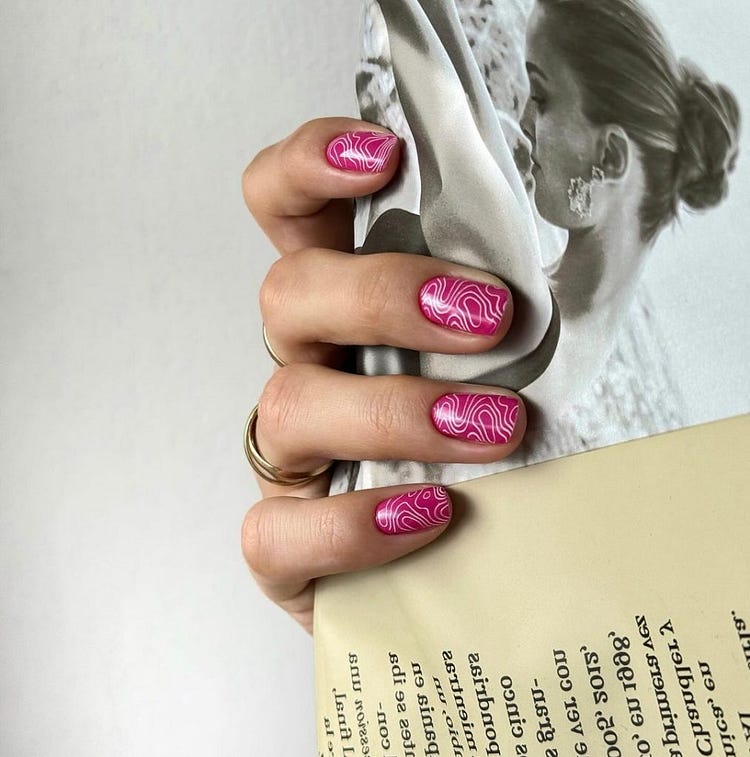
Consumables:
- Pink polish (China Glaze’s “Strawberry Fields”)
- White nail art pen (Sally Hansen’s I Heart Nail Art Pen)
- Top coat (OPI’s “Start to Finish”)
At-Home Instructions:
- Apply the pink polish as your base color.
- Once dry, use the white nail art pen to draw the intricate patterns.
- Seal with a top coat to protect your design and add extra shine.
Classic Color Duo
For a simple yet stylish look, this blue and orange combo is a fantastic choice. The royal blue polish paired with a single orange accent nail creates a striking yet uncomplicated design. This color pattern is perfect for those who prefer a minimalistic style but still want a touch of bright color.
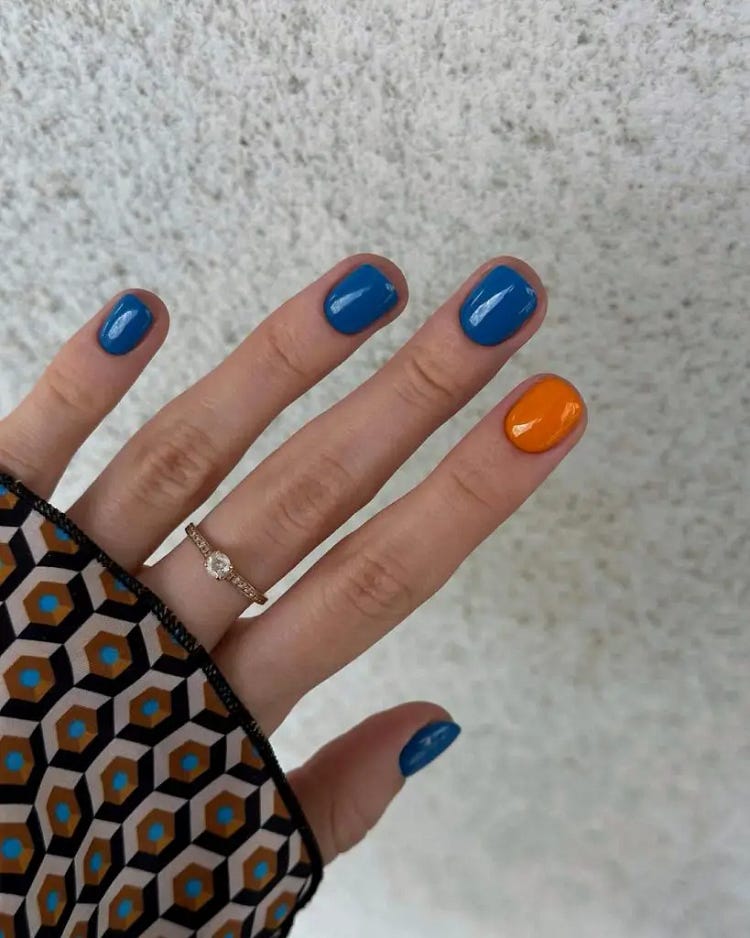
Consumables:
- Royal blue polish (Sally Hansen’s “Pacific Blue”)
- Orange polish (OPI’s “A Good Man-darin is Hard to Find”)
- Top coat (Essie’s “Gel Couture”)
At-Home Instructions:
- Apply the royal blue polish on four nails.
- Paint the accent nail with the orange polish.
- Finish with a top coat to ensure longevity and shine.
Neon French Tips
Elevate the classic French tip with a neon twist! This design features long, square-shaped nails with white bases and vibrant neon yellow tips. It’s a trendy and unique take on the traditional French tip, perfect for a summer vacation where you want your nails to stand out.
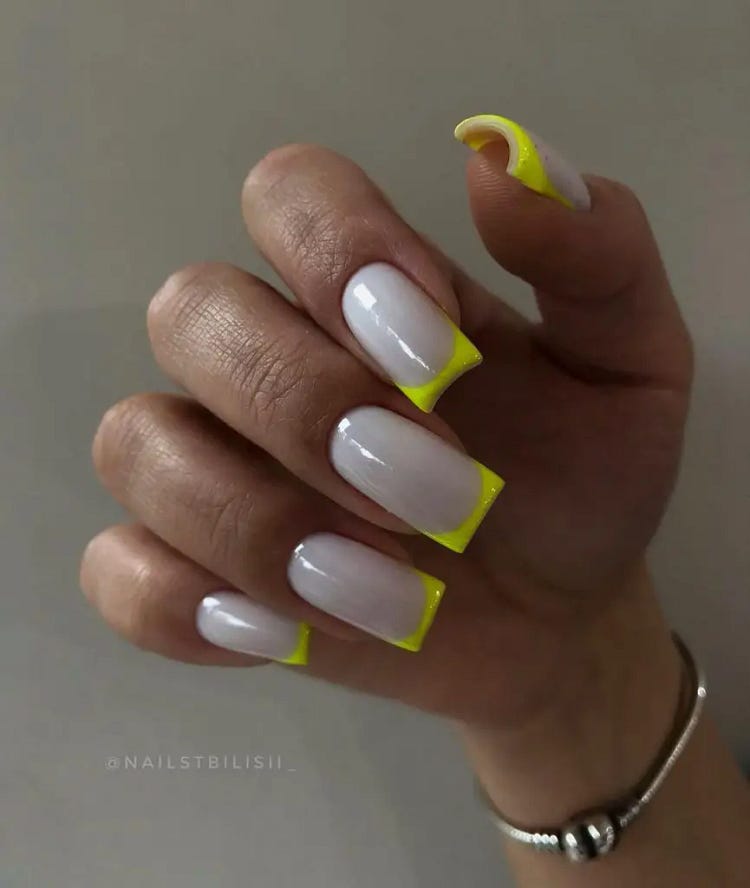
Consumables:
- White polish (Zoya’s “Purity”)
- Neon yellow polish (China Glaze’s “Yellow Polka Dot Bikini”)
- Top coat (Orly’s “Glosser”)
At-Home Instructions:
- Start with a white base coat.
- Once dry, use a nail art brush to apply the neon yellow tips.
- Seal with a top coat to enhance durability and shine.
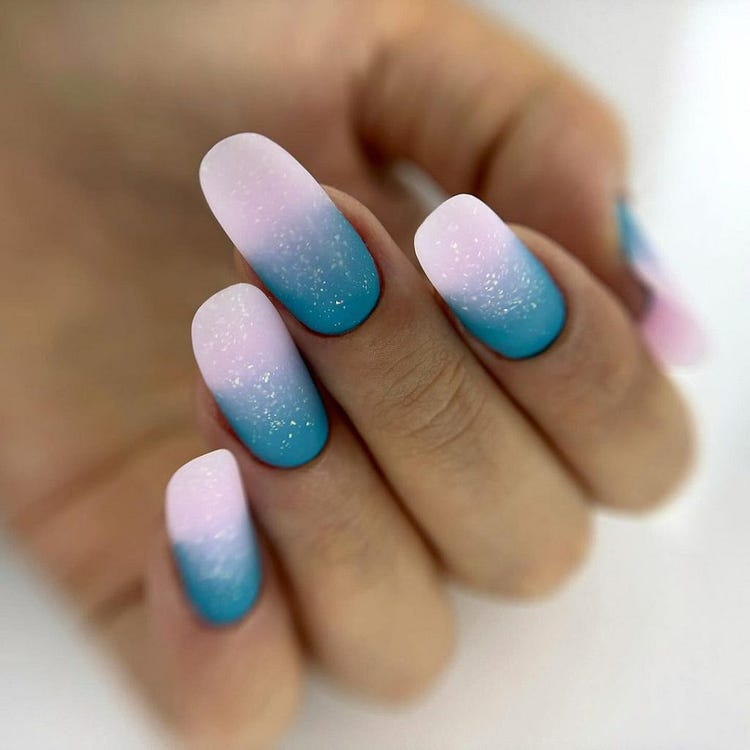
Beachy Gradient Nails
For a vacation acrylic nails look that truly embodies the essence of the beach, this gradient design is perfect. The seamless blend from pastel pink to blue mimics the ocean waves and the sunset sky. The addition of subtle glitter creates a bright and cute effect, perfect for a tropical getaway. This design is ideal for summer vacations and gives a soft, dreamy vibe.

Consumables:
- Gradient nail polish set (Gelish Harmony)
- Fine glitter (holographic)
- Nail sponge
- Top coat (Seche Vite)
At-Home Instructions:
- Apply a base coat.
- Use a sponge to apply the gradient colors, starting with blue at the tips and blending into pink.
- Add a layer of fine glitter to enhance the sparkle.
- Finish with a top coat for a glossy finish and durability.


No comments:
Post a Comment