Elevate your summer style with bright and cute summer orange nails design. Ideal for both short and long nail shapes, these designs incorporate trendy elements like neon, coral, and burnt orange shades. For added inspiration, try pink and orange or green and orange combinations. Gel and acrylic options are available at various price points, making it easy to achieve a pretty, professional look
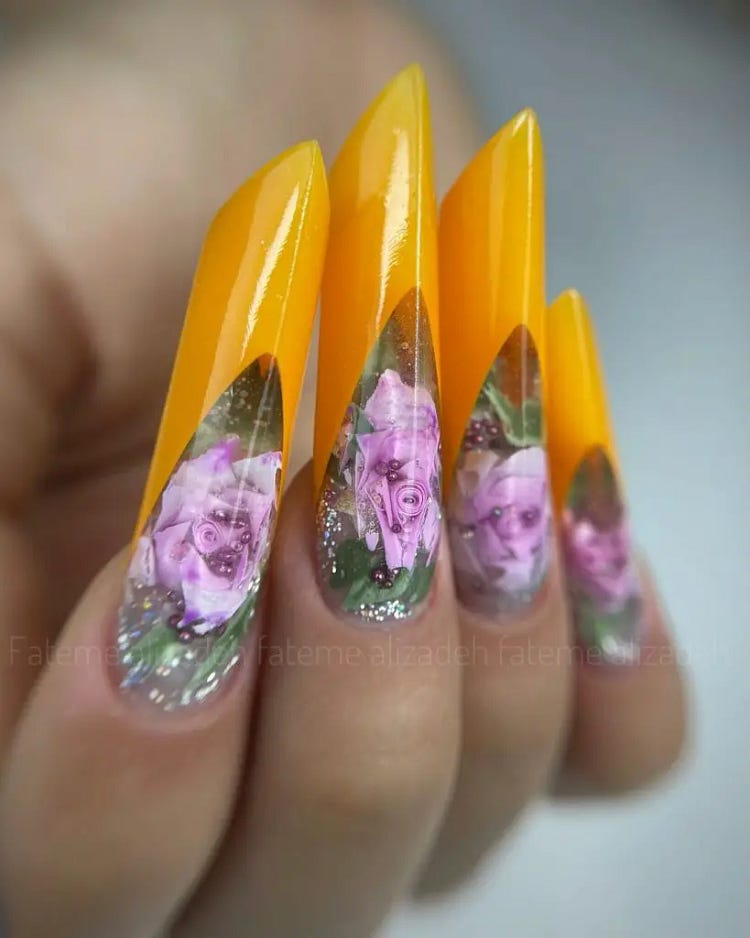
Floral Fantasy With Long Tips
This stunning design features long, sharp tips painted in a vibrant orange hue, with intricate floral artwork on a clear base. The combination of bright orange and delicate pink flowers creates a striking contrast, making these nails a perfect statement piece for any summer event. The addition of glitter adds a touch of glamour, elevating the overall look.
Consumables
- Base coat: OPI Natural Nail Base Coat
- Orange polish: OPI “A Good Man-darin Is Hard to Find”
- Clear polish: Essie “Glass Slipper”
- Floral nail decals: Floral Fantasy Nail Stickers
- Glitter polish: Zoya “Monet”
- Top coat: Seche Vite Dry Fast Top Coat
- Nail art brushes: Winstonia Fine Nail Art Brush Set
DIY Instructions
- Apply the base coat and let it dry.
- Paint the tips with the orange polish, creating a French tip look.
- Apply the clear polish on the rest of the nails.
- Add the floral decals and dab glitter polish around them for a sparkling effect.
- Finish with a top coat to seal the design and add shine.
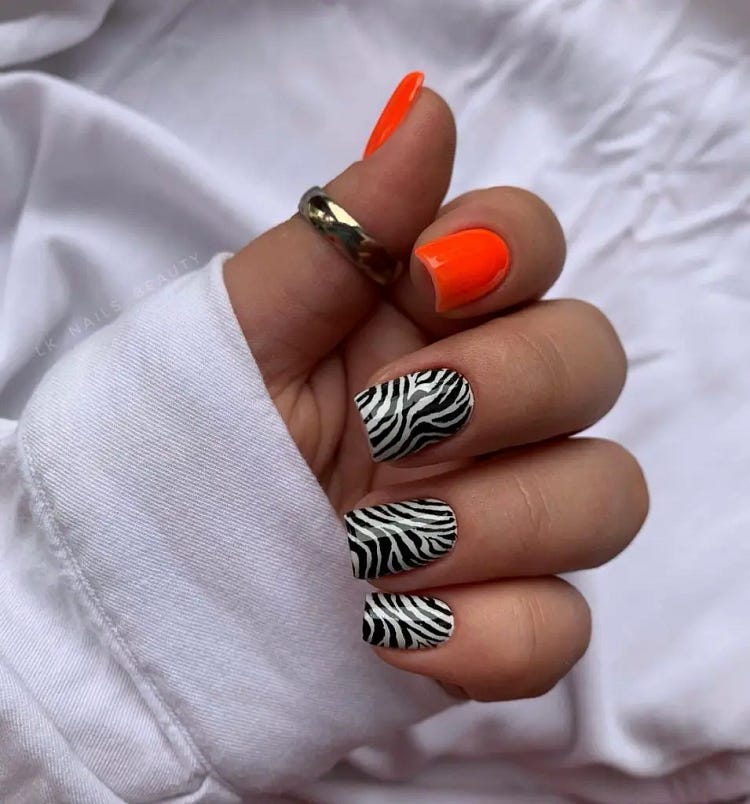
Zebra Stripes With A Pop Of Orange
This trendy design combines bold black and white zebra stripes with a vibrant orange accent nail. The contrast between the dark zebra pattern and the bright orange creates a striking look that is sure to turn heads. This design is perfect for those who love a bit of wildness in their style while keeping it chic and sophisticated.
Consumables
- Base coat: OPI Natural Nail Base Coat
- Orange polish: Essie “Tangerine Tease”
- White polish: OPI “Alpine Snow”
- Black polish: Sally Hansen “Black Out”
- Top coat: Seche Vite Dry Fast Top Coat
- Nail art brushes: Winstonia Fine Nail Art Brush Set
- Striping tape: Born Pretty Striping Tape
DIY Instructions
- Start with a base coat and let it dry.
- Paint the accent nail with the orange polish.
- Paint the remaining nails with the white polish.
- Use striping tape to create zebra stripes with the black polish.
- Seal the design with a top coat for a glossy finish.
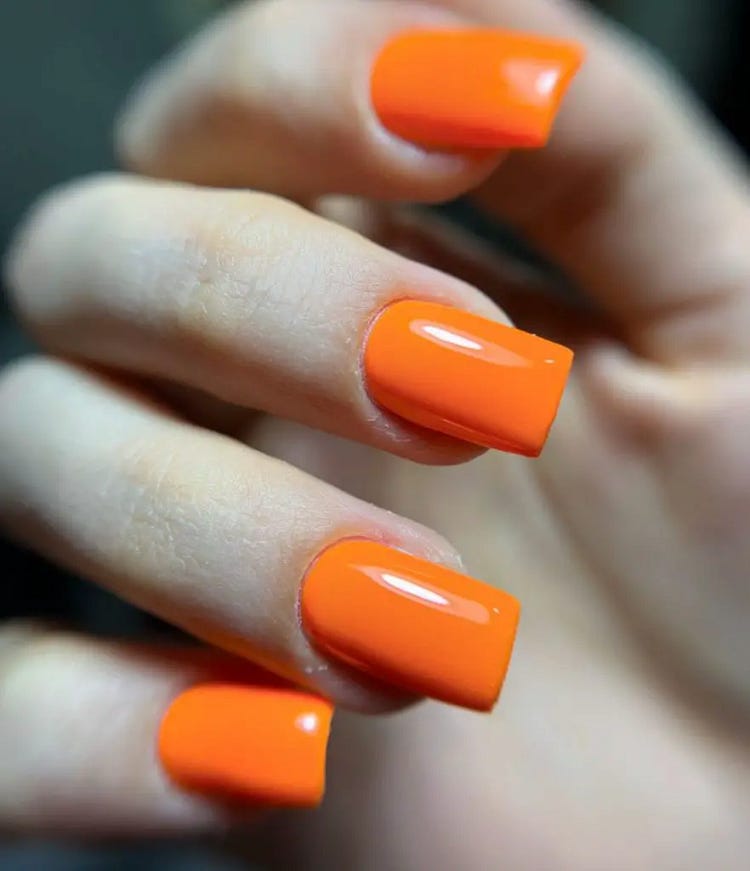
Classic Bright Orange Square Nails
These classic square-shaped nails in bright orange are a timeless choice for any summer occasion. The solid color and high-gloss finish make them simple yet eye-catching. This design is perfect for those who prefer a minimalist yet bold look, easily matching any summer outfit.
Consumables
- Base coat: OPI Natural Nail Base Coat
- Bright orange polish: Essie “Tangerine Tease”
- Top coat: Seche Vite Dry Fast Top Coat
- Nail file and buffer: OPI Crystal Nail File
DIY Instructions
- Shape your nails into a square shape using a nail file.
- Apply the base coat and let it dry.
- Paint your nails with two coats of the bright orange polish.
- Allow the polish to dry between coats.
- Finish with a top coat for a glossy finish.
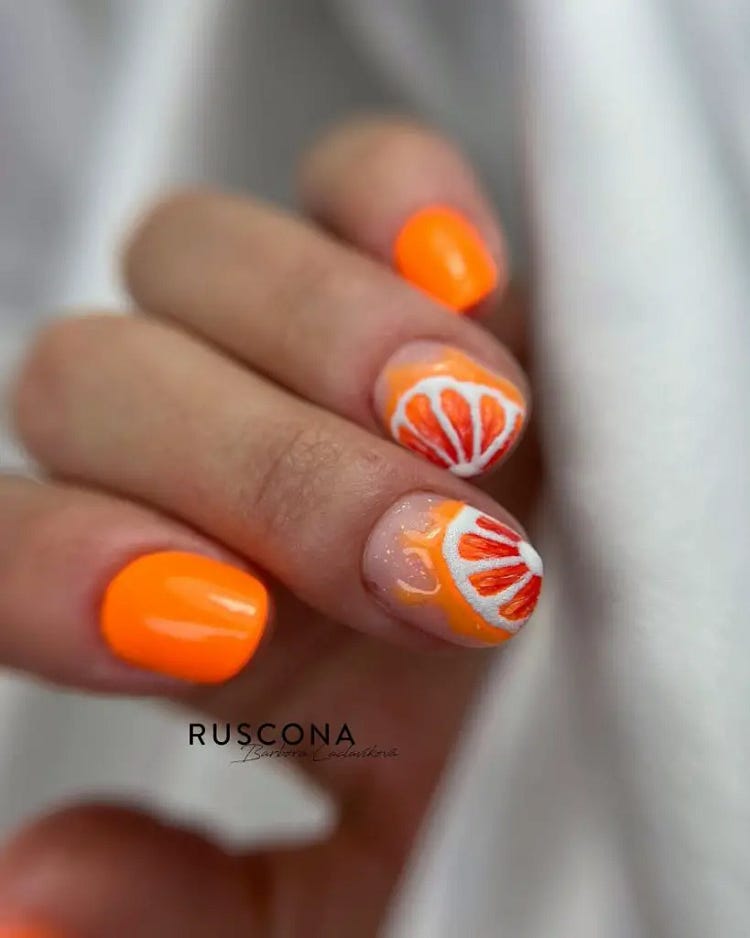
Citrus Delight With Bright Orange
This refreshing nail design features a vibrant orange base with a playful citrus fruit accent. The bright orange polish is perfect for summer, while the detailed orange slice on the accent nail adds a touch of fun and creativity. The use of white to outline the fruit slice enhances the design, making it pop against the bright background.
Consumables
- Base coat: OPI Natural Nail Base Coat
- Bright orange polish: Essie “Tangerine Tease”
- White nail art pen: Sally Hansen I Heart Nail Art Pen in White
- Top coat: Seche Vite Dry Fast Top Coat
- Nail art brushes: Winstonia Fine Nail Art Brush Set
DIY Instructions
- Start with a base coat to protect your nails.
- Apply two coats of the bright orange polish and let it dry completely.
- Use the white nail art pen to draw the citrus fruit slice on the accent nail.
- Fill in the fruit slice with the white and orange polishes for added detail.
- Finish with a top coat to seal the design and add shine.
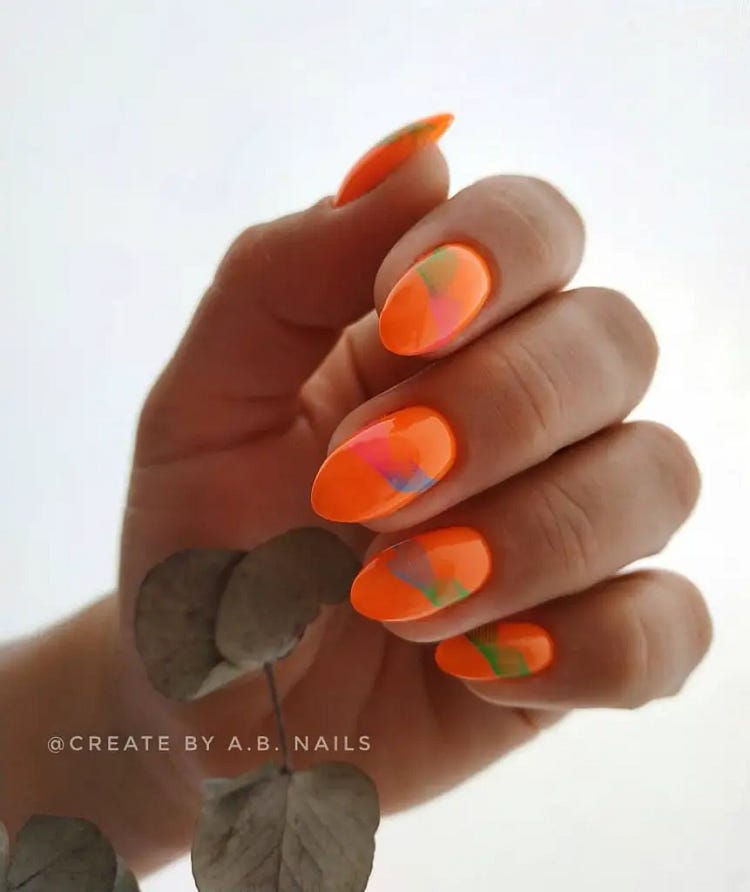
Geometric Summer Vibes
This design combines bright orange with geometric patterns for a trendy summer look. The nails are painted in a solid bright orange color, with subtle geometric accents in green and pink. The almond shape of the nails adds elegance, while the geometric designs provide a modern twist.
Consumables
- Base coat: OPI Natural Nail Base Coat
- Bright orange polish: Essie “Tangerine Tease”
- Green polish: OPI “Green Come True”
- Pink polish: Sally Hansen “Pink Blink”
- Top coat: Seche Vite Dry Fast Top Coat
- Nail art brushes: Beetles Fine Nail Art Brush Set
DIY Instructions
- Apply the base coat and let it dry.
- Paint your nails with two coats of the bright orange polish.
- Use the green and pink polishes to create geometric patterns on a few accent nails.
- Finish with a top coat to protect the design and add a glossy finish.
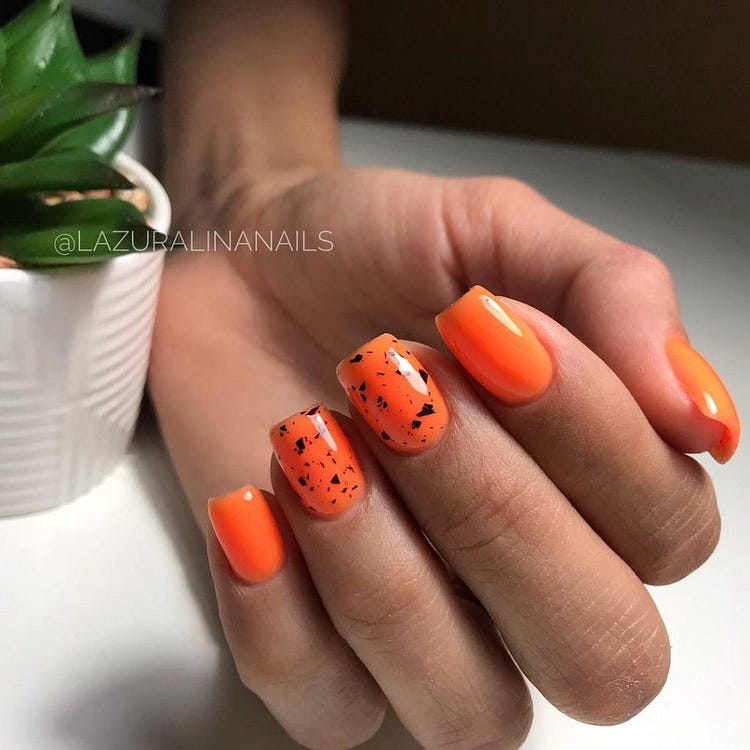
Speckled Orange Fun
This cute nail design features a bright orange base with speckled accents, creating a playful and eye-catching look. The short square shape is practical and trendy, making this design perfect for everyday wear. The black speckles add a unique texture, giving the nails a fun and modern twist.
Consumables
- Base coat: OPI Natural Nail Base Coat
- Bright orange polish: Essie “Tangerine Tease”
- Black speckles polish: Morgan Taylor “Black Shadow”
- Top coat: Seche Vite Dry Fast Top Coat
- Nail art brushes: Winstonia Fine Nail Art Brush Set
DIY Instructions
- Apply the base coat to protect your nails.
- Paint your nails with two coats of the bright orange polish and let it dry.
- Use the black speckles polish to add texture to the accent nails.
- Finish with a top coat to seal the design and add shine.
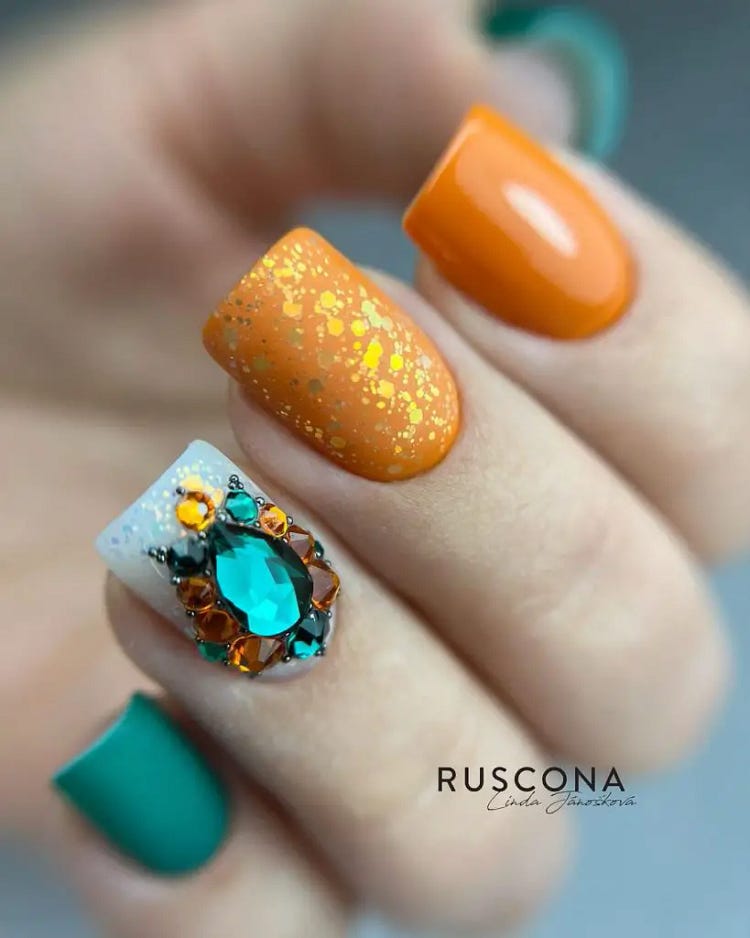
Blinged-Out Orange Nails
For those who love bling and glamour, this design features bright orange nails with stunning gemstone accents. The combination of orange and green gemstones adds a luxurious touch, perfect for special occasions. The glittery orange accent nail ties the design together, making it both chic and eye-catching.
Consumables
- Base coat: OPI Natural Nail Base Coat
- Bright orange polish: Essie “Tangerine Tease”
- Green polish: OPI “Green Come True”
- Glitter polish: Zoya “Monet”
- Gemstones: Born Pretty Nail Art Rhinestones
- Top coat: Seche Vite Dry Fast Top Coat
- Nail art glue: Mia Secret Nail Art Glue
DIY Instructions
- Apply the base coat and let it dry.
- Paint your nails with two coats of the bright orange polish.
- Use the glitter polish on one accent nail.
- Apply nail art glue to attach the gemstones on another accent nail.
- Finish with a top coat to protect the design and add a glossy finish.
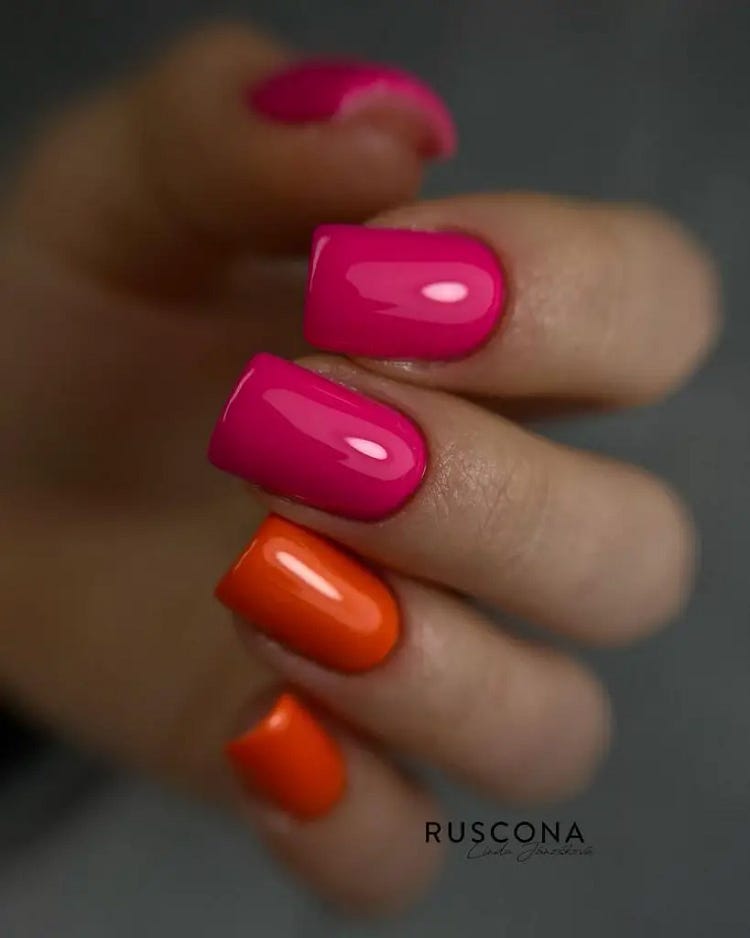
Bold Pink And Orange Combo
This bold design features a striking combination of bright pink and orange nails. The contrast between the two colors creates a vibrant and energetic look, perfect for summer. The square shape of the nails adds a classic touch, while the glossy finish enhances the overall look.
Consumables
- Base coat: OPI Natural Nail Base Coat
- Bright orange polish: Essie “Tangerine Tease”
- Bright pink polish: China Glaze “Neon & On & On”
- Top coat: Seche Vite Dry Fast Top Coat
- Nail file and buffer: OPI Crystal Nail File
DIY Instructions
- Start with a base coat to protect your nails.
- Paint some nails with the bright orange polish and others with the bright pink polish.
- Apply two coats for each color, allowing them to dry between coats.
- Finish with a top coat to seal the design and add shine.
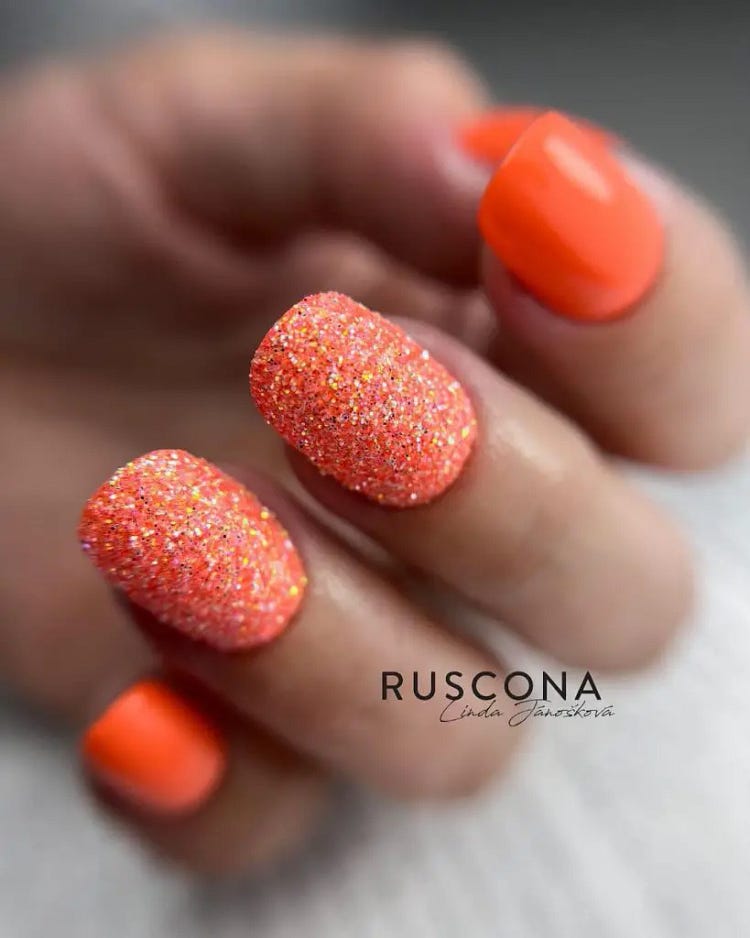
Glittery Coral Delight
This stunning design features a bright orange base with a dazzling coral glitter accent nail. The mix of bright polish and shimmering glitter creates a lively and festive look, perfect for summer parties. The contrast between the smooth, glossy nails and the textured glitter adds depth and interest to this design.
Consumables
- Base coat: OPI Natural Nail Base Coat
- Bright orange polish: Essie “Tangerine Tease”
- Coral glitter polish: Zoya “Ari”
- Top coat: Seche Vite Dry Fast Top Coat
- Nail art brushes: Winstonia Fine Nail Art Brush Set
DIY Instructions
- Apply the base coat and let it dry.
- Paint most of your nails with two coats of the bright orange polish.
- For the accent nail, apply two coats of the coral glitter polish.
- Finish with a top coat to seal the design and add shine.
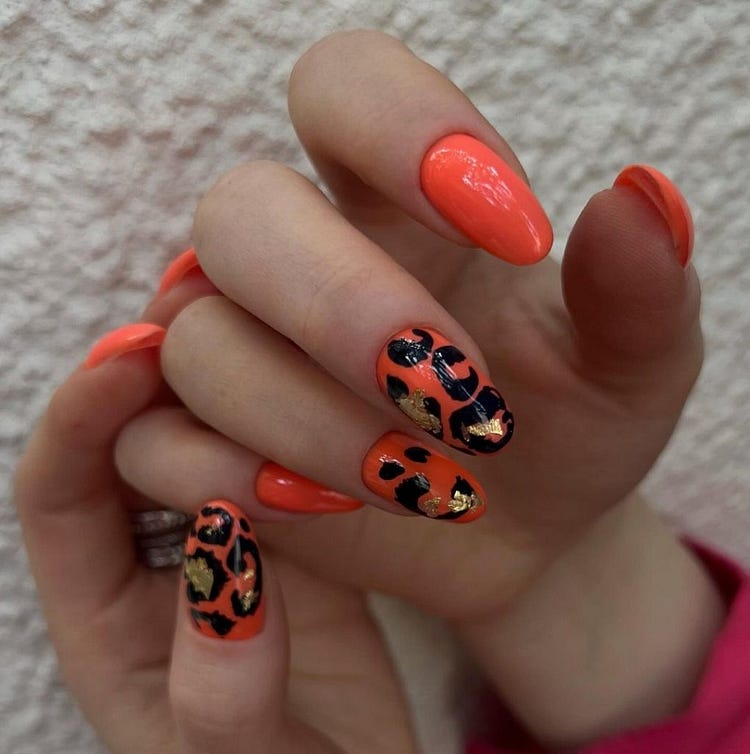
Leopard Print On Bright Orange
This trendy nail design features a vibrant orange base with bold leopard print accents. The combination of bright orange and black with gold details gives a chic and wild look. The almond shape adds elegance, while the leopard print makes a fashion statement.
Consumables
- Base coat: OPI Natural Nail Base Coat
- Bright orange polish: Essie “Tangerine Tease”
- Black polish: Sally Hansen “Black Out”
- Gold foil: Born Pretty Gold Foil Flakes
- Top coat: Seche Vite Dry Fast Top Coat
- Nail art brushes: Beetles Fine Nail Art Brush Set
DIY Instructions
- Apply the base coat and let it dry.
- Paint your nails with two coats of the bright orange polish.
- Use the black polish and a fine nail art brush to create the leopard print spots.
- Apply gold foil flakes within the spots for a touch of glam.
- Finish with a top coat to seal the design and add shine.
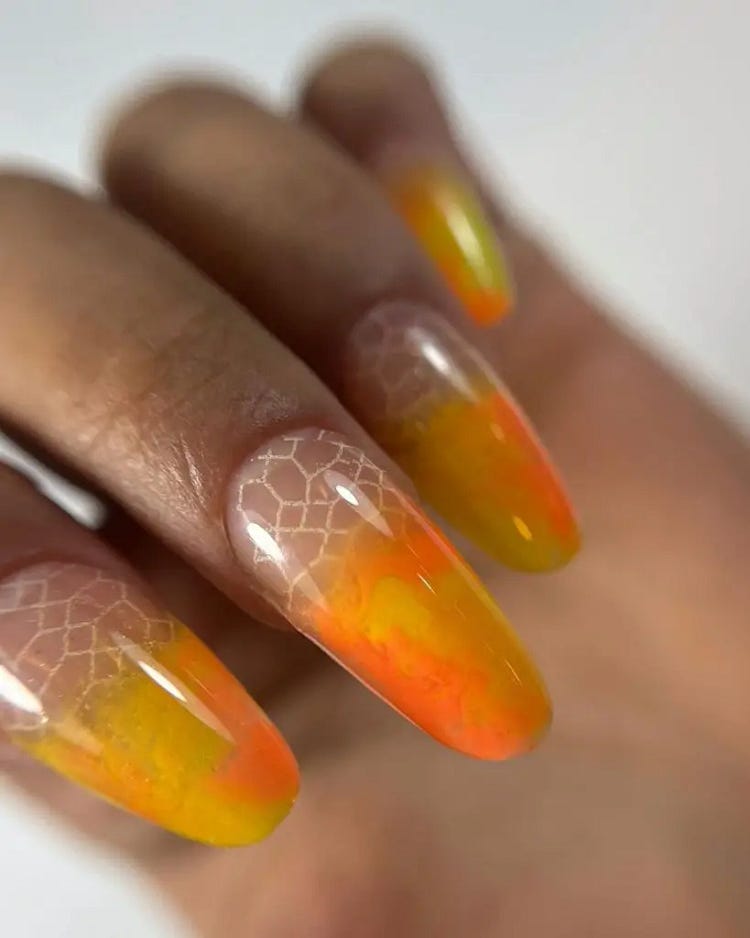
Sunset Gradient Nails
This summer orange nails design mimics a beautiful sunset with a gradient from yellow to orange. The addition of white geometric patterns adds a modern twist, making the design both elegant and trendy. This look is perfect for those who love intricate details and vibrant colors.
Consumables
- Base coat: OPI Natural Nail Base Coat
- Yellow polish: China Glaze “Happy Go Lucky”
- Orange polish: Essie “Tangerine Tease”
- White nail art pen: Sally Hansen I Heart Nail Art Pen in White
- Top coat: Seche Vite Dry Fast Top Coat
- Nail art sponges: Beetles Nail Art Sponges
DIY Instructions
- Apply the base coat and let it dry.
- Create a gradient effect using the yellow and orange polishes with a sponge.
- Once dry, use the white nail art pen to draw geometric patterns.
- Finish with a top coat to protect the design and add shine.


No comments:
Post a Comment