Discover the elegance of summer white toe nail designs for a fresh, clean look. Perfect for pedicures, these designs can include bling, rhinestones, or even a touch of glitter for added flair. Ideal for short nails, these designs can be complemented with matching ideas for your fingernails. The price varies depending on whether you choose gel or traditional polish. Soft and milky white colors create a beautiful, timeless summer style.
Blue And White Duo
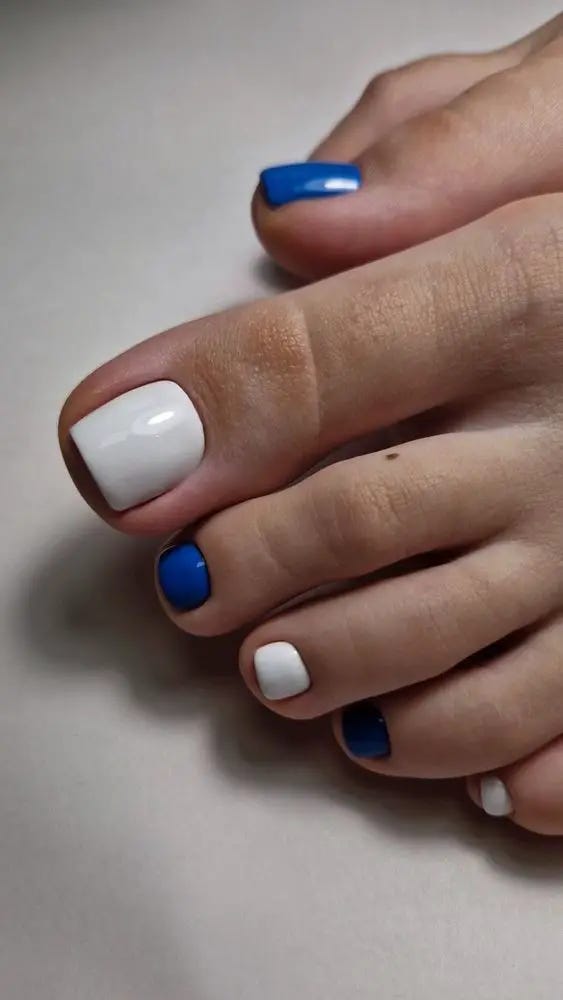
For those looking to add a pop of color to their white toe nail design, this blue and white combination is a fantastic choice. The alternating colors create a playful yet sophisticated look. The large toenail is painted a striking blue, while the rest of the nails are white, providing a beautiful contrast that stands out.
Consumables Needed:
- Bright blue nail polish (e.g., Essie Butler Please)
- Glossy white nail polish (e.g., Zoya Purity)
- Base coat (e.g., Deborah Lippmann Gel Lab Base Coat)
- Top coat (e.g., INM Out The Door Top Coat)
- Nail tape for clean lines
DIY Instructions:
- Apply a base coat to clean, dry toenails.
- Use nail tape to section off the nails you want to paint blue.
- Apply two coats of blue polish to the large toenail, and two coats of white polish to the rest.
- Carefully remove the nail tape and touch up any edges if necessary.
- Finish with a top coat for a glossy finish.
- Let your nails dry completely before walking around.
Subtle Glitter Glam
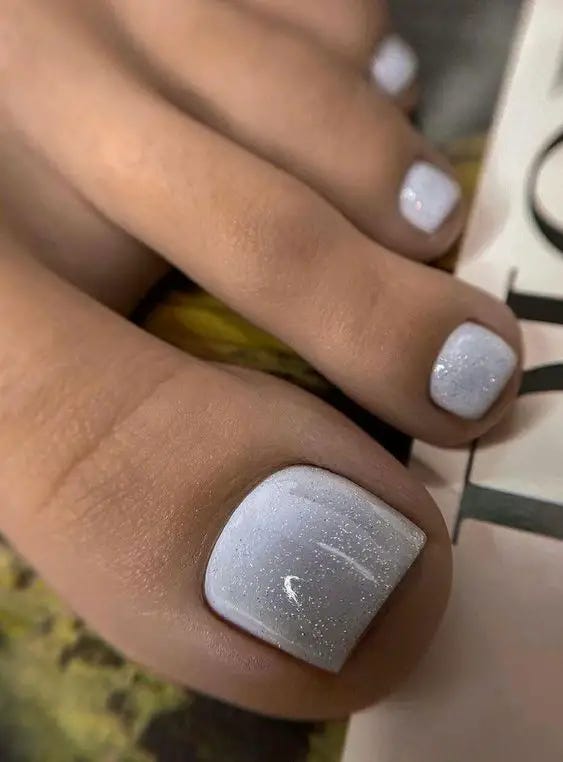
Adding a touch of glitter to your white toe nail design can give it a glamorous upgrade without being too flashy. This design features a milky white base with a subtle glitter overlay, providing just the right amount of sparkle. It’s perfect for special occasions or simply when you want your toenails to shine.
Consumables Needed:
- Milky white nail polish (e.g., Essie Marshmallow)
- Fine silver glitter top coat (e.g., China Glaze Fairy Dust)
- Base coat (e.g., Butter London Nail Foundation)
- Top coat (e.g., Glisten & Glow Top Coat)
- Nail buffer
DIY Instructions:
- Buff your toenails to smooth out the surface.
- Apply a base coat to prepare the nails.
- Paint your nails with two coats of milky white polish, allowing each layer to dry.
- Apply a fine glitter top coat for a subtle shimmer.
- Seal with a top coat to protect the glitter and add shine.
- Allow plenty of drying time to avoid smudging.
Glittery Stripe Accent
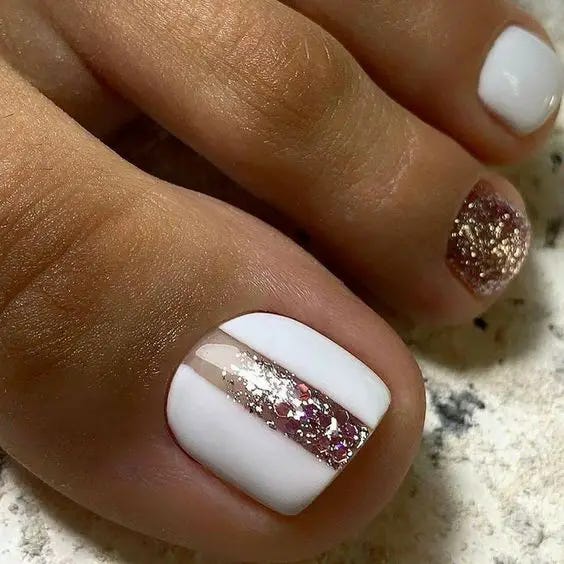
This glamorous design features a striking combination of white and glitter. The big toenail is adorned with a glittery stripe down the center, creating a unique and eye-catching effect. The adjacent toenail also boasts a glittery accent, adding to the overall sparkle and elegance of the design. This look is perfect for those who want to add a touch of glamour to their summer white toe nail designs.
Consumables Needed:
- White nail polish (e.g., Essie Blanc)
- Silver glitter polish (e.g., China Glaze Glistening Snow)
- Nail striping tape
- Base coat (e.g., Orly Bonder)
- Top coat (e.g., Seche Vite Dry Fast Top Coat)
- Small brush for precision application
DIY Instructions:
- Apply a base coat to clean, dry toenails.
- Paint all toenails with two coats of white nail polish.
- Once dry, place striping tape down the center of the big toenail.
- Apply the silver glitter polish within the taped area and on the adjacent toenail.
- Carefully remove the tape and touch up if necessary.
- Finish with a top coat to seal the design and add shine.
- Allow your nails to dry completely before wearing shoes.
Rhinestone Accent
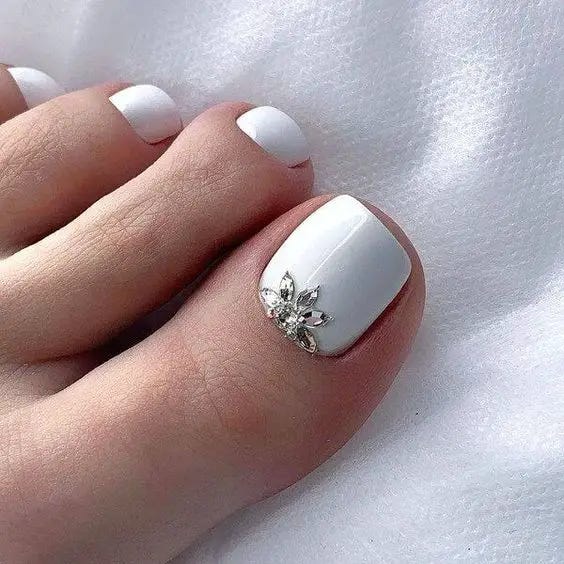
For a touch of luxury, this design incorporates a simple white base with a stunning rhinestone accent on the big toenail. The rhinestones are arranged in a floral pattern, adding a delicate and sophisticated touch to the overall look. This design is ideal for special occasions or when you want to add some bling to your pedicures.
Consumables Needed:
- White nail polish (e.g., OPI Alpine Snow)
- Rhinestones for nails
- Nail glue
- Base coat (e.g., Deborah Lippmann Gel Lab Base Coat)
- Top coat (e.g., INM Out The Door Top Coat)
- Tweezers for rhinestone application
DIY Instructions:
- Start with clean, dry toenails and apply a base coat.
- Paint all toenails with two coats of white nail polish.
- Using tweezers, apply nail glue to the big toenail and place rhinestones in the desired pattern.
- Press the rhinestones gently to ensure they adhere properly.
- Finish with a top coat to secure the rhinestones and add shine.
- Allow your nails to dry thoroughly before wearing any closed-toe shoes.
Subtle Rhinestone Curve
This elegant design features a subtle curve of rhinestones on the big toenail, complementing the soft white polish. The additional rhinestones on the smaller toenails create a cohesive and polished look. This design is perfect for those who prefer a more understated yet glamorous toenails with design.

Consumables Needed:
- Soft white nail polish (e.g., Zoya Purity)
- Small rhinestones for nails
- Nail glue
- Base coat (e.g., Essie First Base)
- Top coat (e.g., CND Vinylux Weekly Top Coat)
- Dotting tool or tweezers for rhinestone application
DIY Instructions:
- Apply a base coat to clean, dry toenails.
- Paint all toenails with two coats of soft white nail polish.
- Use a dotting tool or tweezers to apply a small amount of nail glue in a curved line on the big toenail.
- Place rhinestones along the glue line and press gently.
- Add a few rhinestones to the smaller toenails for a matching look.
- Finish with a top coat to secure the rhinestones and add shine.
- Allow your nails to dry completely before any activity.
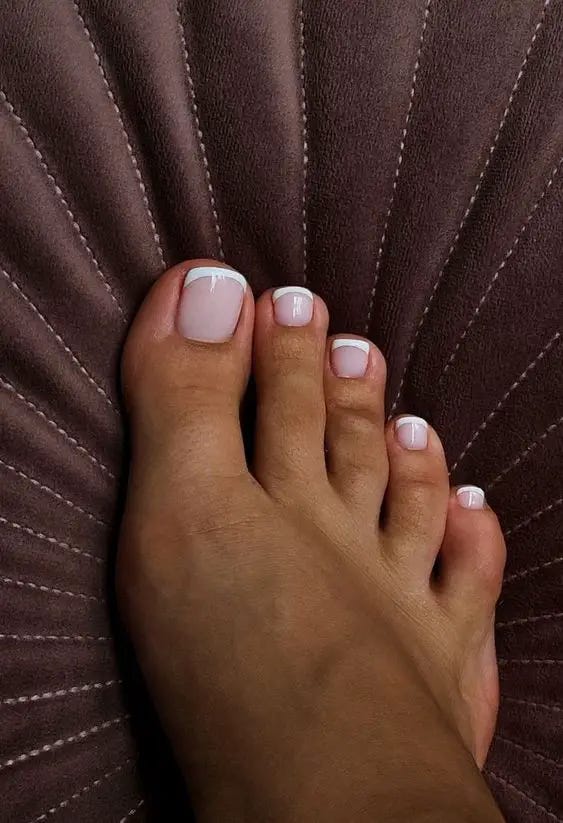
Classic French Tips
The timeless French tip design is always a favorite. This version features a soft pink base with crisp white tips, giving the toenails a clean and elegant appearance. The nails are shaped into a classic square, making this design suitable for any occasion and perfect for summer.
Consumables Needed:
- Sheer pink nail polish (e.g., Essie Ballet Slippers)
- White polish for tips (e.g., Orly White Tips)
- Base coat (e.g., Zoya Anchor Base Coat)
- Top coat (e.g., Sally Hansen Miracle Gel Top Coat)
- French tip guide stickers
DIY Instructions:
- Apply a base coat to clean toenails.
- Paint the nails with a sheer pink polish and let it dry.
- Place the French tip guide stickers on the nails.
- Apply white polish to the tips and allow it to dry.
- Remove the stickers and touch up if necessary.
- Finish with a top coat to seal the design and add shine.
- Ensure your nails are fully dry before any activity.
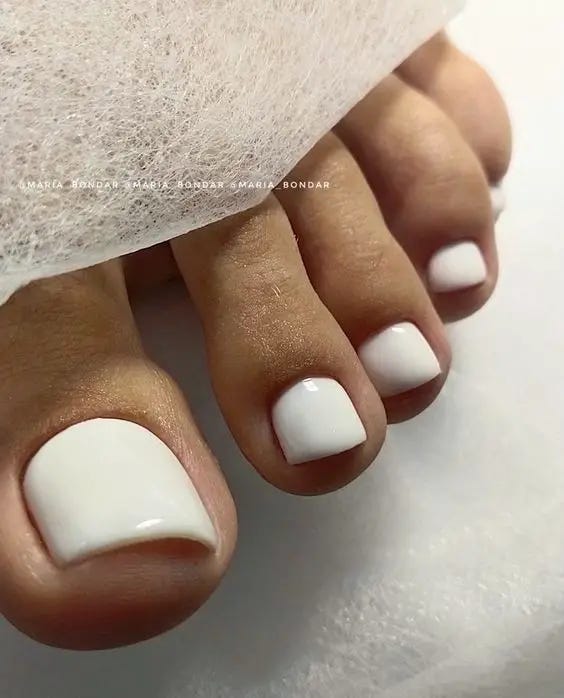
Solid White Perfection
This design is all about simplicity and elegance. The toenails are painted in a solid white polish, creating a clean and crisp look. This design is perfect for those who appreciate minimalism and want a versatile style that matches any summer outfit.
Consumables Needed:
- White nail polish (e.g., Essie Blanc)
- Base coat (e.g., Orly Bonder)
- Top coat (e.g., Seche Vite Dry Fast Top Coat)
- Nail file and buffer
DIY Instructions:
- Start with clean, dry toenails.
- Apply a base coat to protect your nails.
- Apply two coats of white nail polish, allowing each coat to dry thoroughly.
- Finish with a top coat to seal the polish and add extra shine.
- Allow your nails to dry completely before wearing shoes.
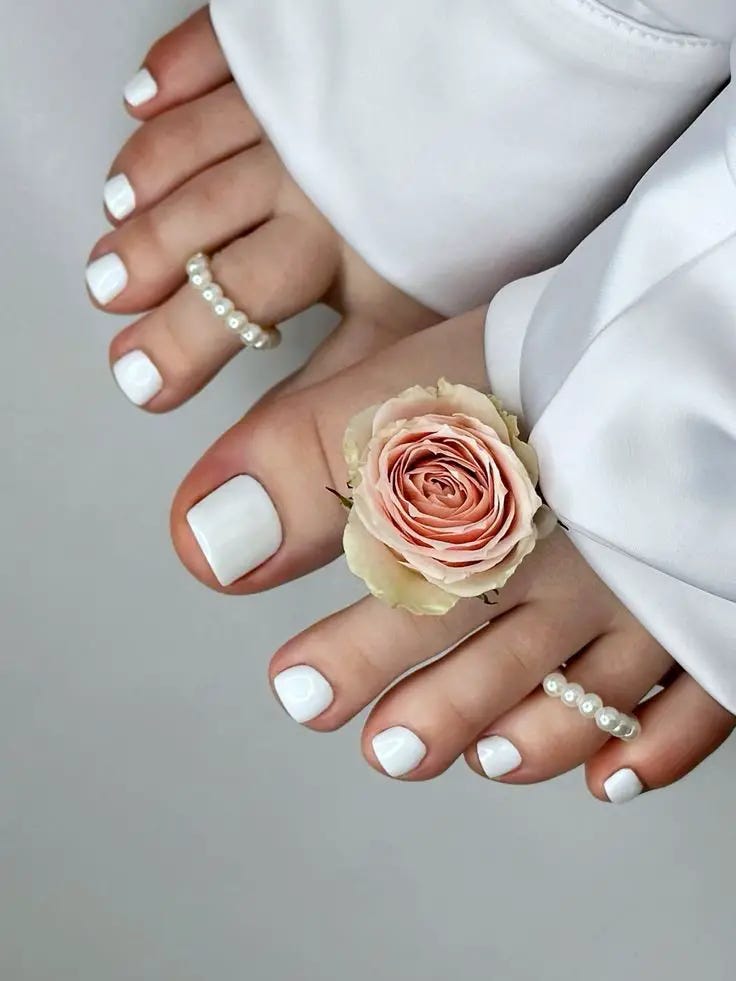
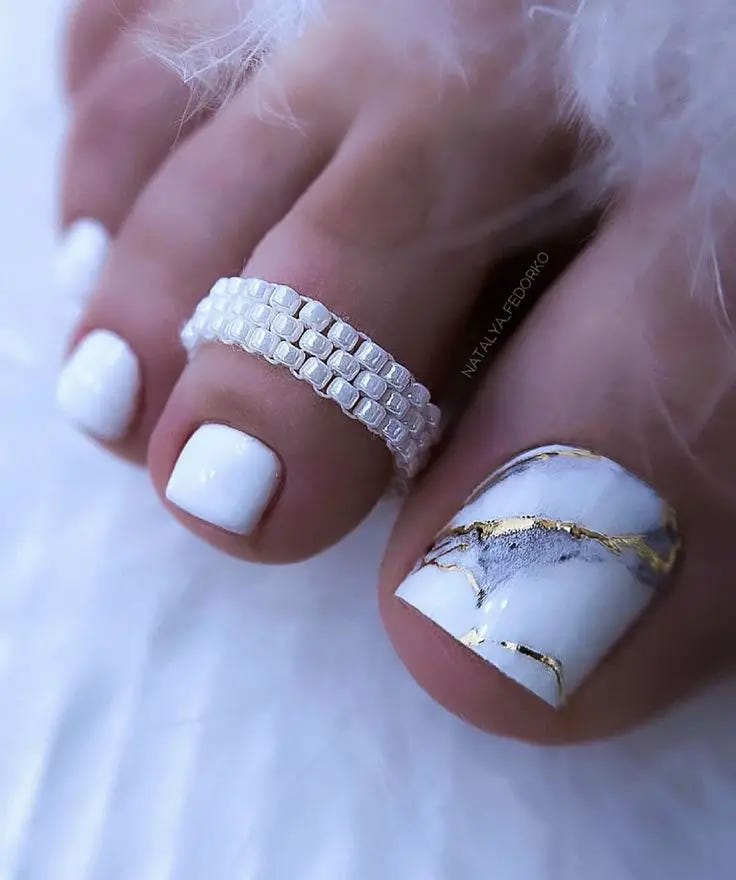
Pearl Accents
This design exudes a sense of elegance and sophistication with its classic white polish and pearl accents. The toenails are shaped into a neat square, while delicate pearl rings adorn the toes, adding a touch of luxury. This look is perfect for a summer wedding or any formal occasion where you want your toenails to stand out.
Consumables Needed:
- White nail polish (e.g., OPI Alpine Snow)
- Pearl toe rings
- Base coat (e.g., Orly Bonder)
- Top coat (e.g., Seche Vite Dry Fast Top Coat)
- Nail file and buffer
DIY Instructions:
- Begin with clean, dry toenails and apply a base coat.
- Paint all toenails with two coats of white nail polish, allowing each coat to dry thoroughly.
- Once dry, place the pearl rings on your toes.
- Finish with a top coat to add extra shine and protect the polish.
- Ensure your nails are fully dry before wearing shoes.
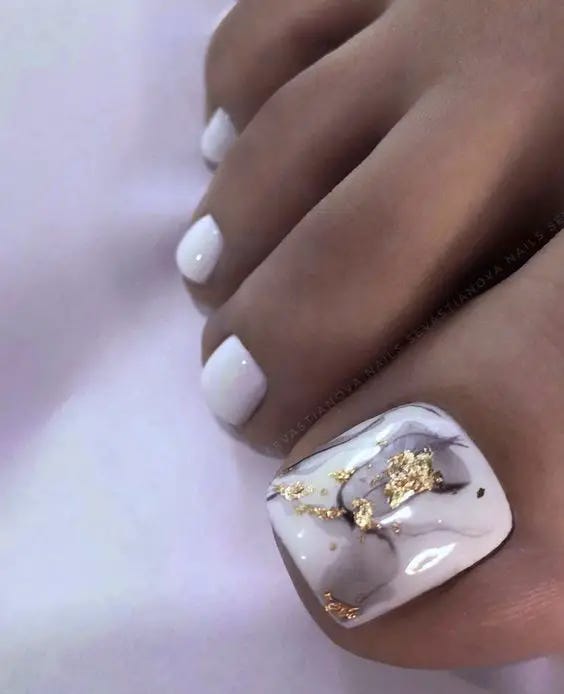
Marble And Gold Foil
This design features a stunning combination of white polish with a marble effect and gold foil accents on the big toenail. The rest of the toenails are painted in solid white, creating a beautiful contrast. The marble design is achieved using a mix of white, grey, and black polishes, while the gold foil adds a touch of glamour.
Consumables Needed:
- White nail polish (e.g., Essie Blanc)
- Grey and black nail polish (e.g., OPI Suzi Skis in the Pyrenees)
- Gold foil
- Base coat (e.g., Butter London Nail Foundation)
- Top coat (e.g., Glisten & Glow Top Coat)
- Nail art brush and dotting tool
DIY Instructions:
- Apply a base coat to clean, dry toenails.
- Paint all toenails with two coats of white nail polish.
- Use a dotting tool to apply grey and black polish in a marble pattern on the big toenail.
- Apply gold foil accents using a nail art brush.
- Seal the design with a top coat.
- Allow your nails to dry completely before any activity.
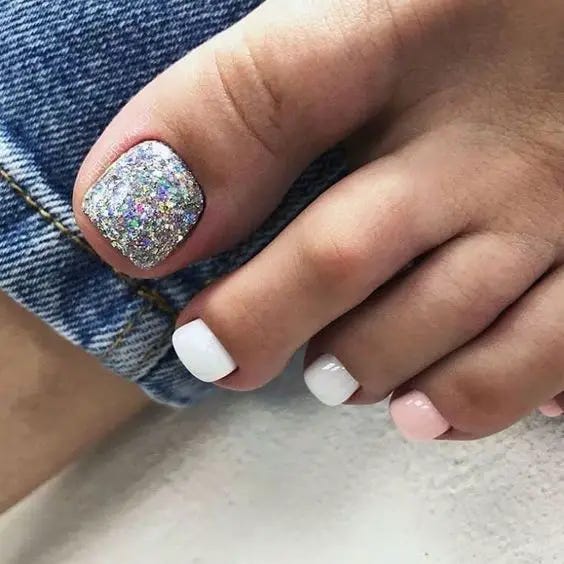
Glitter Glam
This fun and eye-catching design features a glittery big toenail paired with solid white and soft pink nails. The glitter polish on the big toenail creates a dazzling effect, making your toes sparkle with every step. This design is perfect for those who love a bit of bling in their pedicures.
Consumables Needed:
- White nail polish (e.g., Sally Hansen White On)
- Soft pink polish (e.g., Essie Ballet Slippers)
- Silver glitter polish (e.g., China Glaze Glistening Snow)
- Base coat (e.g., Deborah Lippmann Gel Lab Base Coat)
- Top coat (e.g., INM Out The Door Top Coat)
DIY Instructions:
- Start with clean, dry toenails and apply a base coat.
- Paint the big toenail with two coats of silver glitter polish.
- Paint the remaining toenails with alternating coats of white and soft pink polish.
- Finish with a top coat to seal the polish and add shine.
- Ensure your nails are fully dry before any activity.
Marbled Perfection
This design features a chic marbled effect on the big toenail, complemented by solid white polish on the rest. The marbled look is created using white, grey, and gold polishes, resulting in a sophisticated and elegant design perfect for any summer outing.
Consumables Needed:
- White nail polish (e.g., Zoya Purity)
- Grey and gold nail polish (e.g., OPI I Can Never Hut Up and Essie Good as Gold)
- Base coat (e.g., Essie First Base)
- Top coat (e.g., CND Vinylux Weekly Top Coat)
- Nail art brush and dotting tool
DIY Instructions:
- Apply a base coat to clean, dry toenails.
- Paint all toenails with two coats of white polish.
- Use a nail art brush to create the marbled effect on the big toenail with grey and gold polish.
- Seal the design with a top coat.
- Allow your nails to dry completely before any activity.


No comments:
Post a Comment