Are you ready to dive into the vibrant world of summer almond nails colors & designs ideas? Whether you’re planning a vacation or simply looking to spruce up your style at home, summer calls for fresh, exciting nail designs. Almond nails, with their elegant shape, offer a perfect canvas for creativity. But what colors and designs best capture the essence of this season? From the soft hues of pastel to the bold statement of neon, and from intricate patterns to simple yet sophisticated looks, we’ll explore a variety of styles to inspire your next manicure.
Sophisticated Matte Purple With Gold Flakes
This luxurious design pairs a deep matte purple with elegant gold flakes, creating a look that’s both sophisticated and trendy. The almond shape enhances the overall elegance, while the matte finish provides a modern touch. Gold flakes add a hint of luxury, making this manicure a perfect choice for both daytime and evening summer events.

Materials List
- Base coat: Essie Smooth-E Base Coat
- Purple matte polish: Zoya “Harlow”
- Gold leaf flakes
- Matte top coat: OPI Matte Top Coat
Expert Tips: For an even distribution of gold flakes, use a tweezer to place them onto the nail while the purple polish is still tacky. Then, seal with a matte top coat to prevent the flakes from peeling off.
DIY Instructions
Start with a clean nail surface, applying the base coat for adhesion. Paint two coats of “Harlow” and while still slightly wet, use tweezers to apply gold flakes randomly or in a specific pattern as desired. Once set, apply the matte top coat to ensure the flakes are embedded and the finish remains sleek.
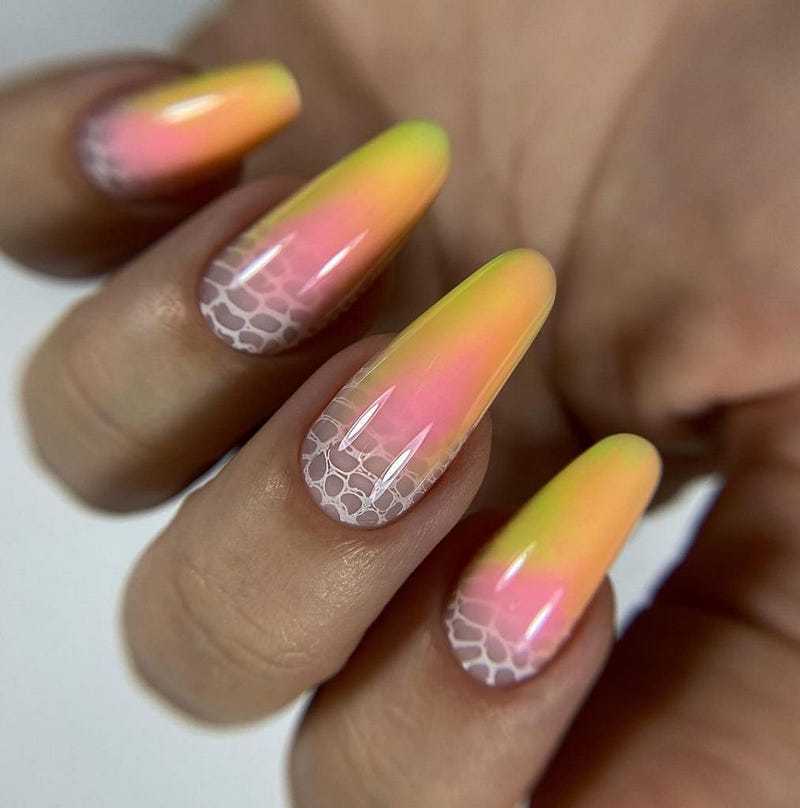
Summer Pastel Lace Detail
This delicate design features soft pastel colors with intricate lace detailing, creating a subtle yet stunning look ideal for summer. The light colors enhance the almond shape and provide a perfect canvas for the white lace patterns. This design is particularly suited for weddings, garden parties, or any event where a touch of elegance is desired.
Materials List
- Base coat: CND Stickey Base Coat
- Pastel polishes: OPI “Let’s Be Friends!” and “Gargantuan Green Grape”
- White nail art pen for lace details
- Top coat: OPI High Gloss Top Coat
Expert Tips: To create lace details, practice the design on paper first. Use a nail art pen for precision and let each layer dry thoroughly to avoid smudging.
DIY Instructions
Apply the base coat followed by two coats of “Let’s Be Friends!” for the base color. Once dry, use the white nail art pen to draw lace patterns. Start with simple shapes and gradually add complexity. Allow the design to dry completely before applying a layer of “Gargantuan Green Grape” at the tips for a subtle gradient effect. Finish with a high gloss top coat for durability and shine.
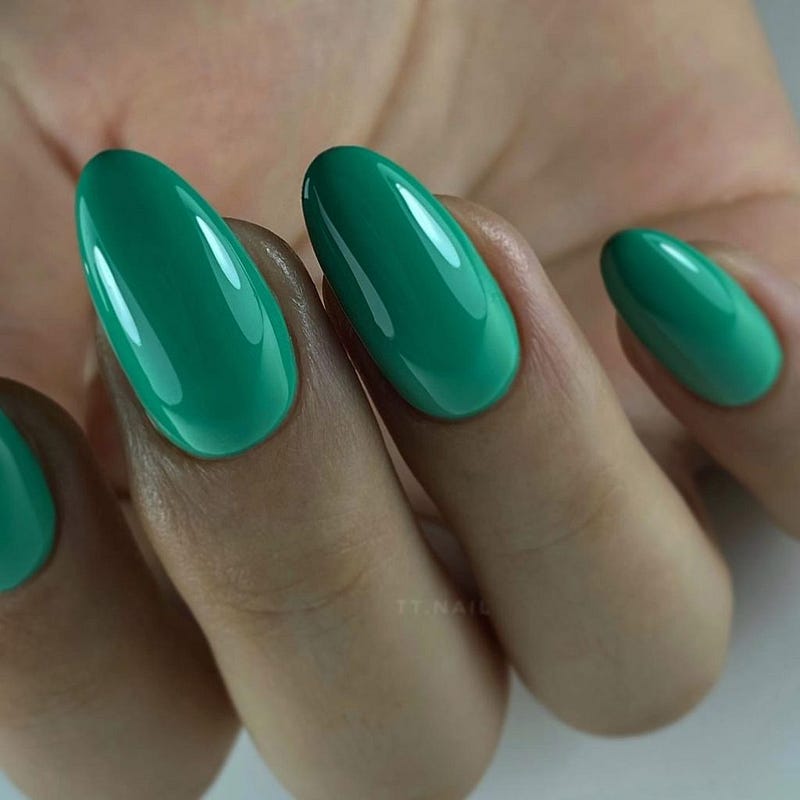
Lush Green Almond Nails
This manicure showcases a stunning solid green color that embodies the freshness of summer. The vibrant, glossy finish on the almond-shaped nails not only highlights the immaculate shape but also makes the colorful and lively hue pop, perfect for those sunny days.
Materials List
- Base coat: Sally Hansen Double Duty
- Green polish: OPI “Jade is the New Black”
- Top coat: Glossy Top Coat by Revlon
Expert Tips: Ensure each layer is fully dry before applying the next to avoid smudging and to achieve a seamless, glass-like finish.
DIY Instructions
After applying a base coat, add two coats of “Jade is the New Black” for deep, opaque coverage. Finish with a high-gloss top coat to enhance the color’s vibrancy and ensure longevity.
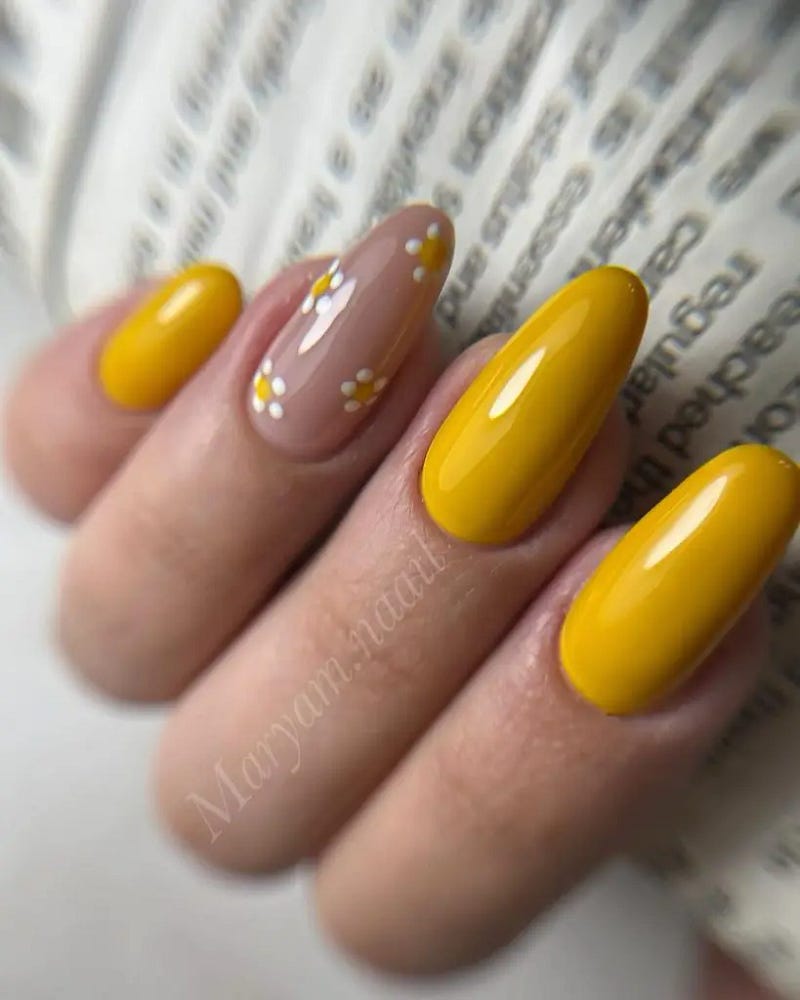
Sunny Yellow With Daisy Accents
A cheerful yellow manicure with delicate daisy accents perfect for summer. The bright neon yellow paired with simple white flowers adds a playful touch to the almond nails, making it a creative and easy choice for seasonal flair.
Materials List
- Base coat: Base Coat by Essie
- Yellow polish: “Mellow Yellow” by Sally Hansen
- White polish for daisies: “Alpine Snow” by OPI
- Detailing tool or small dotting pen
Expert Tips: Use the dotting tool to create perfect daisy petals. Practice on a sheet of paper first to get the hang of the petal shapes.
DIY Instructions
Apply the base coat, followed by two coats of “Mellow Yellow.” Once dry, use “Alpine Snow” to add small daisies by dotting five small petals in a circle. Finish with a clear top coat for protection and shine.
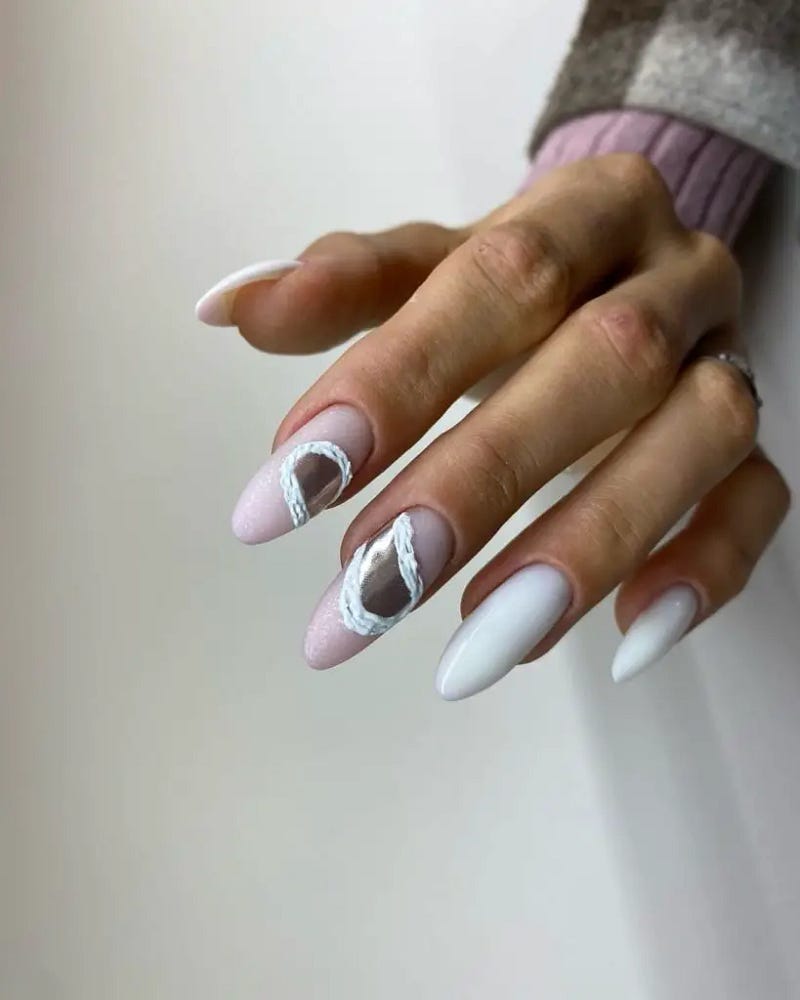
Chic Marble Effect On Pastel
This nail design features a sophisticated white and gray marble effect over a soft pastel pink base. The artistic swirls and subtle color transitions make it an elegant choice for any summer event, blending simple beauty with a touch of elegance on almond-shaped nails.
Materials List
- Base coat: CND Stickey Base Coat
- Pastel pink polish: Essie “Fiji”
- White and gray polish for marbling: Essie “Blanc” and “Chinchilly”
- Detail brush or marbling tool
Expert Tips: Drag the detail brush lightly through the wet polish to create natural-looking marble veins. Work quickly to manipulate the polish before it sets.
DIY Instructions
Start with a base coat and apply two coats of “Fiji.” While the second coat is wet, add small drops of “Blanc” and “Chinchilly.” Use a detail brush to swirl the colors gently. Seal with a top coat for a smooth finish.
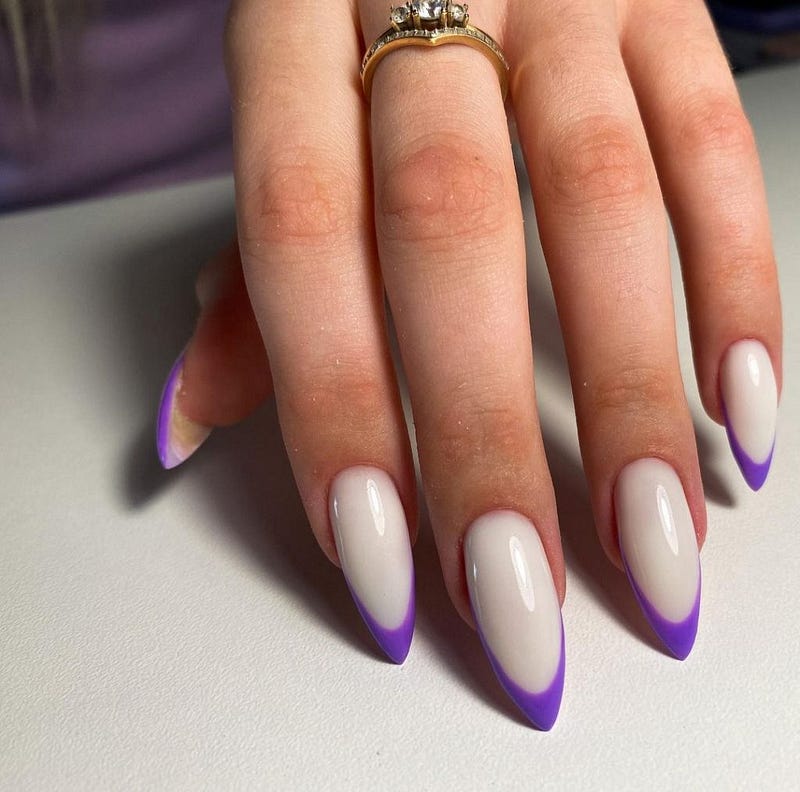
Lavender French Tip
This design reinvents the classic French tip by using a vibrant lavender shade that adds a modern twist to the traditional style. The crisp lines and bold color make it a striking choice for those looking to incorporate colorful and creative elements into their summer nail wardrobe.
Materials List
- Base coat: OPI Natural Nail Base Coat
- Lavender polish: “Do You Lilac It?” by OPI
- White polish for tips: “White On” by Sally Hansen
- Striping tape for precision
Expert Tips: Apply striping tape to ensure sharp, clean lines for your French tips. Remove the tape immediately after painting to avoid lifting the polish.
DIY Instructions
Apply the base coat, then two coats of “Do You Lilac It?” for the base color. Once dry, position the striping tape where you want the tips to start and apply “White On” over the tips. Carefully remove the tape, then finish with a top coat.
Pastel Play With Holographic Accents
A playful yet refined look combining soft pastels with striking holographic accents. The pastel colors provide a dreamy backdrop while the holographic pieces add a futuristic twist, ideal for those seeking a unique summer manicure.
Materials List
- Base coat: Essie Here to Stay Base Coat
- Pastel polishes: “Bikini So Teeny” by Essie and “Can’t Find My Czechbook” by OPI
- Holographic nail accents
- Top coat: INM Out the Door Top Coat
Expert Tips: Apply holographic accents while the second pastel coat is still tacky to ensure they adhere well.
DIY Instructions
Apply a base coat followed by two coats of alternating pastel colors on different nails. While still slightly wet, apply holographic accents on one or two accent nails. Seal everything with a fast-drying top coat to ensure durability and enhance the shine, making your nails ready for any summer adventure.
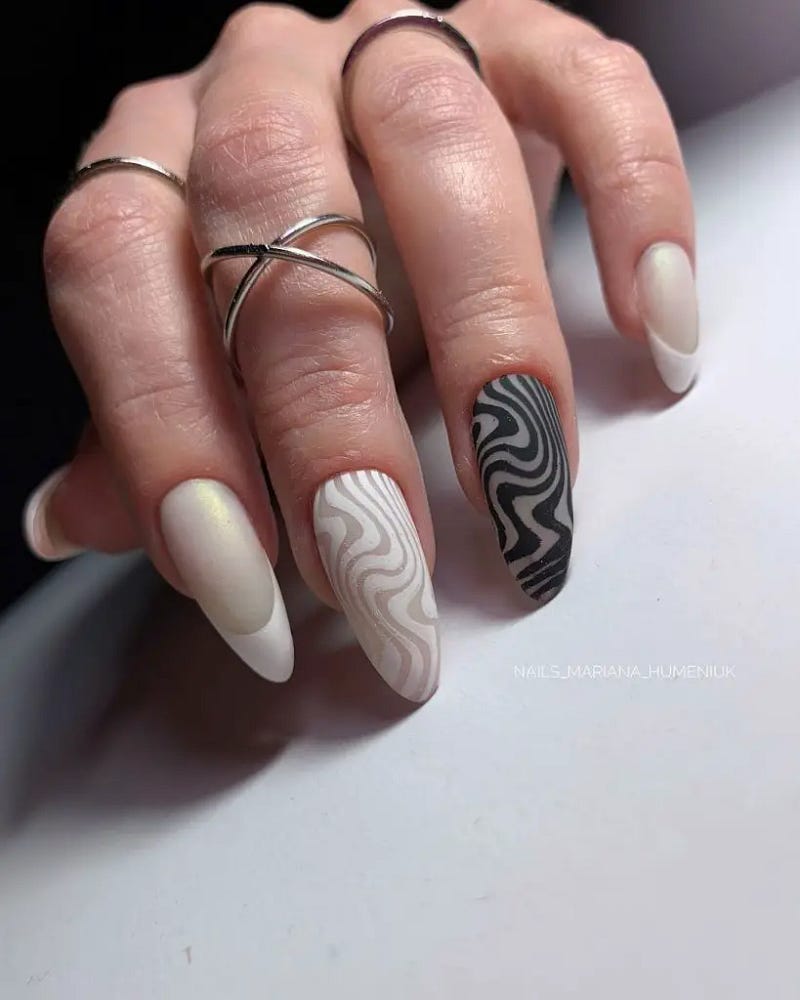
Black And White Elegance
The manicure shown in this image is a masterpiece of minimalistic design, featuring a striking contrast between black and white. The patterns, reminiscent of zebra stripes and abstract swirls, offer a sophisticated yet bold aesthetic. This design is particularly effective on almond-shaped nails, emphasizing the nails’ natural elegance.
Materials List
- Base coat: Essie Strong Start
- Black polish: Sally Hansen “Black Out”
- White polish: OPI “Alpine Snow”
- Detail brush for intricate patterns
Expert Tips: For precise and sharp lines, use a very fine detail brush. Steady your hand by resting it on a flat surface while painting the designs.
DIY Instructions
Start with a base coat to protect your nails. Apply two coats of “Alpine Snow” as the base color. Once dry, use “Black Out” with a fine detail brush to create the desired patterns. Finish with a clear top coat for a glossy finish and added durability.
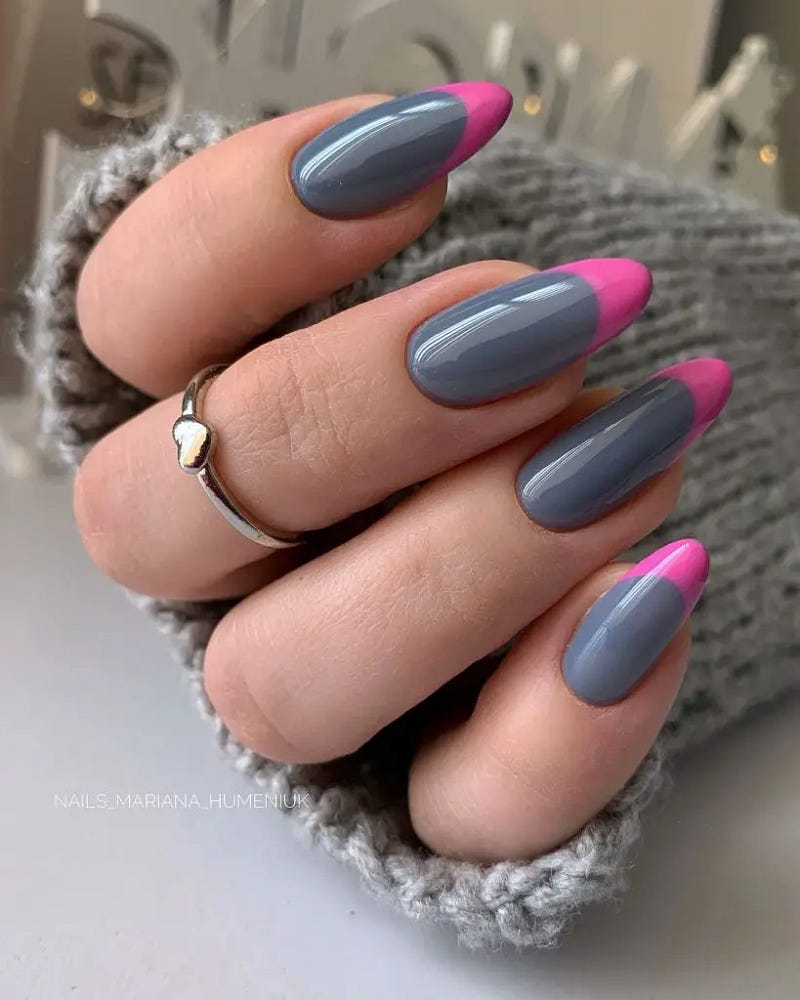
Modern French Tip With Pink Accents
This nail design modernizes the traditional French tip with a bold neon pink shade on a gray base. The almond shape accentuates the modern look, making it a trendy choice for those who want to add a splash of color to their nail art without overwhelming their style.
Materials List
- Base coat: OPI Natural Nail Base Coat
- Gray polish: Essie “Chinchilly”
- Pink polish: Essie “Bachelorette Bash”
Expert Tips: Apply the pink tip freehand for a relaxed look or use striping tape for a sharper, more defined edge.
DIY Instructions
Apply the base coat followed by two coats of “Chinchilly.” Once dry, paint the tips with “Bachelorette Bash.” For a neat finish, use striping tape along the tip line.
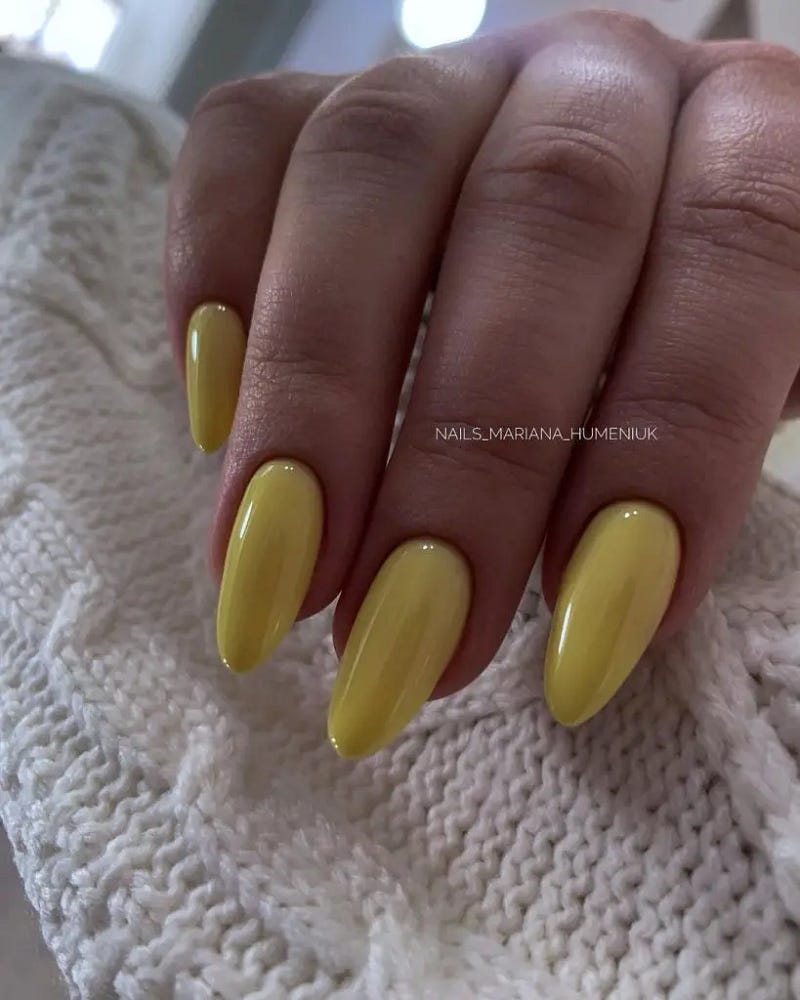
Sunshine Yellow
Bright and bold, this sunshine yellow nail color radiates joy and is perfect for the summer season. The glossy finish and full coverage demonstrate an excellent application technique, ideal for those who prefer a cheerful and vibrant look.
Materials List
- Base coat: CND Stickey Base Coat
- Yellow polish: OPI “Exotic Birds Do Not Tweet”
- Top coat: Seche Vite Dry Fast Top Coat
Expert Tips: Multiple thin coats are better than one thick coat to avoid bubbling and to ensure even color distribution.
DIY Instructions
Apply the base coat to protect your nails. Follow with two to three thin coats of “Exotic Birds Do Not Tweet” to achieve vibrant, opaque coverage. Finish with a glossy top coat for a durable and shiny appearance.
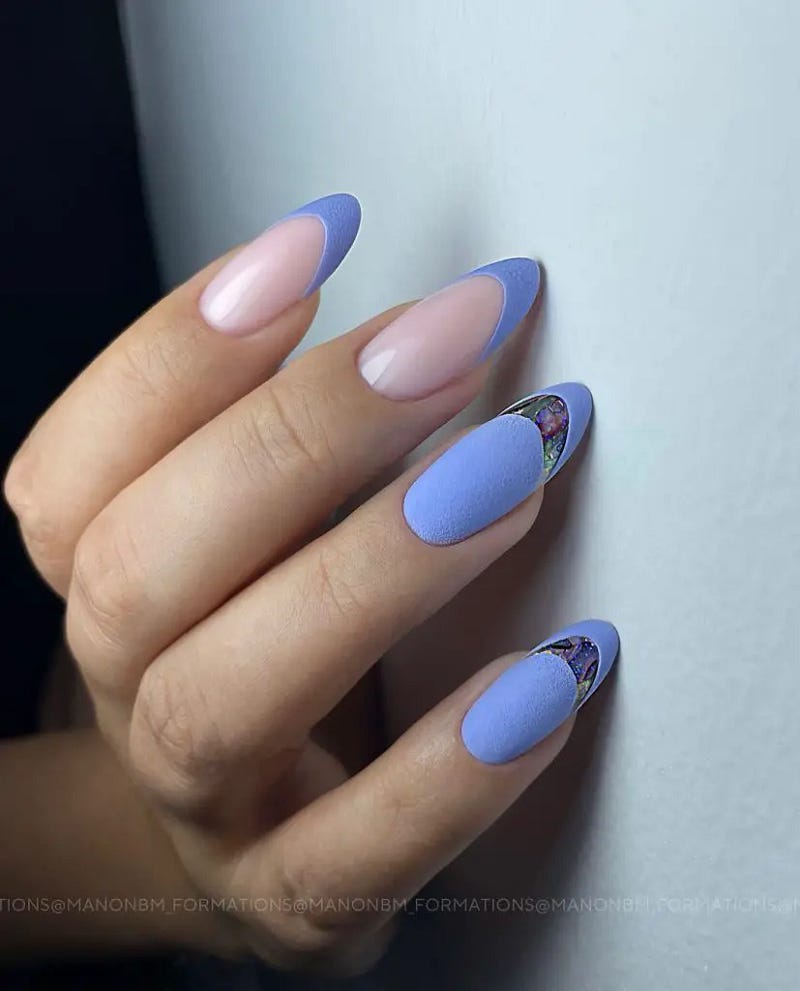
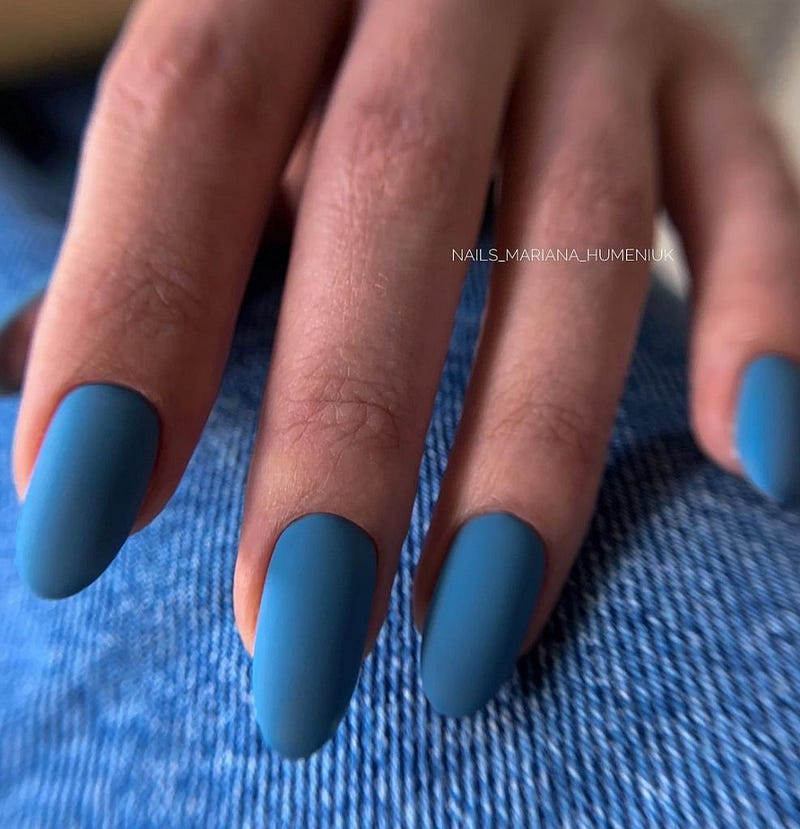
Serene Blue Matte
This design features a calming matte blue finish, providing a touch of sophistication and serenity. The matte texture contrasts beautifully with the almond nail shape, offering a contemporary and stylish look that is both subtle and striking.
Materials List
- Base coat: Essie Here to Stay Base Coat
- Blue polish: Zoya “Blu”
- Matte top coat: OPI Matte Top Coat
Expert Tips: Make sure each layer of polish is completely dry before applying the matte top coat to avoid smearing.
DIY Instructions
Begin with a base coat to protect the nails. Apply two coats of “Blu” for full coverage. Once dry, apply the matte top coat for a smooth, flat finish that enhances the color’s modern aesthetic.
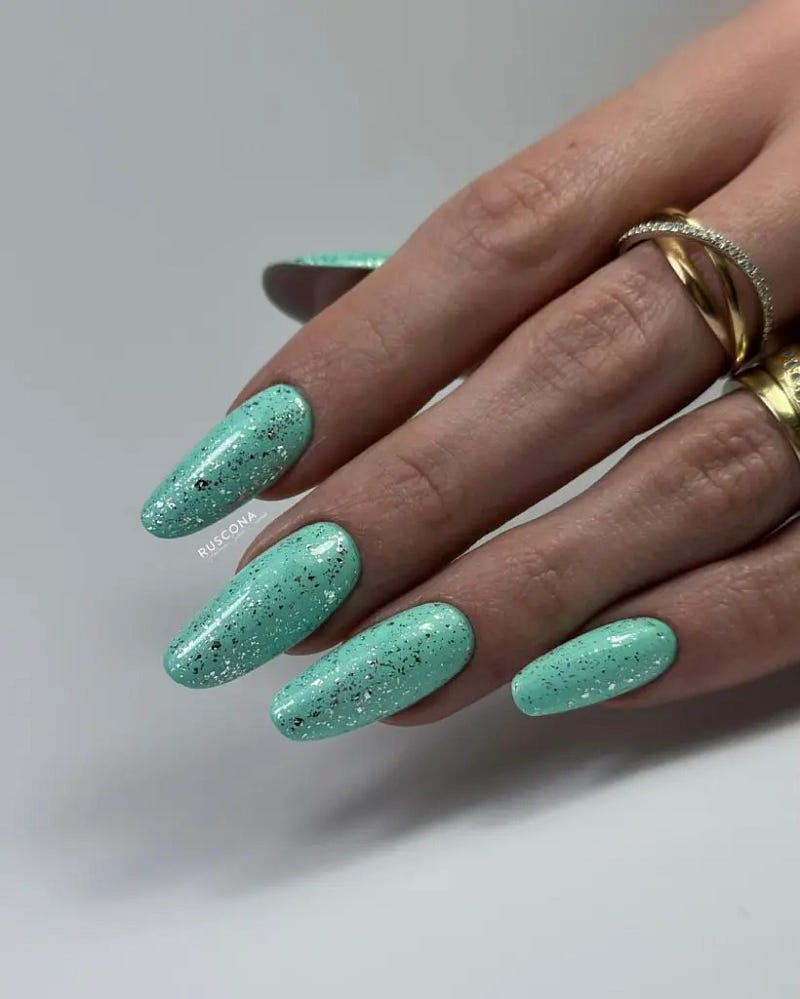
Aquamarine Sparkle
This design is a perfect blend of vibrant aquamarine and subtle glitter, creating a look that’s both refreshing and glamorous. Ideal for summer, the light sparkle mimics the shimmering surface of a pool, making it a fantastic choice for both day and night events.
Materials List
- Base coat: Butter London Nail Foundation
- Aquamarine polish: China Glaze “Too Yacht to Handle”
- Glitter top coat: Essie Luxeffects “Set in Stones”
Expert Tips: Apply the glitter in a gradient fashion, starting more densely at the tip and fading toward the cuticle for a sophisticated sparkle effect.
DIY Instructions
Start by applying a base coat. Layer two coats of “Too Yacht to Handle” for a vivid base color. While the second coat is still tacky, gently dab on “Set in Stones” starting at the tips and fading towards the middle. Seal with a top coat for extra shine and longevity.


No comments:
Post a Comment