Step into the radiant realm of the trendiest summer nails in 2024! Whether you crave a splashy upgrade for your beachside manicure or prefer chic simplicity for everyday grace, this guide has you covered. Discover the freshest trends, ranging from daring to understated, and learn how to effortlessly craft these gorgeous styles in the comfort of your own home.
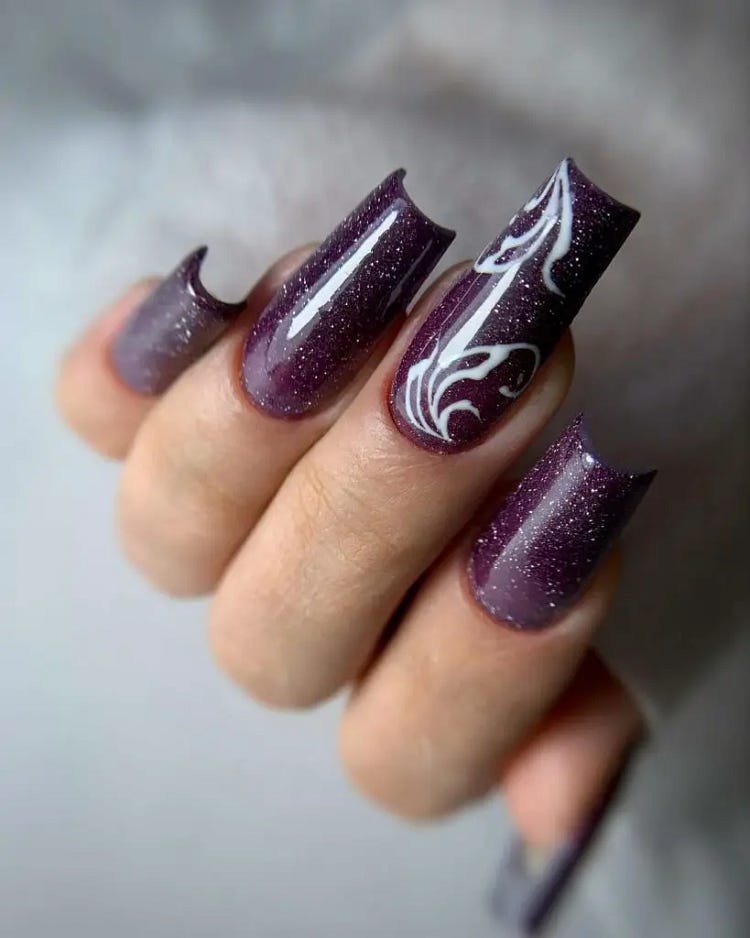
Mystical Purple Swirls
Dive into the mystical world with these deep purple swirls embellished with white accents and shimmer. This design is enchanting and perfect for those who want to make a bold statement.
Consumables:
- Base coat: OPI Natural Nail Base Coat
- Purple glitter polish: Zoya “Aurora”
- White liner polish for swirls
- Top coat: OPI Top Coat for a sparkling finish
DIY Instructions:
- Begin with OPI Natural Nail Base Coat for strong nail protection.
- Apply Zoya’s “Aurora” as the base color, letting each layer dry thoroughly.
- Use a white liner polish to add intricate swirls over the purple.
- Seal everything with OPI Top Coat for extra shimmer and longevity.
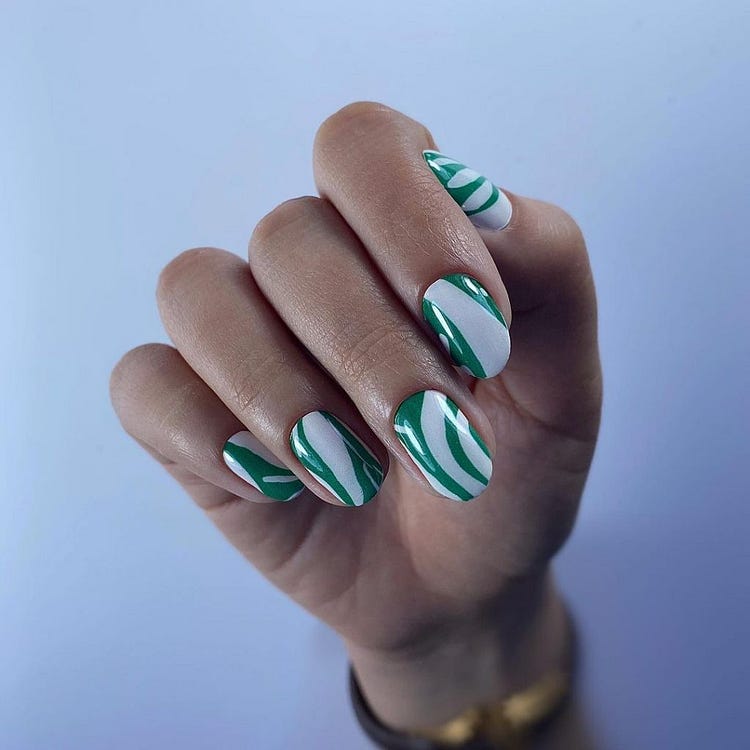
Classic Stripes With A Twist
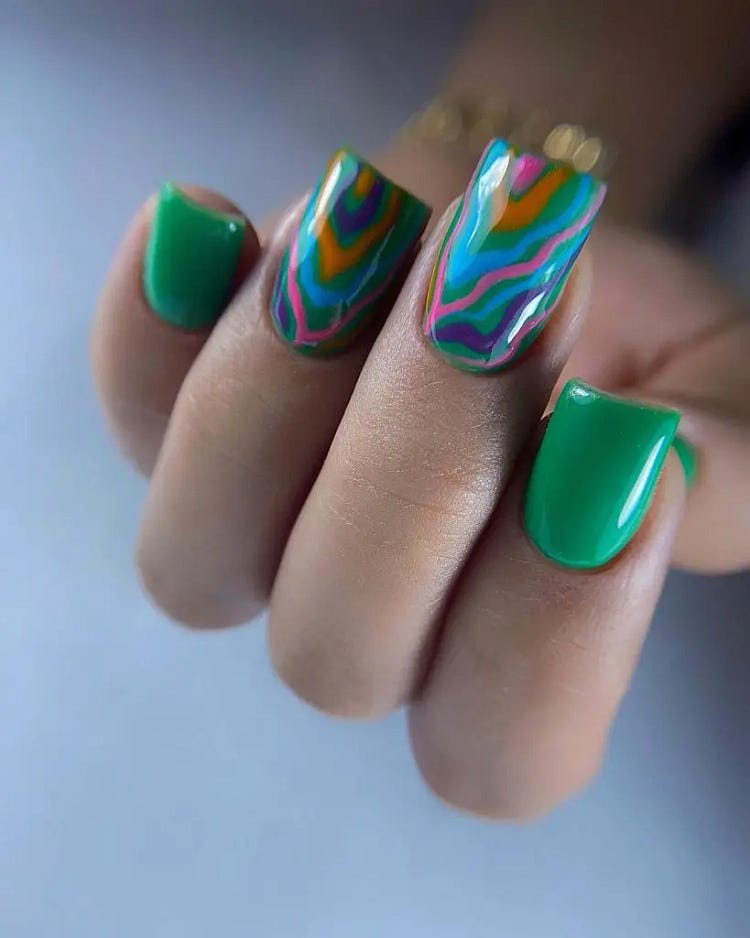
This nail design reinvents classic stripes by incorporating varying shades of green to create a fresh, vibrant look. It’s playful, perfect for summer, and adds a pop of color to any outfit.
Consumables:
- Base coat: Sally Hansen Double Duty Base & Top Coat
- Green polishes: Different shades for the stripes
- Striping tape for perfect lines
- Top coat: Glossy finish to seal the design
DIY Instructions:
- Apply Sally Hansen’s Double Duty as a base coat.
- Choose two or three shades of green and apply them in alternating stripes using striping tape for neat, sharp lines.
- Carefully remove the tape before the polish dries completely.
- Finish with a glossy top coat to enhance the colors and ensure durability.
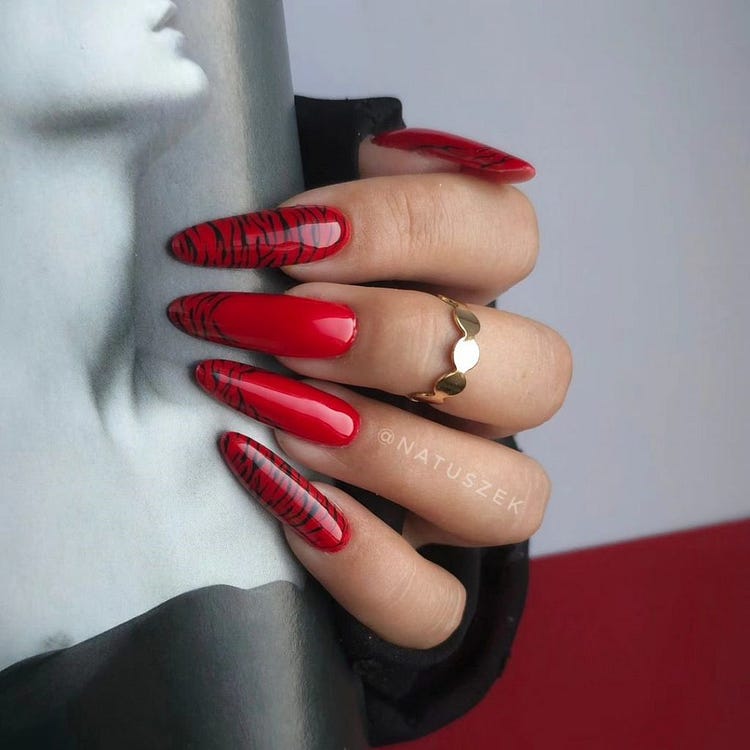
Vibrant Red With Black Stripes
This nail design is a true statement piece, combining a radiant red base with stark black stripes that evoke a wild, almost tribal aesthetic. The glossy finish on the red amplifies its boldness, making it a perfect choice for those looking to stand out.
Consumables:
- Base coat: Essie Strong Start Base Coat
- Red polish: China Glaze “Red-y To Rave”
- Black stripe polish: Sally Hansen “Black Out”
- Top coat: Seche Vite Dry Fast Top Coat
DIY Instructions:
- Apply Essie Strong Start Base Coat for durability and smooth application.
- Paint two coats of “Red-y To Rave” for a vivid red color.
- Once dry, use “Black Out” to draw thin, precise stripes over the red base.
- Seal the design with Seche Vite Top Coat for a glossy, long-lasting finish.
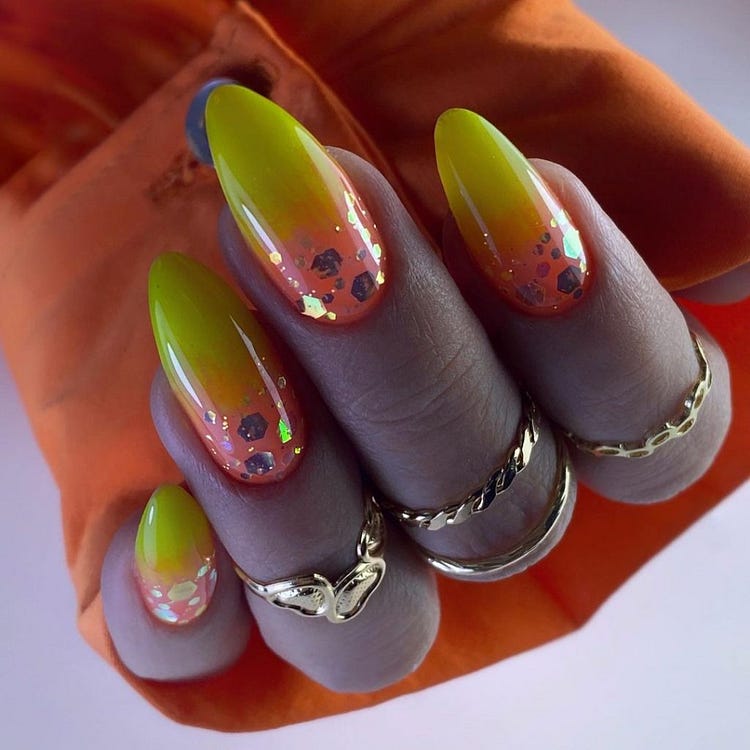
Sunset Glow Gradient
The gradient effect on these nails captures the essence of a sunset, blending orange and yellow hues with sparkling particles to mimic the evening sky’s glow. This design is vibrant and perfect for summer evenings or tropical vacations.
Consumables:
- Base coat: OPI Natural Nail Base Coat
- Orange polish: OPI “Hot & Spicy”
- Yellow polish: Essie “Chillato”
- Glitter top coat: Revlon Transforming Effects Top Coat
- Sponge for gradient effect
DIY Instructions:
- Start with OPI Base Coat for a solid foundation.
- Apply a light layer of “Hot & Spicy” as the base.
- Dab “Chillato” onto a sponge and press gently onto the nail, blending into the orange for a gradient effect.
- Finish with Revlon Glitter Top Coat for a sparkling, sunset-like finish.
Electric Psychedelic Swirls
This design features bold, psychedelic swirls of green, pink, and blue, creating a visually captivating look. The colors are bright and the patterns are fluid, reminiscent of the 1960s psychedelic art.
Consumables:
- Base coat: Sally Hansen Double Duty
- Colored polishes: Various neon colors
- Detailing brush for swirls
- Top coat: Glossy finish for protection
DIY Instructions:
- Apply Sally Hansen Double Duty as both base and top coat.
- Use a fine brush to paint freehand swirls with neon polishes.
- Allow each color to dry slightly before applying the next to avoid smudging.
- Seal with a glossy top coat to enhance the colors and ensure durability.
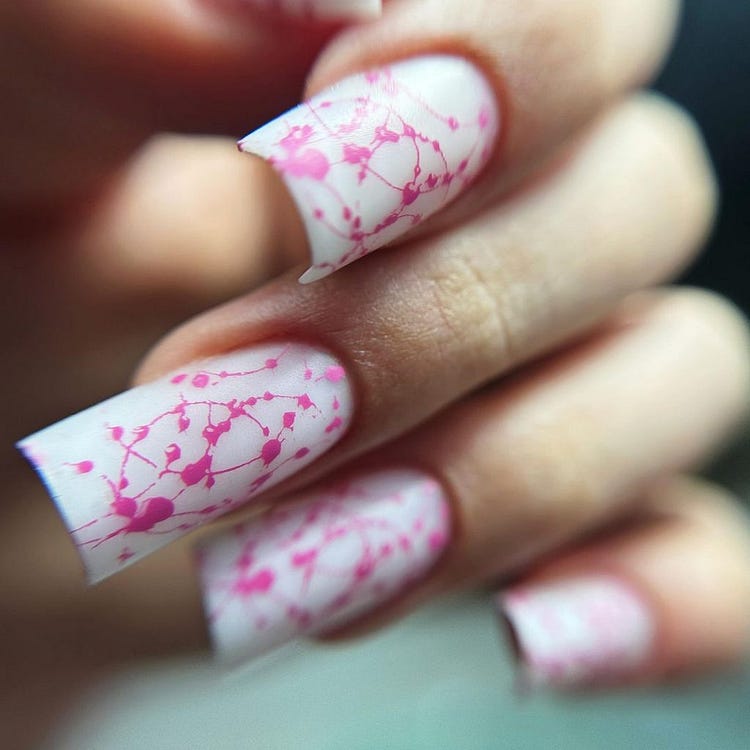
Delicate Pink Crackle
Soft pink serves as a subtle base for a delicate white crackle effect, creating an elegant, refined look. This nail art is understated yet unique, suitable for both casual and formal occasions.
Consumables:
- Base coat: Revlon Quick Dry Base Coat
- Pink polish: Essie “Muchi, Muchi”
- White crackle polish: China Glaze Crackle Glaze
- Top coat: OPI Top Coat
DIY Instructions:
- Prepare the nails with Revlon Quick Dry Base Coat.
- Apply two coats of Essie “Muchi, Muchi” for a soft pink background.
- Once dry, overlay with China Glaze Crackle Glaze in white.
- Complete the look with OPI Top Coat for a smooth, lasting finish.
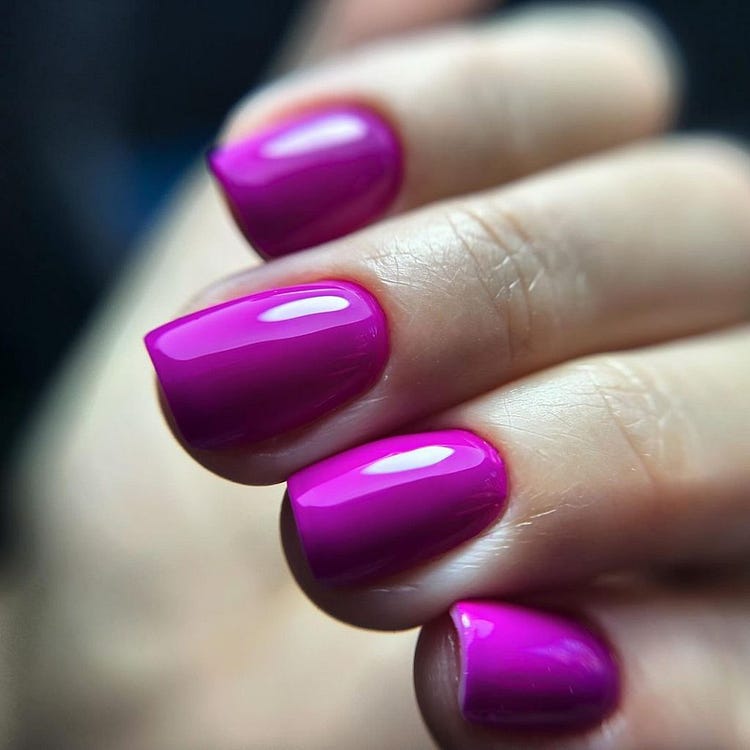
Classic Pink Pop
These nails boast a vibrant, single-color look with a high-gloss finish that enhances the depth of the pink shade. It’s a classic, timeless design that exudes confidence and femininity.
Consumables:
- Base coat: OPI Natural Nail Base Coat
- Pink polish: OPI “Pink Flamenco”
- Top coat: High-gloss for maximum shine
DIY Instructions:
- Begin with OPI Natural Nail Base Coat to protect the natural nail.
- Apply two to three coats of “Pink Flamenco” for a deep, vibrant color.
- Finish with a high-gloss top coat to achieve a reflective, shiny surface.
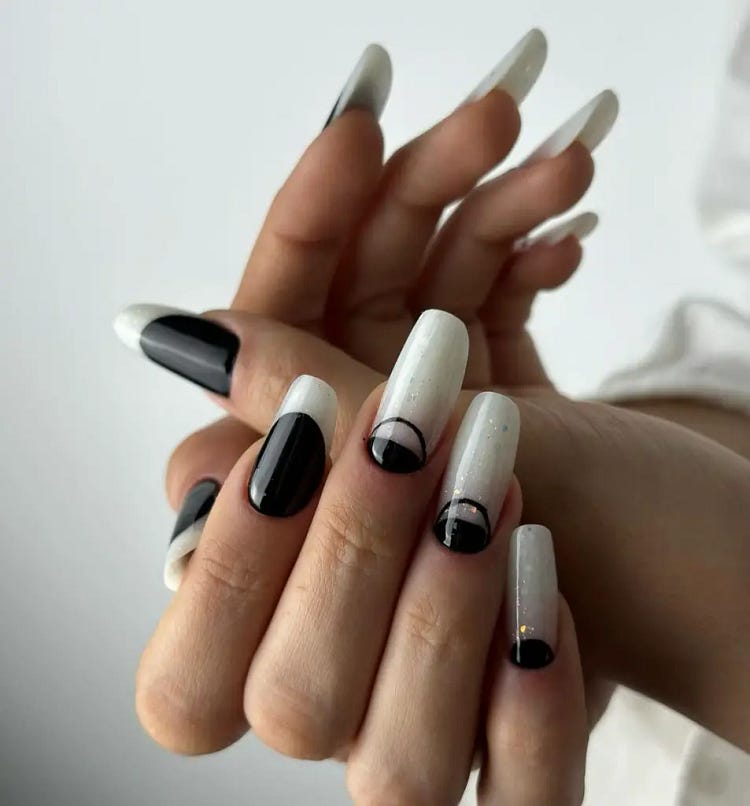
Monochrome Elegance
This design showcases a sophisticated play of black and white monochrome tones, accentuated with circular and half-moon patterns. The stark contrast provides a modern, artsy feel, perfect for those who appreciate bold, graphic styles.
Consumables:
- Base coat: OPI Natural Nail Base Coat
- Black polish: Essie “Licorice”
- White polish: Sally Hansen “White On”
- Detailing brush for precise patterns
DIY Instructions:
- Apply OPI Natural Nail Base Coat for a flawless base.
- Alternate nails with Essie “Licorice” and Sally Hansen “White On” as the base colors.
- Use a detailing brush to add circular and half-moon patterns on opposite colors for contrast.
- Finish with a high-gloss top coat to seal and protect the design.
Metallic Green Longwear
These nails feature a striking metallic green polish, providing a luminous, mirror-like finish. The vibrant hue is reminiscent of emerald oceans, ideal for making a statement at any summer event.
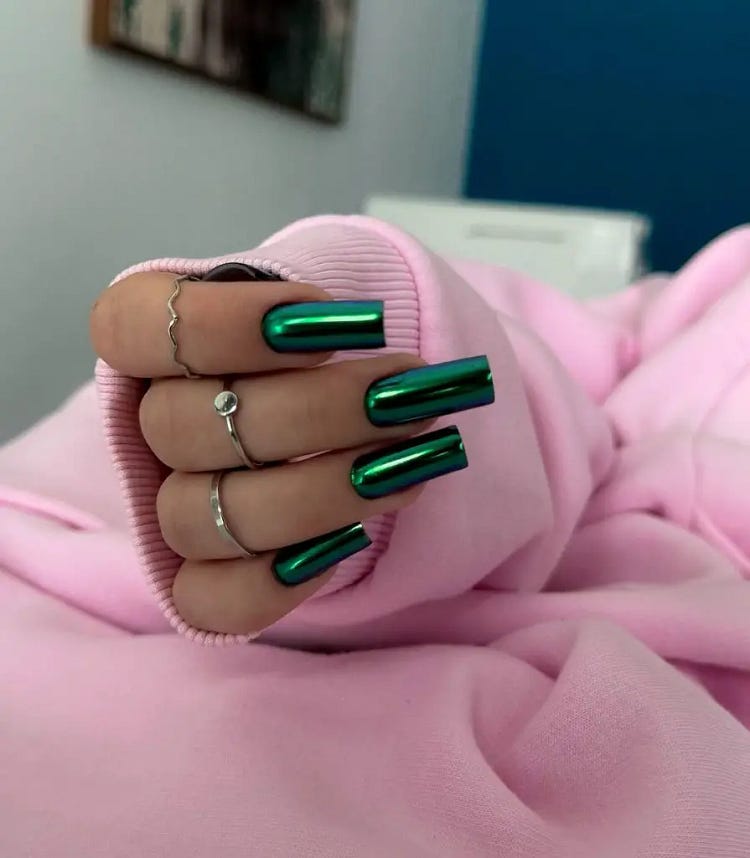
Consumables:
- Base coat: Revlon Quick Dry Base Coat
- Metallic green polish: Chanel “Emeraude”
- Top coat: Seche Vite Dry Fast Top Coat
DIY Instructions:
- Start with Revlon Quick Dry Base Coat for long-lasting wear.
- Apply two coats of Chanel “Emeraude” for a rich, metallic finish.
- Complete the look with Seche Vite Dry Fast Top Coat for durability and shine.
Delicate Pink With Jewels
This elegant design pairs a soft pink base with delicate crystal embellishments and a bold, jeweled accent nail. It’s a luxurious and feminine look, perfect for brides or any formal gathering.
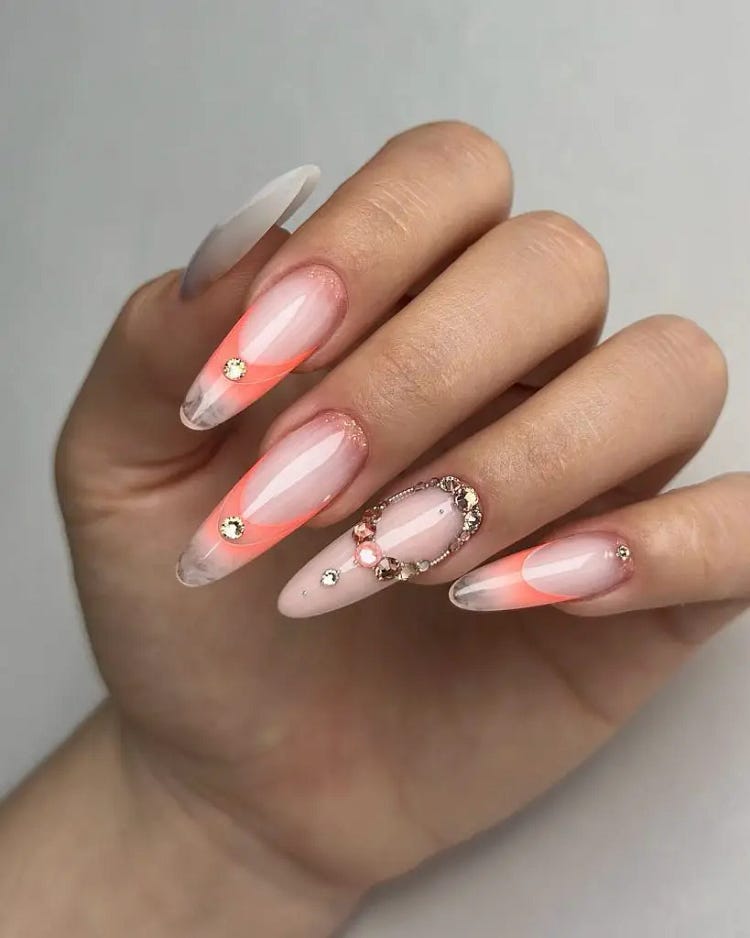
Consumables:
- Base coat: Essie All in One Base
- Pink polish: OPI “Bubble Bath”
- Crystals and jewels for embellishment
- Top coat: OPI Gloss Top Coat
DIY Instructions:
- Apply Essie All in One Base to prepare the nails.
- Paint two thin coats of OPI “Bubble Bath” for a clean, pink base.
- Adorn select nails with crystals and a larger jewel on the accent nail for sparkle.
- Seal with OPI Gloss Top Coat to ensure the jewels stay in place and add a beautiful shine.
Spring Green Fantasy
These nails mix translucent green tones with silver glitter, creating a refreshing spring-inspired look. The use of varied textures and colors offers a playful yet sophisticated style.
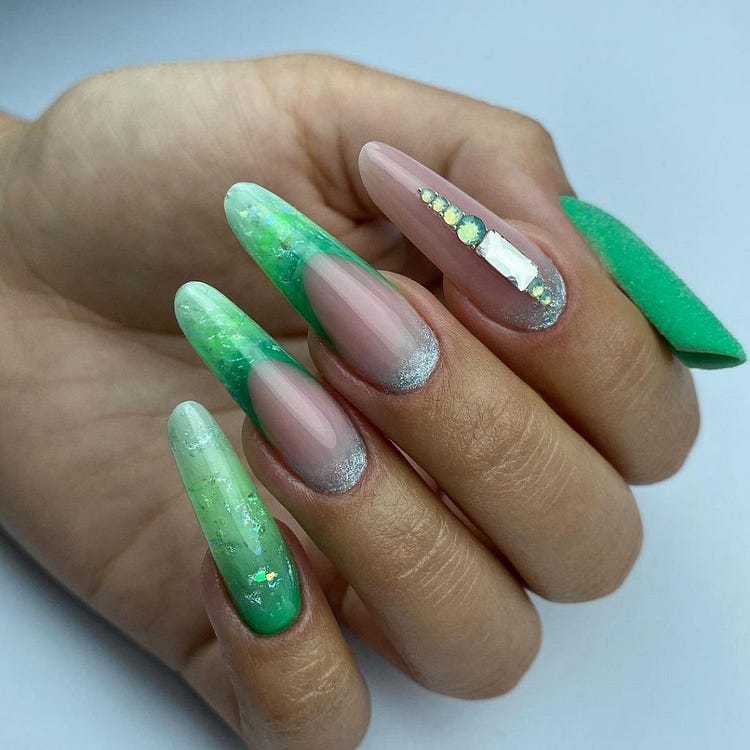
Consumables:
- Base coat: Sally Hansen Hard as Nails
- Translucent green polish: Zoya “Tilda”
- Silver glitter polish
- Top coat: Sally Hansen Mega Shine
DIY Instructions:
- Start with Sally Hansen Hard as Nails as a base coat.
- Apply Zoya “Tilda” as the base color, layering until desired opacity is reached.
- Add accents with silver glitter polish for a sparkling effect.
- Finish with Sally Hansen Mega Shine for a long-lasting, high-gloss look.
Tropical Sunset Ombre
This design captures the colors of a tropical sunset with an ombre effect, transitioning from a warm orange to a deep purple. Gold leaf accents add an exotic touch, making it perfect for vacations and summer parties.
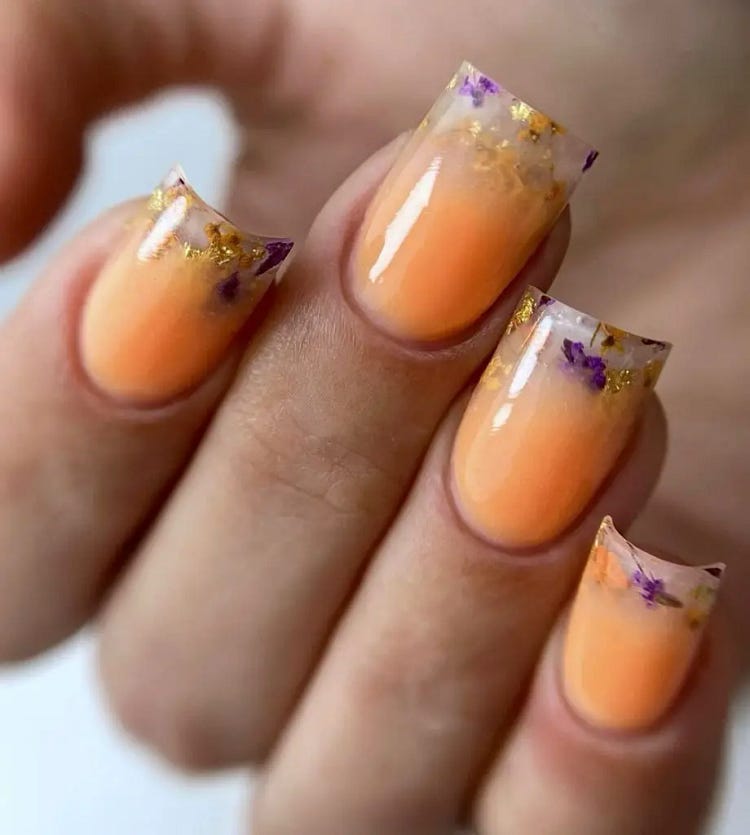
Consumables:
- Base coat: OPI Start to Finish
- Orange polish: Essie “Tart Deco”
- Purple polish: Essie “Play Date”
- Gold leaf for decoration
- Sponge for ombre effect
- Top coat: OPI Top Coat
DIY Instructions:
- Apply OPI Start to Finish as a base coat.
- Paint a base layer of Essie “Tart Deco.”
- Using a sponge, gently dab Essie “Play Date” towards the tips, blending into the orange for an ombre effect.
- Add small pieces of gold leaf for a luxurious finish.
- Seal the design with OPI Top Coat for shine and durability.
Sparkling Fairy Dust
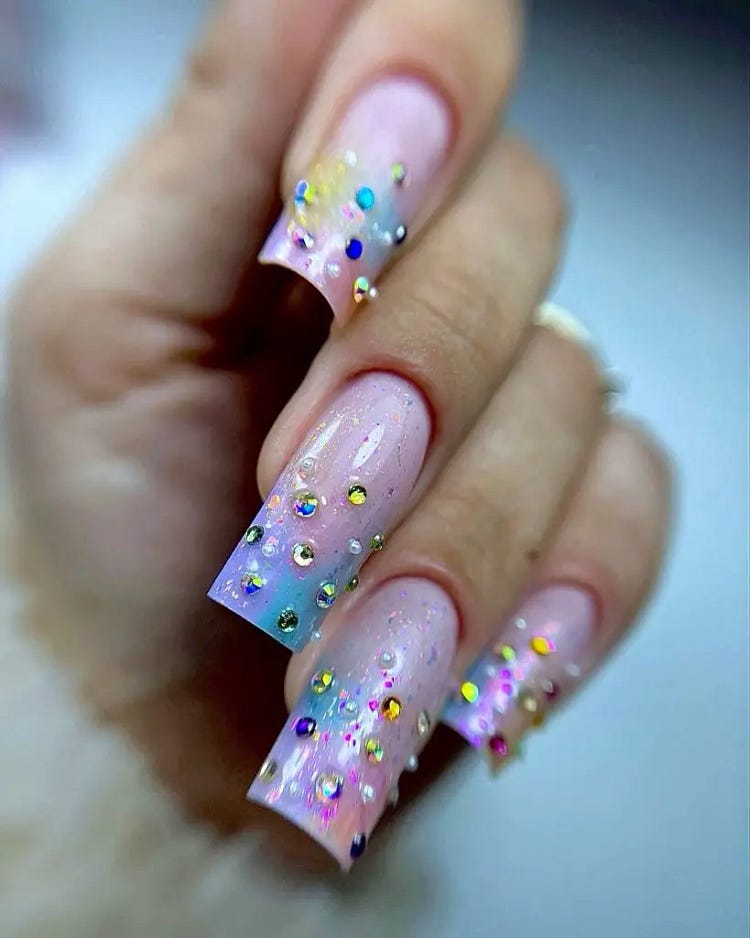
This nail design captures the essence of whimsical enchantment with its soft pink base and scattered multicolored rhinestones. The subtle glitter base enhances the sparkling effect, making it ideal for festive seasons or glamorous events.
Consumables:
- Base coat: Essie Base Coat
- Pink glitter polish: Deborah Lippmann “Baby Love”
- Multicolored rhinestones
- Top coat: Seche Vite Dry Fast Top Coat
DIY Instructions:
- Apply Essie Base Coat for a smooth foundation.
- Paint two coats of Deborah Lippmann’s “Baby Love” for a shimmering pink base.
- While the second coat is still tacky, carefully place multicolored rhinestones using a tweezer for precision.
- Seal the design with Seche Vite Top Coat for a long-lasting glossy finish.
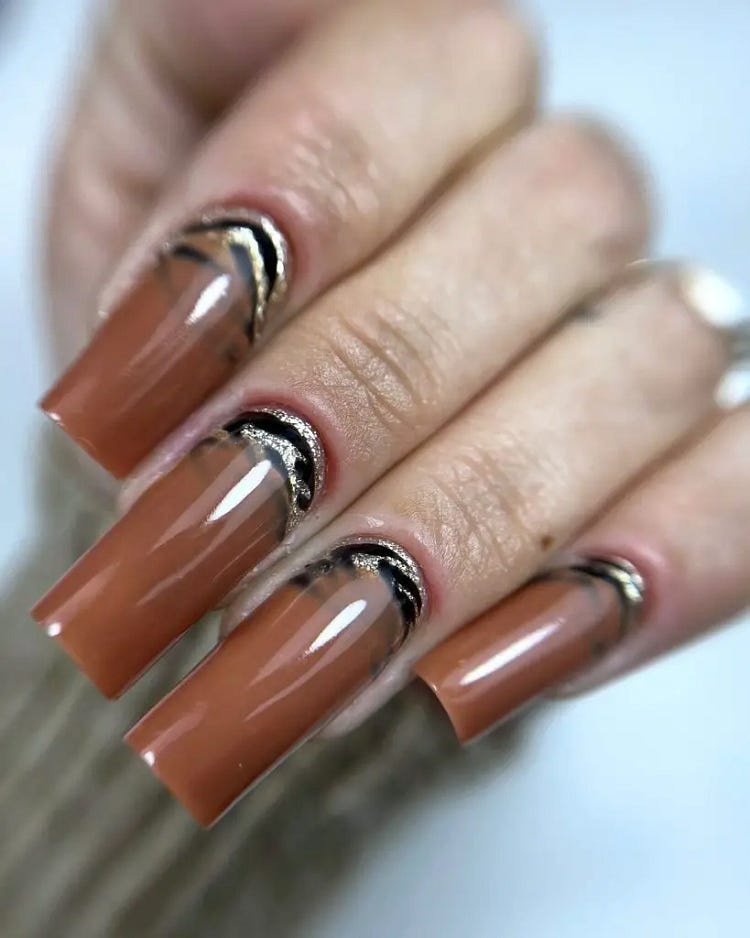
Elegant Taupe Swirls
Featuring a sophisticated taupe base with bold black and gold swirl accents, this design is perfect for those seeking a stylish yet understated look. The gold accents provide a touch of luxury, suitable for both day and night wear.
Consumables:
- Base coat: OPI Natural Nail Base Coat
- Taupe polish: Sally Hansen “Commander in Chic”
- Black and gold acrylic paint
- Top coat: OPI Top Coat
DIY Instructions:
- Start with OPI Natural Nail Base Coat to protect the nails.
- Apply two coats of Sally Hansen’s “Commander in Chic” for a solid taupe background.
- Use black and gold acrylic paint to create elegant swirls on select nails.
- Finish with OPI Top Coat to enhance durability and shine.
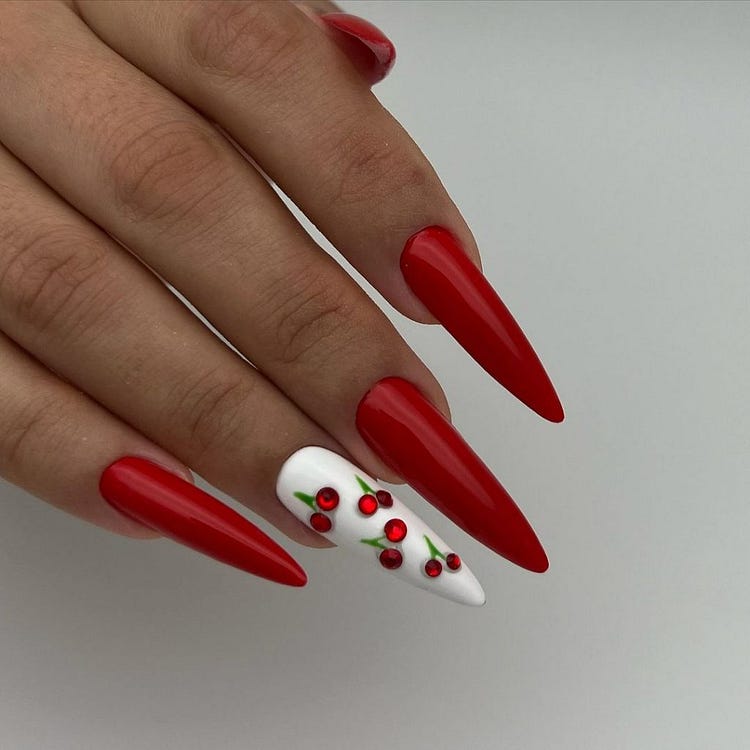
Bold Red With Holiday Accents
This festive design boasts a vibrant red base with playful white accents, evoking the spirit of the holidays. The contrasting white tips and detailed berry motifs are perfect for seasonal celebrations or adding a festive touch to everyday looks.
Consumables:
- Base coat: CND Stickey Base Coat
- Red polish: Essie “Forever Yummy”
- White acrylic paint
- Top coat: Essie Gel Setter Top Coat
DIY Instructions:
- Apply CND Stickey Base Coat for enhanced adhesion.
- Paint two coats of Essie “Forever Yummy” for a bright red finish.
- Use white acrylic paint to add festive berry designs and tips.
- Seal everything with Essie Gel Setter Top Coat for a smooth, protective layer.


No comments:
Post a Comment