Red Summer Nails Shades & Designs: Red summer nails Shades & designs offer endless inspiration for trendy summer trends. From bright coral and orange to dark cherry and wine, there’s a shade for everyone. Cute and unique nail art ideas include fun strawberry designs, neon accents, and classic French tips. For a touch of elegance, try a simple white and red polish for a chic look. These designs are perfect for prom, beach days, and everyday wear, providing endless inspo.
Red And White Heart Nails
Celebrate love and summer with these adorable red and white heart nails. The mix of red polish and white heart accents creates a fun and playful look, perfect for beach days and summer parties.
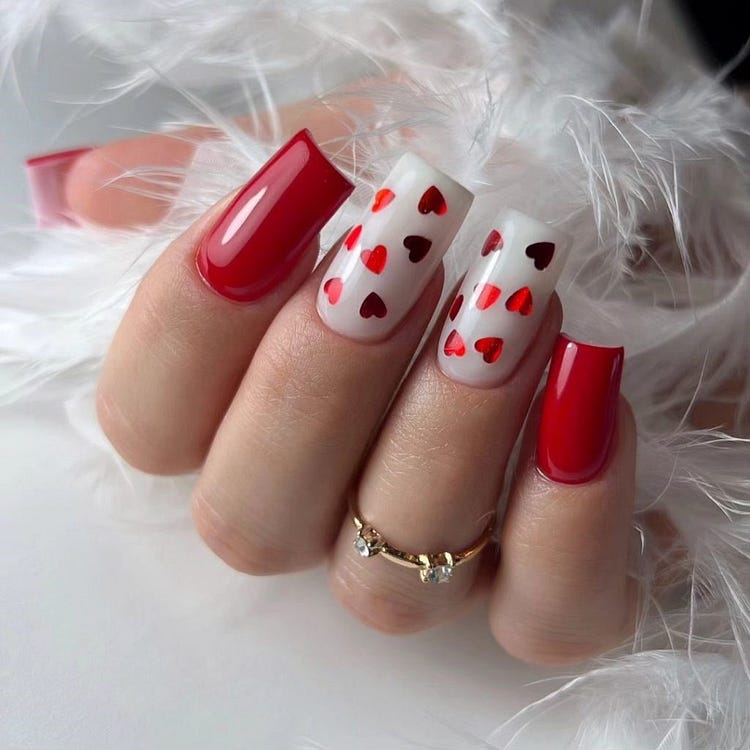
- Consumables:
- Red nail polish (e.g., Essie “A List”)
- White nail polish (e.g., OPI “Alpine Snow”)
- Heart nail stickers or nail art brush
- Top coat
DIY Instructions:
- Apply a base coat to all nails.
- Paint your nails with red polish.
- Using heart stickers or a nail art brush, add white heart accents to two nails.
- Seal the design with a top coat.
Red And Black Leaf Nails
This design features a bold red base with intricate black leaf accents. The combination of colors and patterns creates a unique and sophisticated look that stands out.
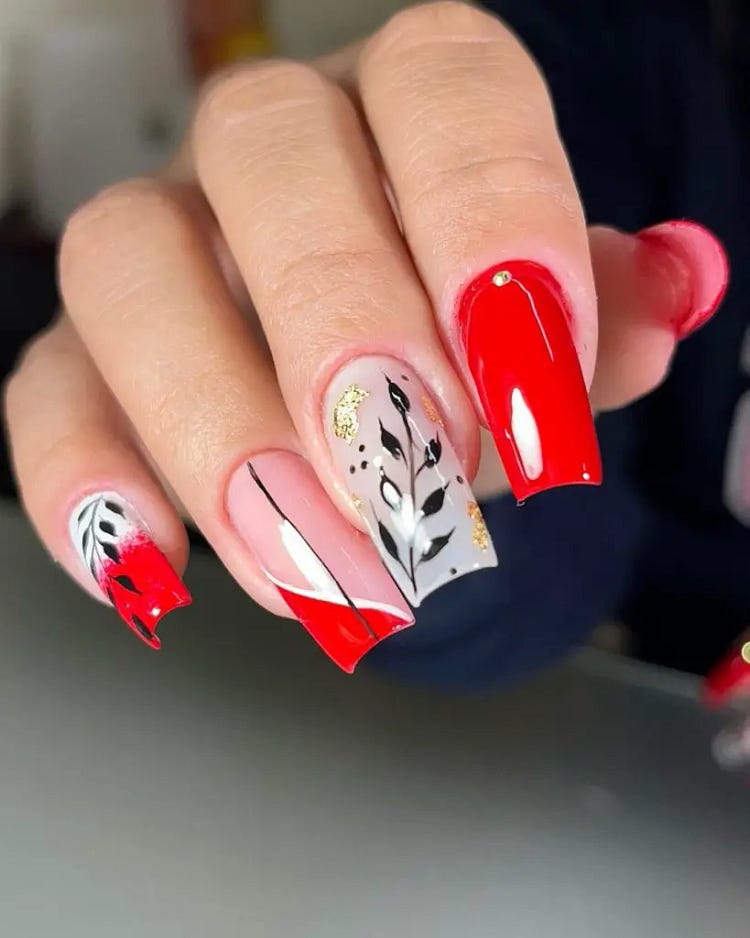
- Consumables:
- Red nail polish (e.g., OPI “Big Apple Red”)
- Black nail polish (e.g., OPI “Black Onyx”)
- Nail art brush for leaf design
- Gold glitter for extra detail
- Top coat
DIY Instructions:
- Apply a base coat to all nails.
- Paint your nails with red polish.
- Using a nail art brush, paint black leaves on one or two nails.
- Add gold glitter accents for a touch of sparkle.
- Finish with a top coat to seal the design.
Dark Cherry Almond Nails
If you’re looking for a bold yet sophisticated look, these dark cherry almond nails are perfect for you. The deep, rich color exudes elegance and is ideal for any occasion. The almond shape enhances the classic appeal while maintaining a modern edge.
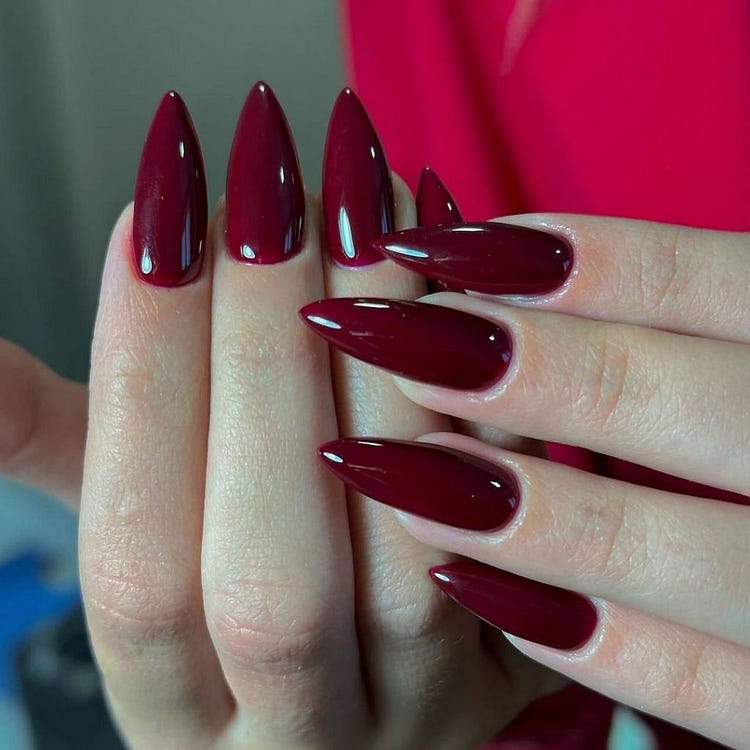
- Consumables:
- OPI Nail Lacquer in “Black Cherry Chutney”
- Almond-shaped nail tips
- Gel top coat
- UV/LED lamp for curing
- Nail file and buffer
DIY Instructions:
- Shape your nails into an almond shape using a nail file.
- Apply a base coat to protect your natural nails.
- Paint your nails with two coats of OPI Nail Lacquer in “Black Cherry Chutney,” letting each coat dry completely.
- Seal with a gel top coat and cure under a UV/LED lamp.
- Finish with cuticle oil to keep your nails healthy and hydrated.
Red And Crystal Embellished Nails
These nails are the perfect blend of simplicity and glamour. The vivid red polish is complemented by a single crystal-embellished nail, adding just the right amount of sparkle for a trendy look.
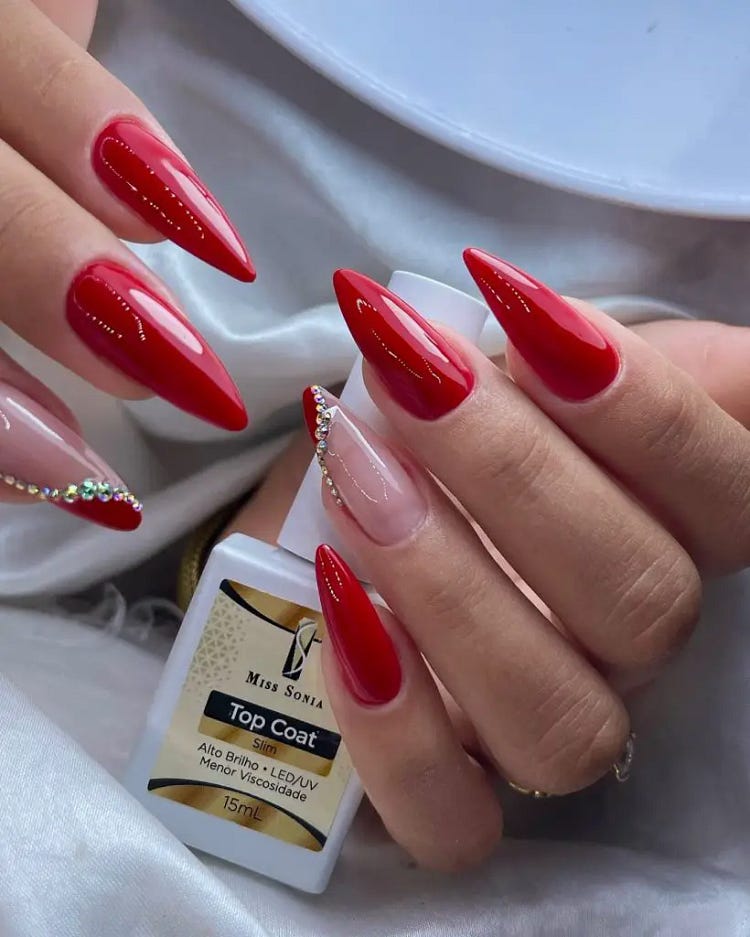
- Consumables:
- Red nail polish (e.g., OPI “Big Apple Red”)
- Clear rhinestones
- Nail glue or clear polish for adhering rhinestones
- Gel top coat
- UV/LED lamp
DIY Instructions:
- Apply a base coat to your nails.
- Paint all but one nail with red polish.
- On the remaining nail, apply clear polish and place rhinestones in a desired pattern.
- Finish with a gel top coat and cure under a UV/LED lamp.
- Use cuticle oil to moisturize your nails.
Strawberry Nail Art
These fun and fruity strawberry nails are perfect for adding a playful touch to your summer look. The cute strawberry design on a nude base creates a whimsical and eye-catching effect.
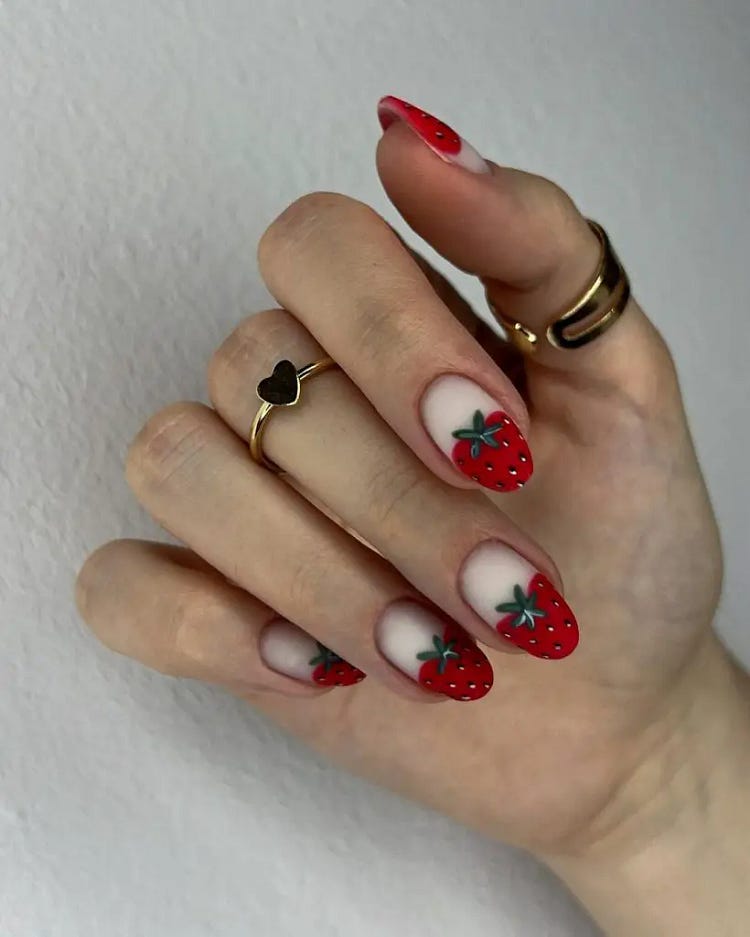
- Consumables:
- Nude nail polish (e.g., OPI “Samoan Sand”)
- Red, green, and black nail polish for the strawberries
- Nail art brushes for detailed painting
- Top coat
DIY Instructions:
- Apply a base coat to all nails.
- Paint your nails with a nude polish.
- Using a nail art brush, paint small red strawberries on each nail, then add green leaves and black seeds.
- Seal the design with a top coat to add shine and protect the art.
Red Heart And Glitter Nails
These nails feature a combination of red polish, glitter, and heart accents, creating a romantic and glamorous look. The mix of textures and embellishments makes this design perfect for special occasions or adding a touch of sparkle to your everyday style.
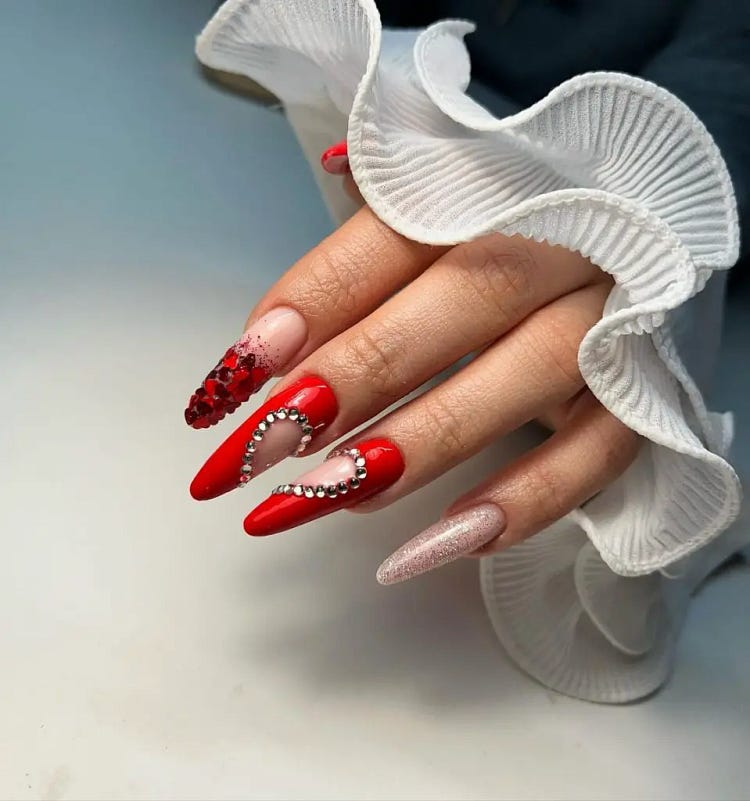
- Consumables:
- Red nail polish (e.g., Essie “A List”)
- Nude nail polish (e.g., OPI “Bubble Bath”)
- Red glitter polish
- Heart-shaped rhinestones
- Top coat
DIY Instructions:
- Apply a base coat to protect your nails.
- Paint your nails with a combination of red and nude polishes.
- Add red glitter polish to accent nails and heart-shaped rhinestones to others.
- Finish with a top coat to secure the design and add shine.
Leopard And Matte Black Nails
For a bold and edgy look, try these red and black leopard print nails. The combination of glossy red, matte black, and leopard print creates a striking and unique design that’s sure to stand out.
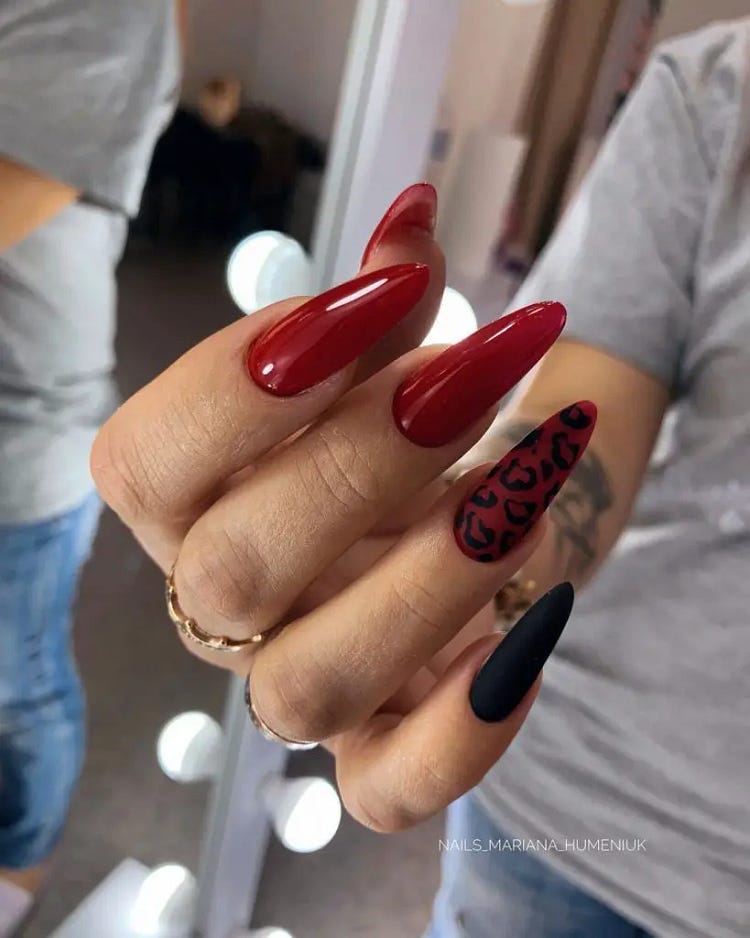
- Consumables:
- Red nail polish (e.g., OPI “Big Apple Red”)
- Matte black nail polish (e.g., Essie “Matte About You”)
- Black nail polish for leopard spots
- Nail art brush for detailed painting
- Top coat
DIY Instructions:
- Apply a base coat to all nails.
- Paint most of your nails with red polish, leaving one for the matte black and leopard print.
- Using a nail art brush, paint black leopard spots on the matte black nail.
- Finish with a top coat to add shine and protect the design, avoiding the matte nail.
Elegant Red And Gold Heart Nails
These red and gold heart nails are the perfect blend of elegance and romance. The red nails are complemented by a nude accent nail adorned with a small red heart and gold foil, creating a sophisticated and eye-catching look.

- Consumables:
- Red nail polish (e.g., Essie “Forever Yummy”)
- Nude nail polish (e.g., OPI “Bubble Bath”)
- Gold foil flakes
- Nail art brush
- Gel top coat
- UV/LED lamp
DIY Instructions:
- Apply a base coat to your nails.
- Paint most of your nails with red polish, and one or two nails with nude polish.
- Using a nail art brush, apply a small amount of nail glue to the nude nails and place gold foil flakes around a red heart accent.
- Finish with a gel top coat and cure under a UV/LED lamp.
- Apply cuticle oil to keep your nails hydrated.
Short Red And Gold Nails
These short red nails with gold accents are a chic and sophisticated choice for any occasion. The deep red polish is beautifully contrasted with subtle gold detailing around the edges, adding a touch of luxury.
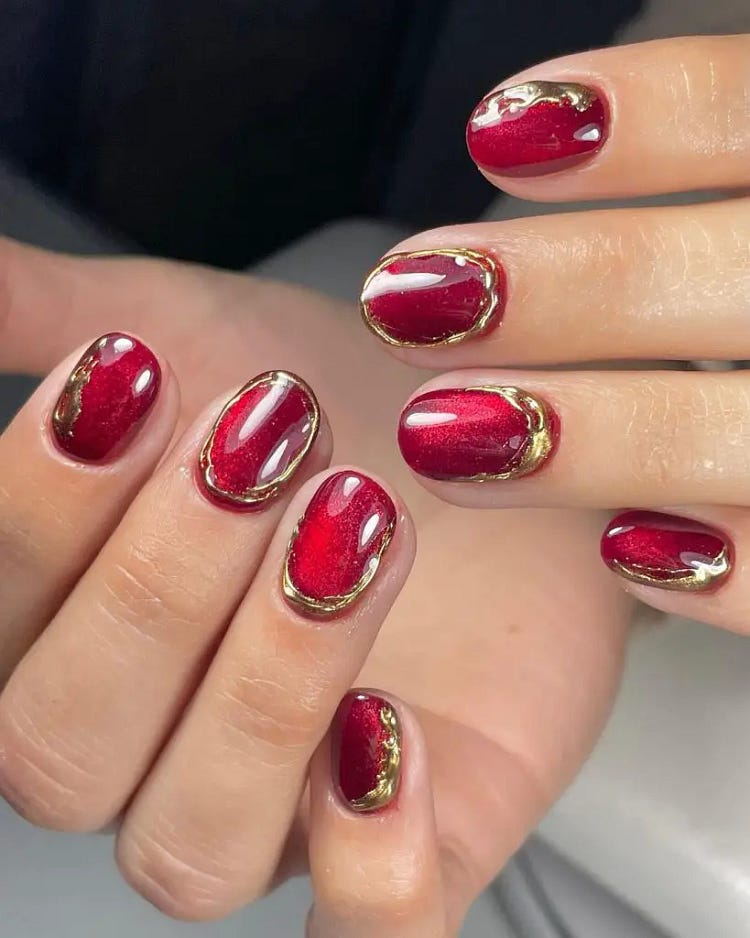
- Consumables:
- Red nail polish (e.g., OPI “Red Hot Rio”)
- Gold nail polish or gold foil
- Nail art brush
- Gel top coat
- UV/LED lamp
DIY Instructions:
- Apply a base coat to all nails.
- Paint your nails with two coats of red polish, letting each coat dry completely.
- Using a nail art brush, apply gold polish or gold foil along the edges of each nail for a luxurious touch.
- Finish with a gel top coat and cure under a UV/LED lamp.
- Use cuticle oil to maintain nail health.
Red And White Damask Nails
These nails feature a stunning red base with intricate white damask patterns, creating a classic and elegant design. Perfect for those who love detailed nail art, this look is both sophisticated and eye-catching.
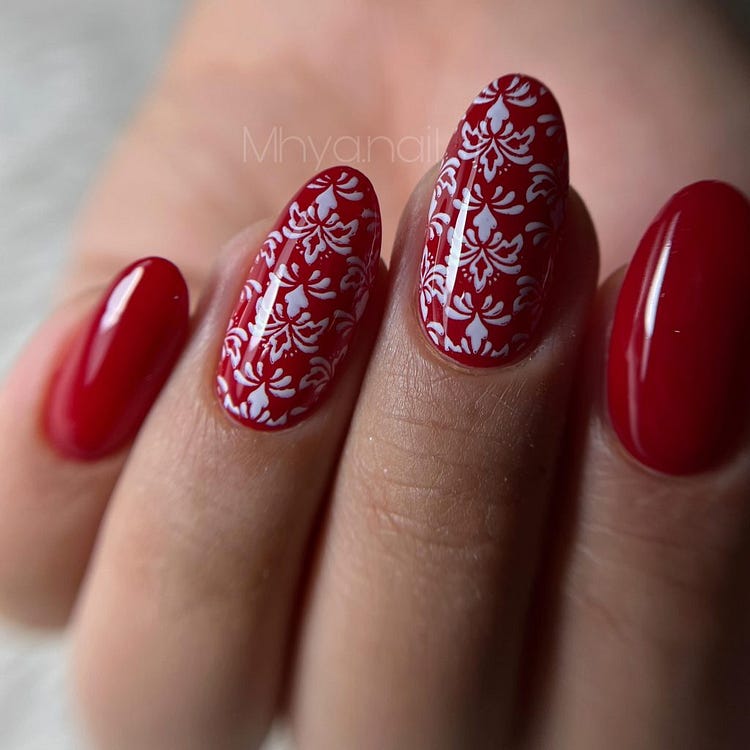
- Consumables:
- Red nail polish (e.g., Essie “A List”)
- White nail polish (e.g., OPI “Alpine Snow”)
- Nail stamping plate with damask pattern
- Stamper and scraper
- Top coat
DIY Instructions:
- Apply a base coat to all nails.
- Paint your nails with two coats of red polish, allowing each coat to dry.
- Using a nail stamping plate, stamper, and scraper, apply white polish to the damask pattern and transfer it onto your nails.
- Finish with a top coat to seal the design and add shine.
Red And Black Animal Print Nails
These nails combine red, black, and white polishes with various animal prints, creating a bold and trendy look. The mix of leopard and cow prints makes this design perfect for fashion-forward individuals.
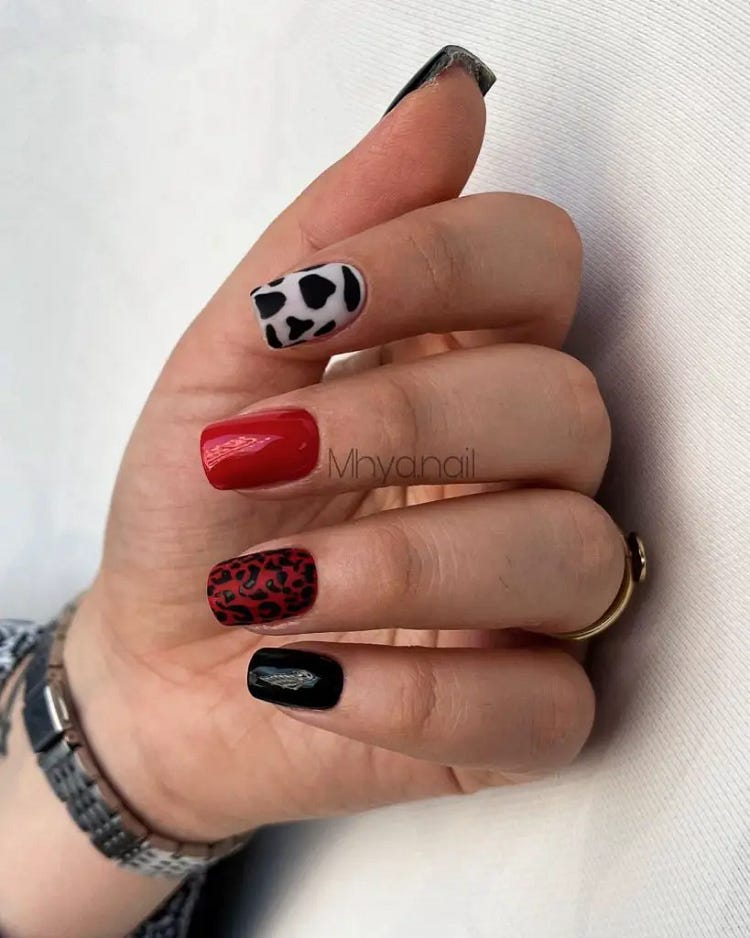
- Consumables:
- Red nail polish (e.g., OPI “Big Apple Red”)
- Black nail polish (e.g., Essie “Licorice”)
- White nail polish (e.g., OPI “Alpine Snow”)
- Nail art brushes for detailed painting
- Top coat
- DIY Instructions:
- Apply a base coat to all nails.
- Paint your nails with a combination of red, black, and white polishes.
- Using a nail art brush, create animal print patterns (leopard and cow prints) on designated nails.
- Seal the design with a top coat for a glossy finish.
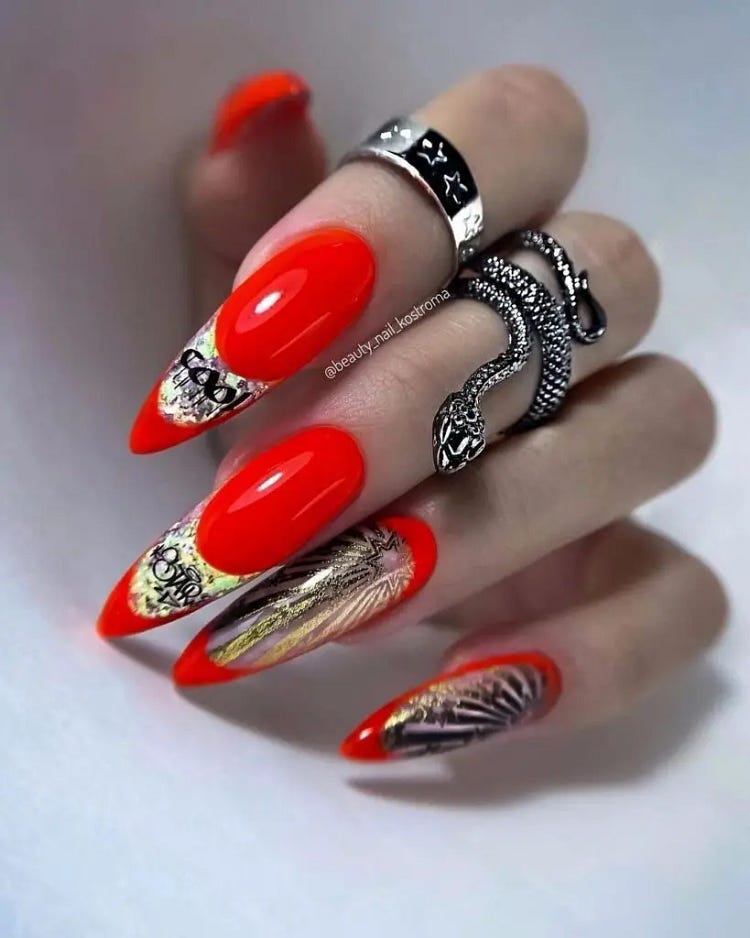
Orange And Gold Leaf Nails
These vibrant orange nails with gold leaf accents are perfect for making a bold statement this summer. The combination of bright orange and metallic gold creates a striking and unique design.
- Consumables:
- Orange nail polish (e.g., China Glaze “Orange Knockout”)
- Gold leaf foil
- Nail art brush
- Top coat
- UV/LED lamp
DIY Instructions:
- Apply a base coat to all nails.
- Paint your nails with two coats of orange polish, allowing each coat to dry.
- Using a nail art brush, apply a small amount of nail glue to the tips and place gold leaf foil.
- Seal with a top coat and cure under a UV/LED lamp.
- Finish with cuticle oil to keep your nails healthy and shiny.
Glossy Red Square Nails
These glossy red square nails are perfect for a sleek and sophisticated look. The deep red polish has a high-shine finish that exudes confidence and elegance. This classic design is ideal for any occasion, adding a touch of glamour to your ensemble.
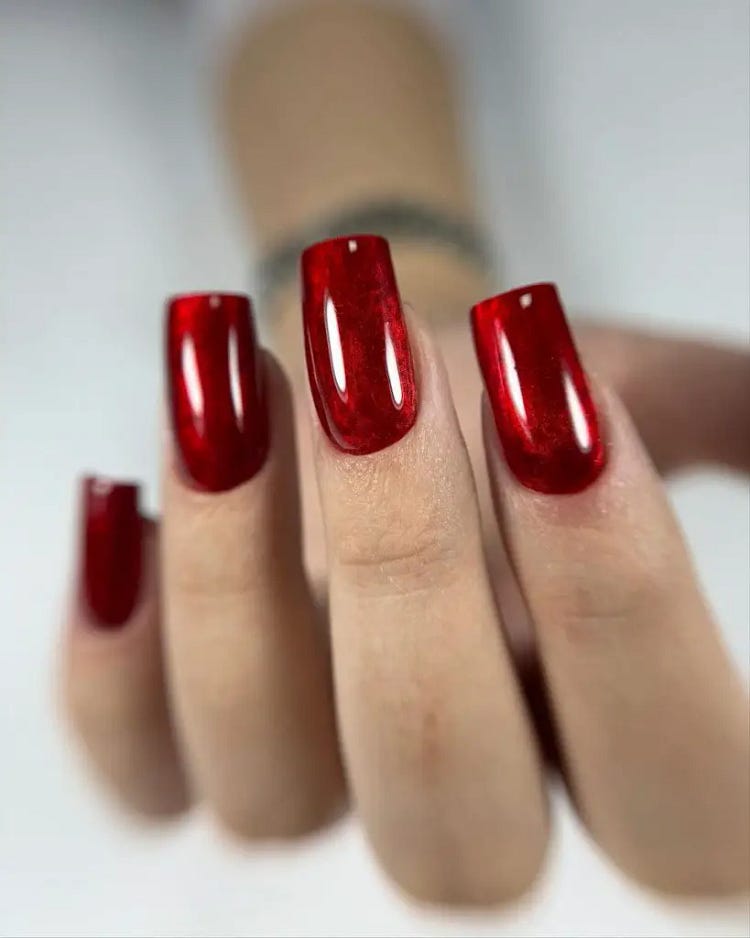
- Consumables:
- Red nail polish (e.g., OPI “Big Apple Red”)
- Gel top coat
- UV/LED lamp
- Nail file and buffer
DIY Instructions:
- Shape your nails into a square shape using a nail file.
- Apply a base coat to protect your natural nails.
- Paint your nails with two coats of red polish, allowing each coat to dry.
- Seal the look with a gel top coat and cure under a UV/LED lamp.
- Finish with cuticle oil to keep your nails healthy and shiny.
Red And Zebra Print Nails
These red and zebra print nails combine bold red polish with striking animal print accents. The combination of red and black stripes on a nude base creates a trendy and eye-catching design that is perfect for those who love unique and fun nail art.

- Consumables:
- Red nail polish (e.g., Essie “Forever Yummy”)
- Nude nail polish (e.g., OPI “Bubble Bath”)
- Black nail polish for stripes
- Nail art brush
- Top coat
DIY Instructions:
- Apply a base coat to your nails.
- Paint most of your nails with red polish, and a couple with nude polish.
- Using a nail art brush, paint black zebra stripes on the nude nails.
- Finish with a top coat to seal the design and add shine.
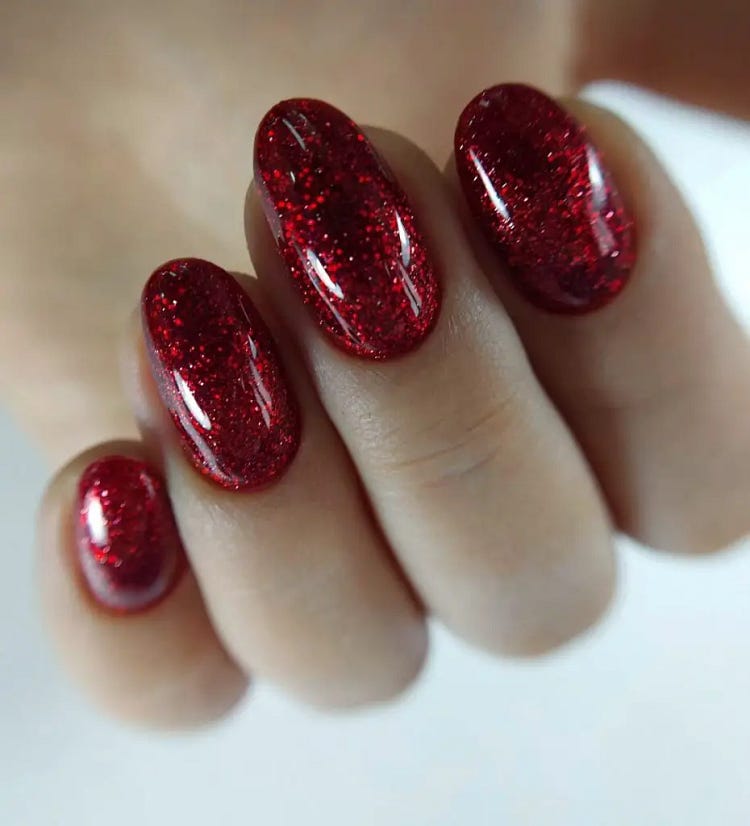
Red And Pink Glitter Nails
These red and pink glitter nails are perfect for adding a touch of sparkle to your summer look. The combination of red polish and pink glitter accents creates a fun and glamorous design that is sure to stand out.
- Consumables:
- Red nail polish (e.g., China Glaze “Ruby Pumps”)
- Pink glitter polish
- Gel top coat
- UV/LED lamp
DIY Instructions:
- Apply a base coat to protect your nails.
- Paint your nails with a combination of red polish and pink glitter polish.
- Apply a gel top coat to seal the design and cure under a UV/LED lamp.
- Use cuticle oil to keep your nails moisturized and healthy.


No comments:
Post a Comment