Summer Nail Art: Embrace the latest summer nail art with vibrant and trendy designs perfect for any style. This season’s trends include funky neon colors, simple geometric patterns, and bright summer pinks. Short nails with square shapes are easy to maintain and fun to style. Whether you prefer DIY ideas or professional acrylic and gel options, these stylish designs are ideal for women seeking an aesthetic look. Explore easy hacks for beginners to achieve the perfect summer nails at any price.
Chic Black And White Geometric Art
This trendy design combines black and white with geometric patterns to create a modern and stylish look. The nails are shaped in a square style, providing a clean canvas for the intricate designs. The mix of matte and glossy finishes adds depth and texture to the overall look. This design is perfect for those who love to incorporate artistic elements into their nail art, making a bold statement with minimal colors.

Consumables:
- Base coat: Zoya Anchor Base Coat
- Black nail polish: Essie Nail Polish in ‘Licorice’
- White nail polish: Sally Hansen Hard As Nails Xtreme Wear in ‘White On’
- Matte top coat: Butter London Matte Finish Shine Free Topcoat
- Nail art brush: Winstonia Fine Detail Brush Set
DIY Instructions:
- Apply a base coat to your nails and let it dry.
- Paint your nails with the white polish and allow it to dry.
- Use a nail art brush to create geometric patterns with the black polish.
- Apply a matte top coat to the black areas, leaving the white sections glossy.
- Finish with a top coat to seal and protect the design.
Blue And Gold Elegance
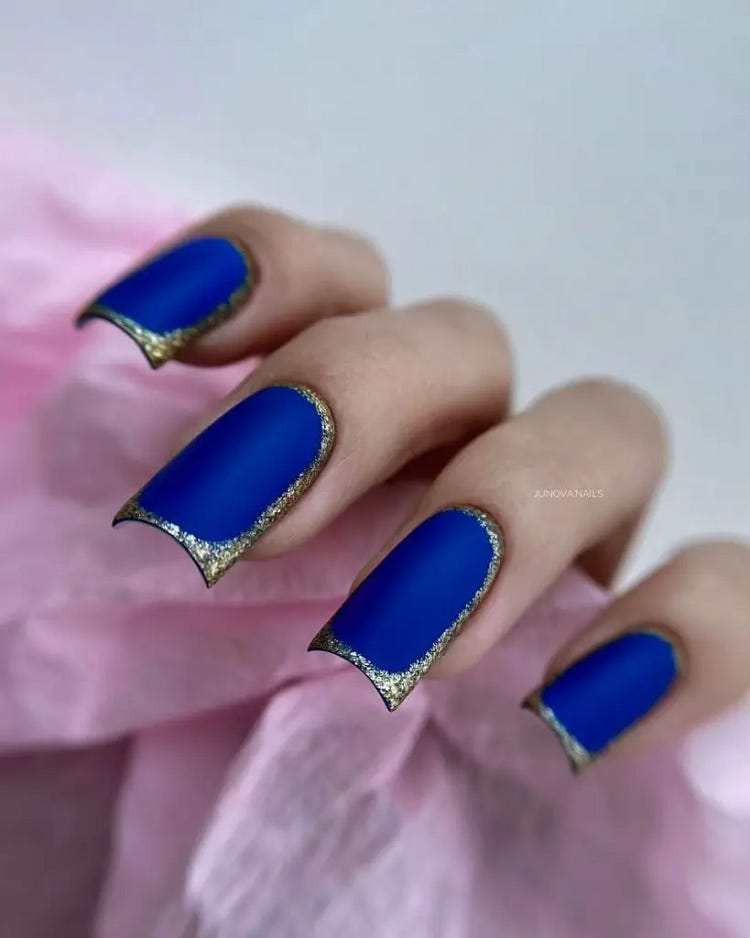
This striking blue and gold design is the epitome of elegance and sophistication. The matte royal blue base contrasts beautifully with the shimmering gold accents along the nail edges. The precise application of the gold glitter creates a refined and regal look, making it perfect for any special occasion. The combination of the matte finish with the glittery gold provides a balanced aesthetic that is both trendy and timeless.
Consumables Needed
- Matte royal blue nail polish (e.g., OPI Matte Nail Lacquer in “Yoga-ta Get This Blue”)
- Gold glitter nail polish (e.g., Essie Nail Polish in “Summit of Style”)
- Base coat (e.g., Sally Hansen Double Duty Base & Top Coat)
- Top coat (e.g., Seche Vite Dry Fast Top Coat)
- Thin nail art brush
DIY Instructions
- Start with a clean, trimmed nail.
- Apply a base coat to protect your natural nails.
- Once dry, apply two coats of the matte royal blue polish.
- Using a thin nail art brush, carefully outline the edges of your nails with the gold glitter polish.
- Allow the glitter to dry completely before applying a top coat to seal the design and add extra durability.
Vibrant Geometric Patterns
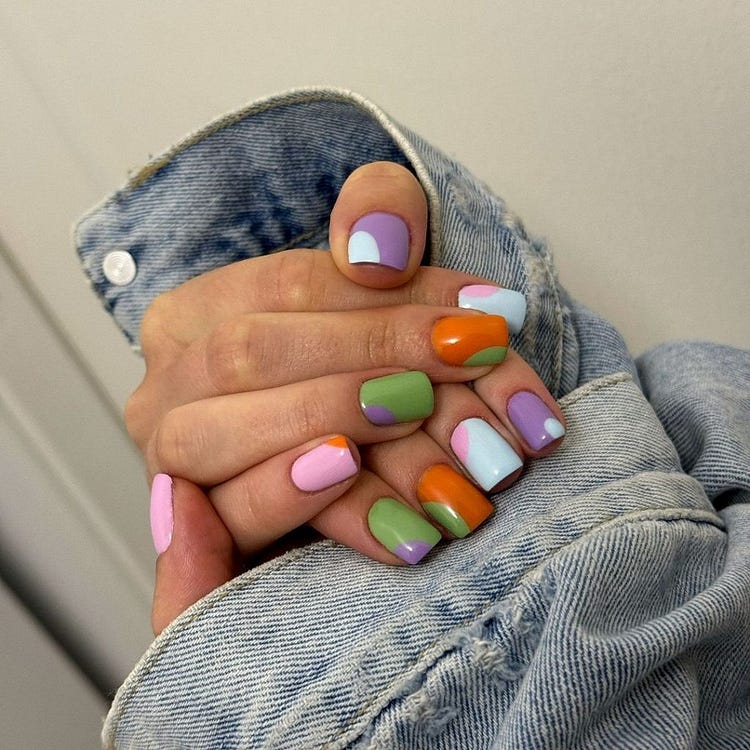
This vibrant geometric design features a playful mix of colors and shapes, making it perfect for those who love bold and funky nail art. The combination of pastel shades with striking neon accents creates a unique and eye-catching look. The different shapes and patterns on each nail add an element of fun and creativity, making this design ideal for summer.
Consumables Needed
- Pastel nail polishes in pink, green, blue, and purple (e.g., Essie Nail Polish in “Ballet Slippers”, “Mint Candy Apple”, “Lilacism”, and “Blanc”)
- Neon nail polish in orange (e.g., China Glaze Nail Polish in “Orange Knockout”)
- Base coat
- Top coat
- Nail art brushes of varying thicknesses
DIY Instructions
- Apply a base coat to each nail.
- Paint each nail with a different pastel color as a base.
- Using the nail art brushes, create geometric patterns on each nail with the neon orange polish.
- Experiment with different shapes and lines to achieve a varied look.
- Once the patterns are dry, finish with a top coat to protect your design.
Tropical Paradise Nails
This tropical-inspired design is perfect for summer vacations and beach outings. The gradient from white to orange resembles a beautiful sunset, while the coconut and palm tree decals add a touch of paradise. This look is bright, fun, and sure to bring a smile to your face every time you glance at your nails.

Consumables Needed
- White nail polish (e.g., OPI Nail Lacquer in “Alpine Snow”)
- Orange nail polish (e.g., Essie Nail Polish in “Meet Me at Sunset”)
- Coconut and palm tree nail decals or stickers
- Base coat
- Top coat
- Nail art sponge for gradient effect
DIY Instructions
- Apply a base coat to all nails.
- Use the nail art sponge to create a gradient effect with the white and orange polishes.
- Once the gradient is dry, apply the coconut and palm tree decals to the accent nails.
- Seal the design with a top coat to ensure longevity.
Nature-Inspired Art
This nature-inspired nail design features soft mint green as the base, complemented by intricate leaf and lion face decals. The subtle black speckles add depth and dimension to the overall look. This design is ideal for those who appreciate the beauty of nature and want to incorporate it into their nail art.

Consumables Needed
- Mint green nail polish (e.g., Sally Hansen Insta-Dri Nail Color in “Mint Sprint”)
- Leaf and lion face nail decals
- Black speckle polish or fine black glitter
- Base coat
- Top coat
DIY Instructions
- Begin with a base coat to protect your nails.
- Apply two coats of the mint green polish for full coverage.
- Once dry, place the leaf and lion face decals on the desired nails.
- Add black speckles using a fine brush or black speckle polish.
- Finish with a top coat to secure the decals and speckles.
Fierce Leopard Print
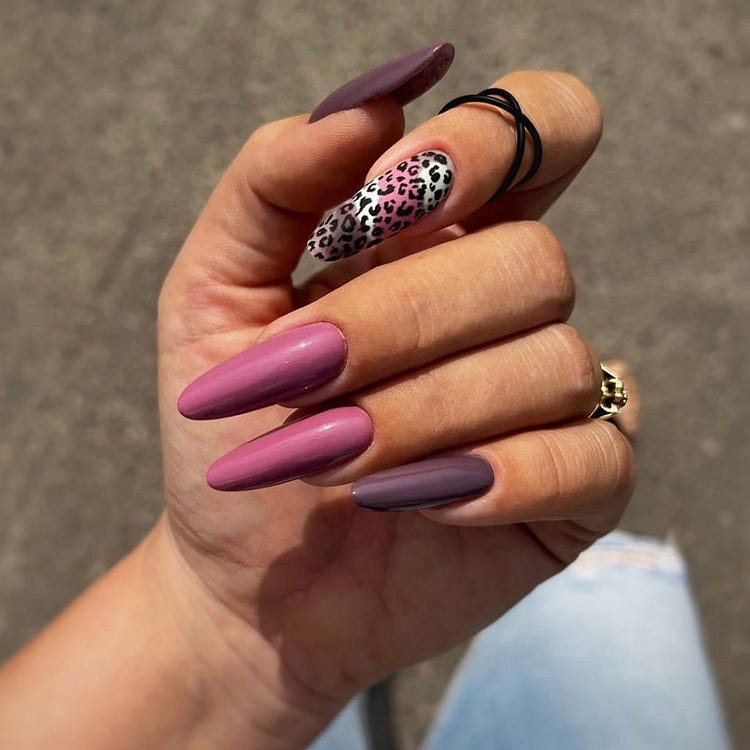
Leopard print nails are always in style, and this design adds a modern twist with its mix of purple and mauve shades. The detailed leopard print accent nail adds a touch of wild elegance, making it perfect for both casual and formal occasions. The long, almond-shaped nails enhance the overall sophisticated look.
Consumables Needed
- Purple nail polish (e.g., OPI Nail Lacquer in “Do You Lilac It?”)
- Mauve nail polish (e.g., Essie Nail Polish in “Mauve-tivation”)
- Black and white nail art pens for leopard print
- Base coat
- Top coat
DIY Instructions
- Apply a base coat to each nail.
- Paint most of your nails with the purple polish, leaving one or two accent nails for the mauve polish.
- Use the black and white nail art pens to create the leopard print on the accent nails.
- Once the design is complete and dry, apply a top coat to protect your manicure.
Vibrant Green Nails
These vibrant green nails are a perfect way to embrace the fun and lively vibes of summer. The glossy finish enhances the boldness of the green, making it a standout choice for anyone looking to make a statement. The oval shape of the nails adds a touch of elegance, ensuring that this look is both playful and stylish. This shade of green is not only trendy but also versatile, fitting seamlessly into both casual and more formal summer occasions.

Consumables Needed
- Bright green nail polish (e.g., Essie Nail Polish in “Mojito Madness”)
- Base coat (e.g., OPI Natural Nail Base Coat)
- Top coat (e.g., Seche Vite Dry Fast Top Coat)
- Nail buffer and file
DIY Instructions
- Start with a base coat to protect your nails.
- Apply two coats of the bright green polish for full opacity.
- Ensure each layer is fully dry before applying the next.
- Finish with a top coat to add shine and longevity to your manicure.
Cute Toucan Nail Art
This adorable nail art features a toucan design along with simple lettering, making it a quirky and fun choice for summer. The pale pink base provides a soft and feminine backdrop, allowing the black, white, and yellow toucan details to really pop. The short nail length makes this design practical and easy to maintain, perfect for those who prefer low-maintenance yet stylish nails.

Consumables Needed
- Pale pink nail polish (e.g., OPI Nail Lacquer in “Bubble Bath”)
- Black, white, yellow, and orange nail art pens or polishes
- Base coat
- Top coat
- Fine nail art brushes
DIY Instructions
- Apply a base coat to protect your nails.
- Paint your nails with two coats of the pale pink polish.
- Use the nail art brushes and pens to create the toucan and letter designs.
- Allow the designs to dry completely before sealing with a top coat.
Iridescent White Nails
These iridescent white nails are a perfect blend of simplicity and sparkle, making them ideal for summer. The subtle shimmer catches the light beautifully, giving the nails an ethereal, almost magical look. The almond shape adds to the elegance of this design, making it suitable for both day and night occasions. This nail art is perfect for those who love a clean, sophisticated look with a touch of glam.

Consumables Needed
- Iridescent white nail polish (e.g., China Glaze Nail Lacquer in “Pearl Jammin’”)
- Base coat
- Top coat
- Nail file and buffer
DIY Instructions
- Start with a base coat to protect your nails.
- Apply two coats of the iridescent white polish, allowing each coat to dry completely.
- Finish with a top coat to add extra shine and durability.
Sparkling Pink Nails
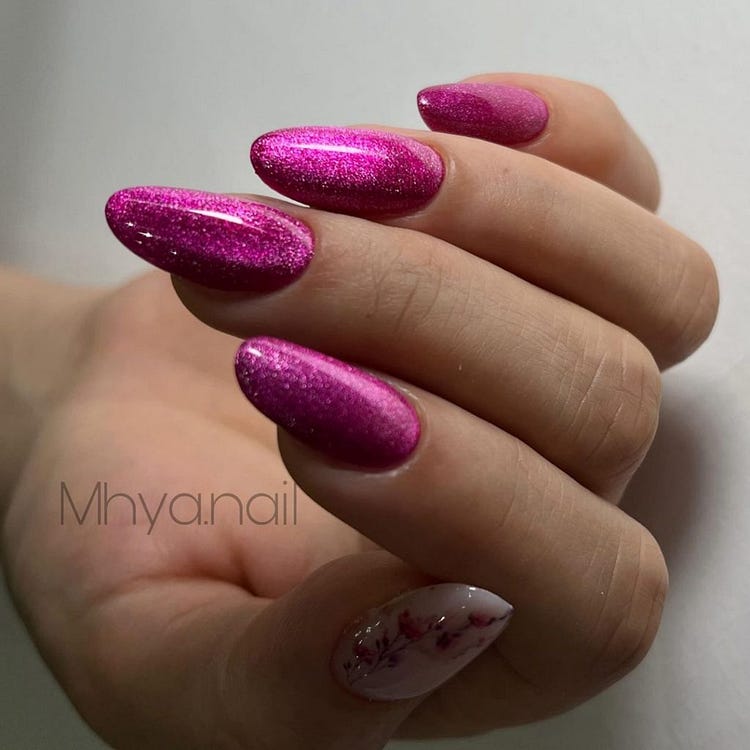
These sparkling pink nails are the perfect way to add some glitz and glamour to your summer look. The vibrant pink shade is fun and feminine, while the glittery finish adds a touch of luxury. The combination of the almond shape and the accent nail with a delicate floral design makes this look both trendy and unique. This design is perfect for anyone who loves to stand out and isn’t afraid to shine.
Consumables Needed
- Glittery pink nail polish (e.g., Essie Nail Polish in “Jazzy Jubilant”)
- Clear polish with pink glitter (e.g., OPI Nail Lacquer in “Teenage Dream”)
- Floral nail decals
- Base coat
- Top coat
- Nail art brushes
DIY Instructions
- Apply a base coat to all nails.
- Paint most of your nails with the glittery pink polish, leaving one or two accent nails.
- Apply the floral decals to the accent nails.
- Finish with a top coat to secure the design and add extra sparkle.
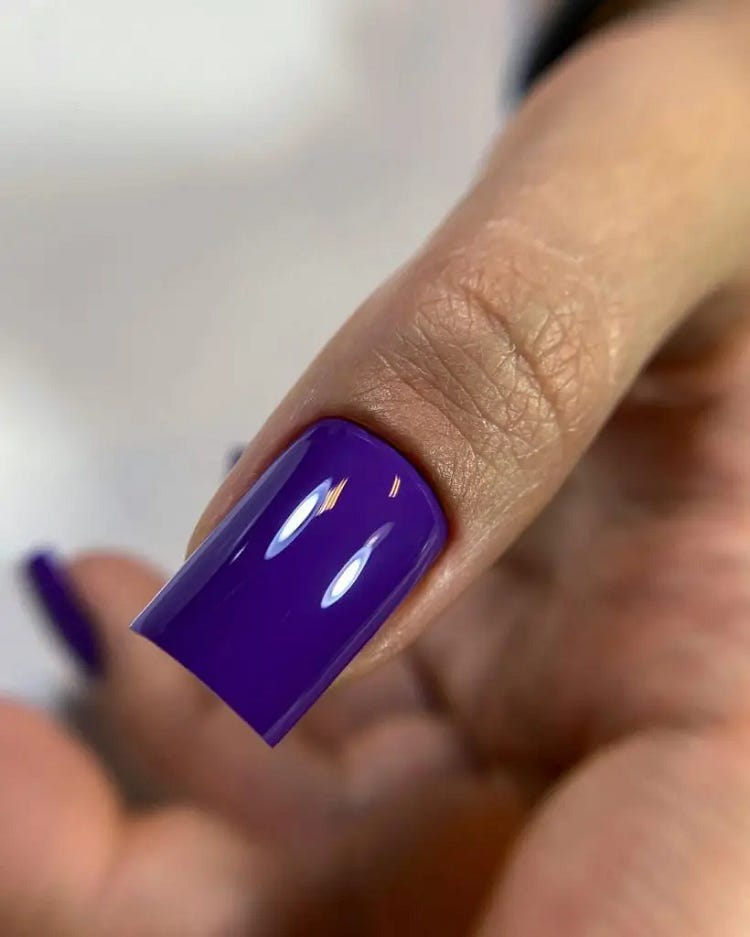
Bold Purple Nails
These bold purple nails are a striking choice for summer, perfect for making a statement. The glossy finish enhances the rich purple color, giving the nails a sleek and sophisticated look. The square shape adds a modern twist to this classic color, making it a versatile choice that can be dressed up or down. This design is ideal for those who love vibrant colors and want their nails to be a standout accessory.
Consumables Needed
- Bright purple nail polish (e.g., OPI Nail Lacquer in “Do You Have This Color in Stock-holm?”)
- Base coat
- Top coat
- Nail file and buffer
DIY Instructions
- Start with a base coat to protect your nails.
- Apply two coats of the bright purple polish, ensuring each layer is dry before applying the next.
- Finish with a top coat to add shine and longevity to your manicure.
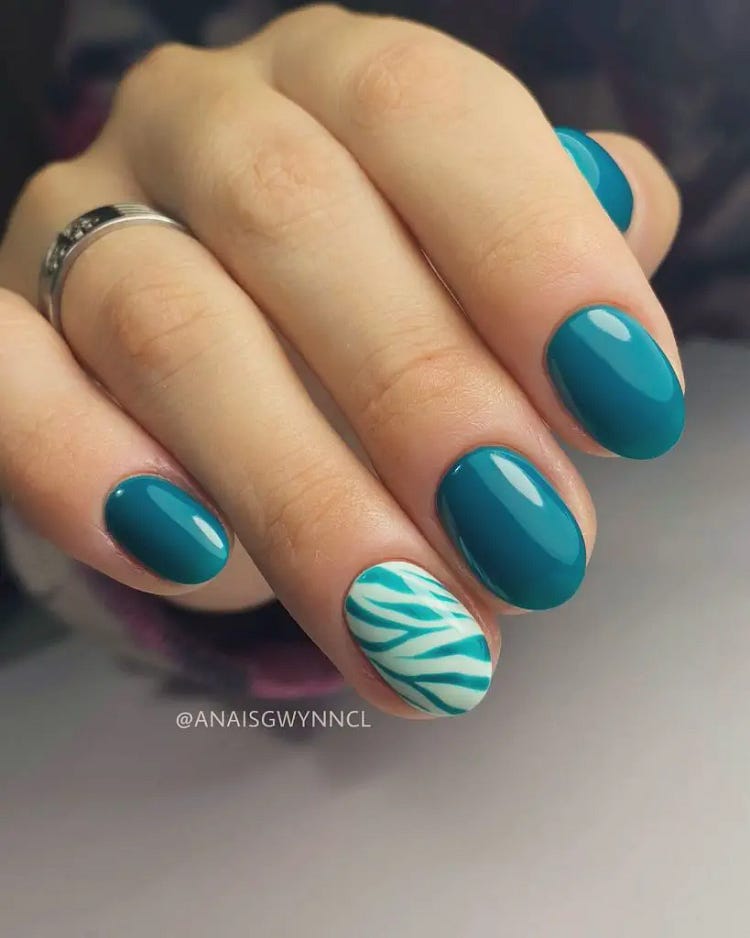
Teal And Zebra Stripes
This teal and zebra stripe design combines the tranquility of the ocean with the wild spirit of the jungle. The rich teal polish provides a solid, vibrant background, while the zebra stripe accent nail adds a playful and unique touch. This combination is both stylish and trendy, perfect for summer outings and beach vacations. The oval nail shape complements the overall design, giving it a chic and modern look.
Consumables Needed
- Teal nail polish (e.g., Essie Nail Polish in “Turquoise & Caicos”)
- White nail polish for the base of the zebra stripe accent nail (e.g., OPI Nail Lacquer in “Alpine Snow”)
- Black nail art pen or polish for the zebra stripes
- Base coat
- Top coat
- Nail art brushes
DIY Instructions
- Apply a base coat to protect your nails.
- Paint most of your nails with the teal polish, leaving one accent nail for the zebra stripes.
- For the accent nail, apply two coats of white polish.
- Once dry, use a black nail art pen or brush to draw the zebra stripes on the accent nail.
- Finish with a top coat to seal the design and add shine.
Bold Blue And Orange Swirls
This bold blue and orange swirl design is the epitome of summer fun and energy. The vivid blue and bright orange create a striking contrast, making this nail art stand out. The swirling patterns add a dynamic and funky element, perfect for those who love bold and daring looks. The almond shape enhances the elegance and sophistication of this design, making it suitable for any summer event.

Consumables Needed
- Bright blue nail polish (e.g., Essie Nail Polish in “Butler Please”)
- Bright orange nail polish (e.g., China Glaze Nail Polish in “Orange Knockout”)
- Base coat
- Top coat
- Nail art brushes for creating swirls
DIY Instructions
- Start with a base coat to protect your nails.
- Apply two coats of the bright blue polish as the base.
- Use a nail art brush to create orange swirls on each nail.
- Allow the swirls to dry completely before applying a top coat to seal the design.


No comments:
Post a Comment